🛒 Order with confidence! We’re trusted by thousands of farmers across Kenya. If anything goes wrong on our side, you’re protected by our 100% refund guarantee. ✅🇰🇪
Azolla farming in Kenya can cut feed costs by up to 30 percent while boosting livestock nutrition. This 2026 step by step guide shows how to set up ponds, manage growth and harvest Azolla for high, consistent yields.
Snippet Summary:Coconut farming in Kenya is a high-yield, long-term investment primarily suited for the Coastal region, offering returns from raw nuts, madafu, oil, and value-added byproducts. By 2026, demand for coconut oil and organic water has surged, making this “Tree of Life” a pillar of agribusiness stability. With proper variety selection like the East African Tall and strategic intercropping, farmers can achieve break-even within 5 years and sustain profits for decades.
The coconut tree, often revered as the “Tree of Life,” is more than just a scenic feature of the Kenyan coast; it is an industrial powerhouse waiting to be tapped. As we move through 2026, the agricultural landscape in Kenya has shifted towards crops that offer climate resilience and multiple revenue streams. Coconut farming fits this description perfectly.
Whether you are in Kilifi, Kwale, or Lamu, the potential to transform a sandy shambainto a recurring revenue engine is immense. The global shift toward plant-based diets and natural cosmetics has spiked the price of coconut derivatives. Farmers are no longer just selling nuts; they are entering a complex value chain.
However, many beginners fail because they treat coconut farming as a “plant and forget” venture. It requires agronomic precision, from soil testing to pest management against theRhinoceros Beetle.This guide serves as your authoritative blueprint, moving beyond basic advice to provide financial realities and actionable strategies for the modern Kenyan farmer.
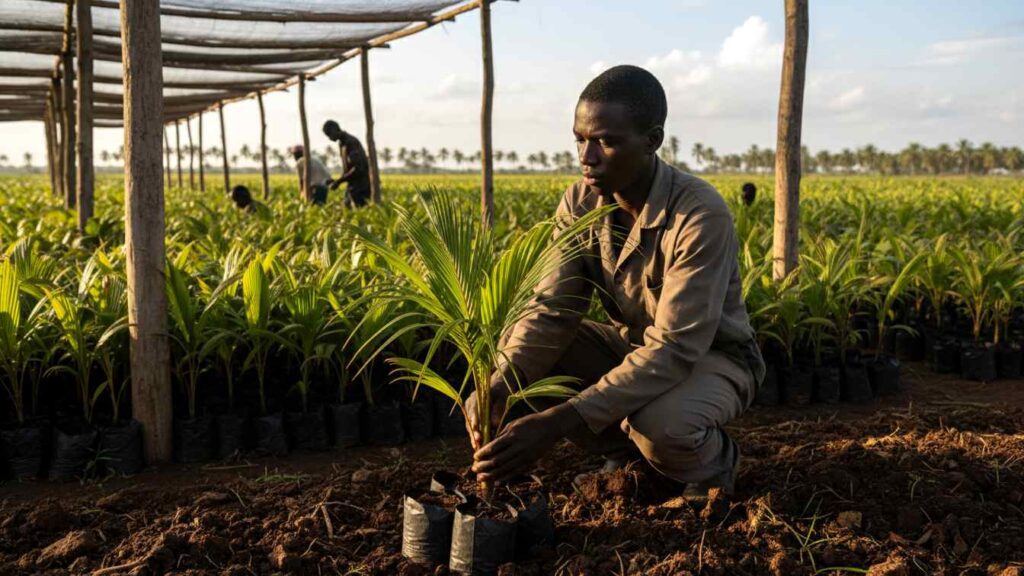
image of a young Kenyan farmer inspecting a healthy East African Tall coconut seedling in a nursery in Kilifi
What Are the Most Profitable Coconut Varieties for Kenyan Soil in 2026?
The most profitable varieties for 2026 are the East African Tall for longevity and drought resistance, and the Hybrid varieties(like PB 121) for early maturity and higher nut counts. While the Tall variety takes 5-7 years to fruit, it produces for up to 80 years. Hybrids fruit in 3-4 years but require more water and intensive care.
Selecting the right variety is the single most critical decision you will make. In Kenya, the market is historically dominated by the East African Tall (EAT). However, the landscape is changing with the aggressive introduction of hybrids byKALRO (Kenya Agricultural and Livestock Research Organization).
Your choice depends entirely on your end goal and financial timeline. Are you selling madafu (water) for quick cash flow? Or are you aiming for dry nuts for the copra and oil industry? Your strategy dictates your seed selection.
The East African Tall (EAT)
This is the heritage breed of the coast and the backbone of the industry. It is incredibly hardy, capable of withstanding the salty winds and sandy soils of Mombasa and Kilifi better than any import. It yields large nuts with thick meat (kernel), making it ideal for the oil and copra industry.
The downside is patience, as you must wait nearly seven years for the first commercial harvest. However, once established, these trees require minimal irrigation. They act as a legacy investment for future generations.
The Hybrids (Dwarfs and Crosses)
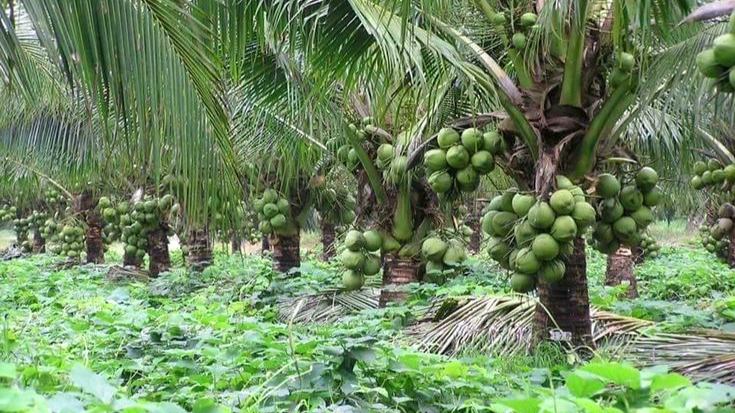
High yielding dwarf coconut trees loaded with green coconuts in a dense, well managed plantation.
For farmers looking for a quicker return on investment, hybrids are the answer. Varieties developed or certified by KALRO Mtwapaoften combine the resilience of the local tall varieties with the high yield of imported dwarfs. These trees are shorter, making harvesting safer and cheaper.
They can start flowering in as little as 36 months, drastically reducing the wait time. However, they are less tolerant of drought and low-nutrient soils. They demand a strict fertilization regime to maintain their high output.
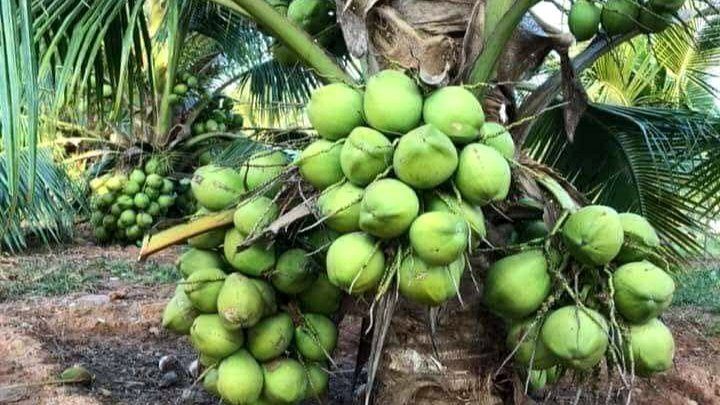
photograph shows a dwarf coconut palm tree heavily laden with clusters of smooth, bright green, young coconuts.
“Expert Tip: If your farm is far from a reliable water source, stick to the East African Tall. Hybrids are like high-maintenance dairy cows; if you miss watering schedules during the first three years, their growth stunts permanently.”
How Do You Prepare Your Shamba for Maximum Yield?
Preparation involves clearing the land and digging holes measuring 2ft x 2ft x 2ft, spaced at 9m x 9m for tall varieties to allow canopy spread. Fill holes with topsoil mixed with compost manure and a phosphate fertilizer. This spacing ensures 60-70 trees per acre, optimizing sunlight penetration and reducing fungal disease risks.
Land preparation in 2026 goes beyond just slashing bush. You must conduct a soil test to ensure the pH is between 5.5 and 7.0. Coconuts thrive in sandy loam soils that drain well; waterlogging is the silent killer of coconut roots.
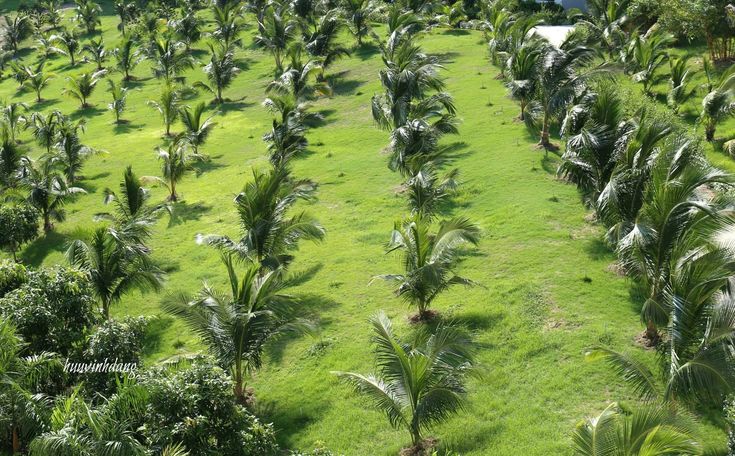
perfectly spaced coconut plantation in Kwale
The downside is patience, as you must wait nearly seven years for the first commercial harvest. However, once established, these trees require minimal irrigation. They act as a legacy investment for future generations.
When digging your holes, carefully separate the topsoil from the subsoil. Mix the topsoil with two debes of well-decomposed manure and 200g of planting fertilizer. This creates a nutrient-rich “cradle” for the delicate seedling.
Do not bury the collar of the seedling too deep, as this can lead to rotting before establishment. Ensure the area is free of termite mounds. Termites can destroy a young plantation in weeks if not managed early.
Coconut farming is not uniform across Kenya. While the crop is synonymous with the coast, the agronomic and market conditions vary significantly between counties. Below is a comparative analysis of the three primary coconut-producing giants: Kilifi, Kwale, and Lamu.
1. Kilifi County: The Market Hub
Kilifi is the undisputed capital of coconut farming in Kenya. The infrastructure here is superior, with better road networks connecting farms to processors like Kentaste. The presence of research institutions gives farmers an edge in knowledge.
Pros: Highest concentration of buyers; established cooperatives; access to KALRO Mtwapa for seedlings. Cons: Land prices are higher due to tourism competition; higher labor costs due to urbanization.
2. Kwale County: The High-Yield Frontier
Kwale offers deeper, more fertile soils compared to the rocky parts of Northern Kilifi. The rainfall patterns in the Shimba Hills belt support vigorous growth without heavy irrigation. This region is becoming the new frontier for large-scale plantations.
Pros: Cheaper land acquisition costs; fertile soils leading to larger nut sizes; proximity to the Mombasa port for export. Cons: Some interior roads are impassable during the long rains, complicating logistics.
3. Lamu County: The Premium Niche
Lamu retains a traditional farming approach. The coconuts here are often grown organically by default, fetching a premium in niche markets. The isolation helps in maintaining bio-security against certain pests.
Pros: High demand for organic certification; potential for agro-tourism integration; less pest prevalence due to isolation. Cons: Significant logistical challenges getting produce to Mombasa/Nairobi; security concerns in border areas affecting labor availability.
Verdict for 2026: If you want volume and quick market access, choose Kilifi. If you are an investor looking for cheap land with high long-term soil potential, choose Kwale.
What Are the Water and Fertilizer Requirements?
Adult coconut trees require 50-100 liters of water per week during dry spells. For fertilization, apply NPK (rich in Potassium/Muriate of Potash) biannually. A deficiency in Potassium leads to yellowing fronds and small, elongated nuts that lack market value. Organic mulch is mandatory to retain soil moisture.
Water is the fuel for the coconut engine. In the first year, seedlings must be watered twice a week without fail. By 2026, many smart farmers are using solar-powered drip irrigation to mitigate the erratic coastal rains.
This investment cuts mortality rates from 20% down to nearly 0%. A stressed tree will abort its flowers. Consistent moisture ensures the “button nuts” hold onto the tree until maturity.
Regarding nutrition, the coconut tree is a heavy feeder of Potassium (K). You must apply salt (agricultural salt or sodium chloride) if you are far from the sea, alongside Muriate of Potash. A common mistake is using only DAP; while good for roots, it does not support nut formation.
Successful coconut farming requires adhering to a strict calendar aligned with the coastal monsoon winds and rain patterns. Farming by the season maximizes yield and minimizes cost. Here is your 2026 operational schedule.
Quarter 1: January – March (Hot & Dry)
Focus: Moisture Conservation & Pit Prep. This is the driest period of the year. Aggressively mulch around the base of your trees using dry coconut fronds or husks (coir).
Do not burn waste on the farm, as this destroys organic matter. Start digging holes for new planting now so the soil aerates and sterilizes in the sun. If you have irrigation, maintain a steady flow to prevent nut abortion.
Quarter 2: April – June (Long Rains – Masika)
Focus: Planting & Fertilization. This is the main planting season. Transplant seedlings immediately after the first heavy rains wet the soil deep (at least 30cm).
Apply the first round of manure and NPK fertilizers to established trees. Watch out for fungal infections like Bud Rot as humidity rises. Ensure drainage channels are open to prevent waterlogging.
Quarter 3: July – September (Cool & Dry)
Focus: Pest Control & Weeding. The Rhinoceros Beetle is most active during this transition. Inspect the crowns of young trees weekly.
Use pheromone traps to capture adults before they breed. Clear weeds that compete for nutrients, especially ring-weeding 2 meters around the trunk. Slashing the inter-row spaces now creates mulch for the coming dry season.
Quarter 4: October – December (Short Rains – Vuli)
Focus: Secondary Planting & Harvesting. A second planting window opens during the short rains. This is also a peak harvesting period for the end-of-year market demand.
Apply the second dose of fertilizer in late October to capitalize on the moisture. Review your annual yields and plan for the next cycle. Secure your madafu contracts for the December tourist season.
Module C: Deep-Dive Financials (2026 Projections)
Let’s talk money. Farming without math is just a hobby. The table below outlines the costs and potential revenue for one acre of coconut farming (approx. 60 trees) in Kenya, assuming a mix of selling fresh madafu and dry nuts.
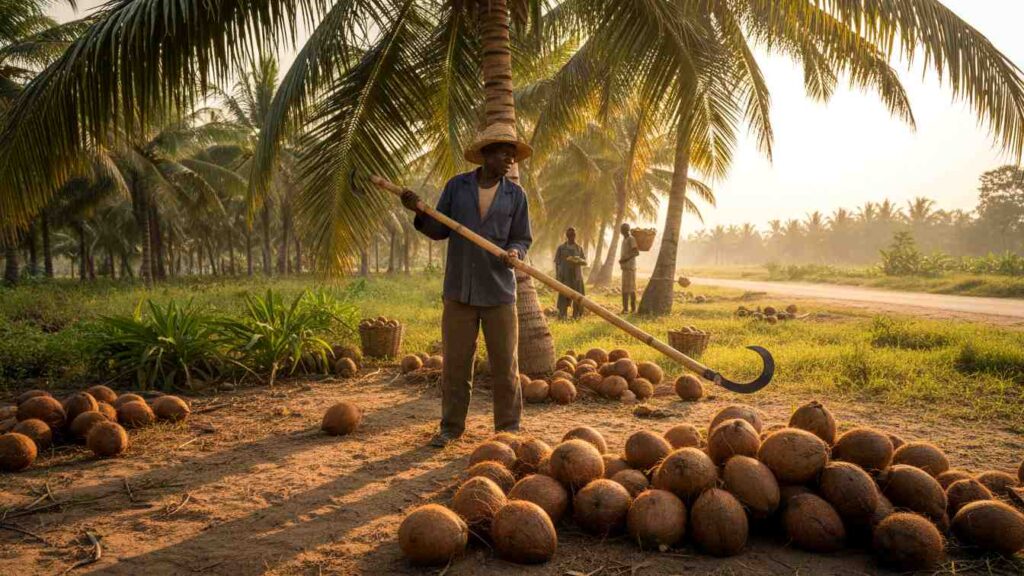
image of a farm worker in Malindi utilizing a long bamboo pole with a hooked knife to harvest mature brown coconuts
Assumptions: 1. Land is owned (no lease costs included). 2. Variety is Hybrid (starting production in year 4). 3. 2026 Market prices: KES 40 per mature nut, KES 50 per madafu.
Cost Item
Year 1 (Setup)
Year 2-3 (Maintenance)
Year 4 (First Harvest)
Year 5+ (Full Production)
Land Prep (Clearing/Holes)
KES 15,000
KES 5,000
KES 5,000
KES 5,000
Seedlings (Hybrid @ KES 350)
KES 21,000
KES 0
KES 0
KES 0
Manure & Fertilizers
KES 10,000
KES 12,000
KES 15,000
KES 18,000
Labor (Weeding/Pest Control)
KES 20,000
KES 15,000
KES 20,000
KES 25,000
Total Annual Cost
KES 66,000
KES 32,000
KES 40,000
KES 48,000
Revenue (Nuts/Tree)
0
0
30 nuts x 60 trees
80 nuts x 60 trees
Gross Revenue (@ KES 45 avg)
KES 0
KES 0
KES 81,000
KES 216,000
Net Profit
(KES 66,000)
(KES 32,000)
KES 41,000
KES 168,000
Break-Even Analysis
As shown, you will operate at a loss for the first 3 years. By Year 4, you break into profit. From Year 5 onwards, the maintenance costs stabilize while yields increase.
A well-managed acre can generate KES 15,000 – KES 20,000 per month passively for decades. This does not include income from intercropping (e.g., beans or capsicum), which can cover your operational costs in years 1-3. The real wealth is in scale; 10 acres provides a managerial salary.
How Do You Handle Pest and Disease Management?
The primary threats are the Rhinoceros Beetle (bores into the crown), the Red Palm Weevil, and Lethal Yellowing Disease. Control beetles using pheromone traps and physical removal with a hooked wire. For Lethal Yellowing, there is no cure; infected trees must be uprooted and burned immediately to save the plantation.
Pest control requires vigilance. The Rhinoceros Beetle is attracted to rotting organic matter, so keep your farm clean. Avoid heaps of cow dung near the coconut trees unless it is fully decomposed, as this acts as a breeding ground.
For chemical control, consult Agri-SeedCo or local agro-vets for recommended systemic insecticides if infestation is severe. However, for export-quality nuts, organic traps are preferred. A simple trap using castor cake and yeast can be highly effective.
Lethal Yellowing is a more serious threat causing widespread devastation. It causes the nuts to drop prematurely and the fronds to yellow from the bottom up. If you spot these signs, contact the county agricultural officer immediately.
Module E: Supply Chain & Value Addition
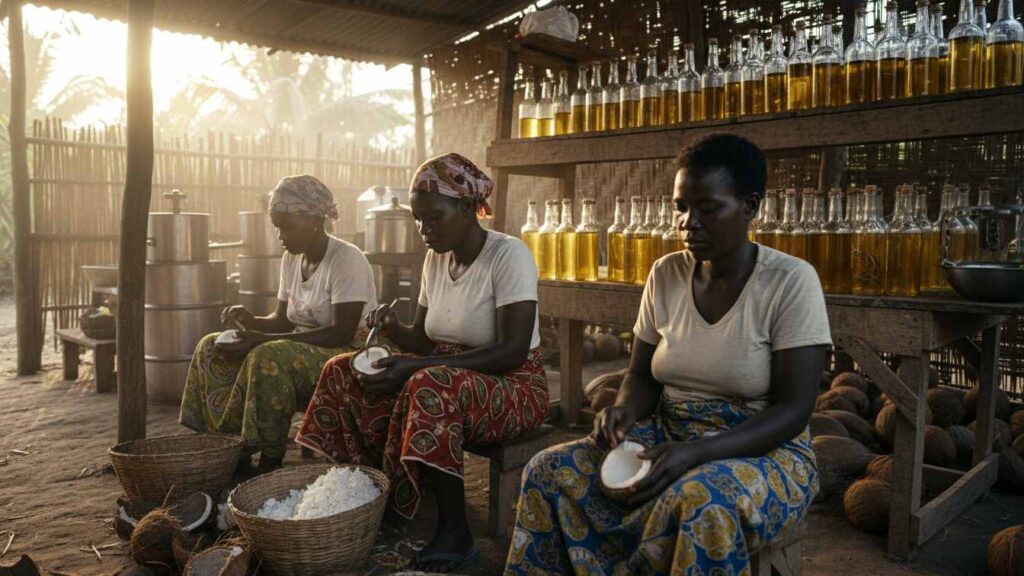
image of a small-scale processing unit in Kilifi where women are extracting white coconut meat from shells
Selling raw nuts is the lowest tier of profitability. In 2026, the real money lies in value addition and understanding the supply chain. You must move up the ladder to maximize returns.
1. The Copra Chain
Dry nuts are split and dried to make copra, which is pressed for oil. If you can dry your own copra (using solar dryers), you can sell directly to millers like Pwani Oil or Kentaste. This bypasses the brokers who offer rock-bottom prices for whole nuts.
2. The Madafu Market
Urban centers like Nairobi and Mombasa have an insatiable thirst for madafu. The logistics here are speed-dependent. You need a reliable transporter to get the nuts to market within 24 hours of harvest.
This market pays instant cash (via M-Pesa) compared to the copra market which may have payment delays. Branding your madafu for hotels can double your margin. Hygiene in handling is paramount for this segment.
3. By-Products: Nothing is Waste
Coir (Husks): Used for making ropes, mats, and cocopeat for hydroponic farming. Cocopeat prices are rising as greenhouse farming expands.
Shells: Carbonized to make charcoal briquettes. This is a booming eco-friendly fuel sector in Kenya.
Makuti: The leaves are woven for roofing thatch, highly prized by hotels in Diani and Malindi.
Conclusion: 2026 Outlook
The outlook for coconut farming in Kenya for 2026 and beyond is overwhelmingly positive, driven by the global wellness trend and the local demand for cooking oil alternatives. The government’s push, through the Nuts and Oil Crops Directorate, to revitalize the sector is beginning to bear fruit. Better seedling availability and standardized pricing models are now realities.
However, climate change remains a variable. Your success will depend on your ability to adapt, using drought-resistant varieties, investing in water harvesting, and not relying on a single revenue stream. Intercrop your coconuts.
Process your own oil if possible. Join a cooperative to increase your bargaining power. The “Tree of Life” will reward those who respect its agronomic needs.
Your Action Plan: 1. Secure land in Kilifi or Kwale. 2. Source certified seedlings from KALRO Mtwapa or buy online jiji kenya (Contact them directly). 3. Dig your holes now. 4. Plan your intercropping strategy to fund the first 4 years.
FAQ: Troubleshooting Coconut Farming
1. How many coconut trees can I plant on one acre?
You can plant between 60 to 70 trees per acre using a spacing of 9m x 9m. If you plant them closer (e.g., 6m x 6m), the canopy will close up too early, reducing photosynthesis and nut production, while also making intercropping impossible.
2. How long does it take for a coconut tree to bear fruit?
It depends on the variety. Hybrid varieties and Dwarfs typically start bearing fruit in 3 to 4 years. The traditional East African Tall takes about 6 to 7 years. However, the Tall variety is more drought-resilient and lives longer.
3. What is the current price of a coconut in Kenya in 2026?
The farm-gate price for a mature dry nut ranges from KES 30 to KES 50 depending on size and season. Madafu (tender coconut) retails for KES 50 to KES 80 in urban centers, offering a higher margin if you handle the logistics.
4. Can coconuts grow in Nairobi or central Kenya?
Generally, no. Coconuts require high humidity, sandy soil, and warm temperatures (27°C average). While they might survive in Nairobi as ornamental trees, they will likely not fruit or will produce very small, commercially unviable nuts due to the altitude and cold nights.
5. Where can I buy certified coconut seedlings in Kenya?
The most reliable source is KALRO Mtwapa (Industrial Crops Research Institute). You can also check with licensed private nurseries in Kilifi and Kwale. Avoid buying roadside seedlings of unknown genetic origin.
6. What is the Lethal Yellowing Disease?
This is a phytoplasma disease spread by leafhoppers. It causes the fronds to turn yellow and drop, and the nuts to fall prematurely. It is incurable. The only management is to cut down and burn infected trees to stop the spread to healthy ones.
7. Is coconut farming profitable for small-scale farmers?
Yes, but it is a volume game. A small farmer with 2 acres (120 trees) can earn a decent supplementary income, especially if they add value (e.g., selling charcoal briquettes or oil). Intercropping with cash crops like maize, simsim, or cassava is essential for profitability on small plots.
8. How do I make Virgin Coconut Oil (VCO) at home?
To make VCO, grate fresh mature coconut meat, extract the milk using warm water, and let it ferment for 24-48 hours. The oil will separate from the water and curds. Scoop the oil and filter it. This “cold press” method fetches the highest price in the market.
9. Can I use borehole water for irrigation?
Yes, but you must test the salinity. While coconuts are salt-tolerant, highly saline borehole water can eventually damage the soil structure and affect nutrient uptake. Drip irrigation is recommended to maximize efficiency.
10. Are there government subsidies for coconut farmers in 2026?
The County Governments of Kilifi and Kwale occasionally distribute free or subsidized seedlings during the long rains. Check with your local Ward Agricultural Officer or the Agriculture and Food Authority (AFA) offices at the coast for current programs.
Growing Clover seed in Kenya is a strategic 2026 venture, offering dual revenue from high-protein livestock fodder and premium certified seeds. With a short maturity period of 4-5 months, farmers in high-altitude zones can harvest up to 300kg of seed per acre. This significantly reduces reliance on expensive commercial dairy meal. This comprehensive guide covers agronomy, regional analysis, and profitability.
The Kenyan dairy sector faces a critical challenge in 2026 due to the escalating costs of commercial protein concentrates. Astute farmers are shifting towards on-farm protein production to sustain profitability. Clover (Trifolium spp.) has emerged as the premier solution for nitrogen fixation and high-protein forage.
Producing your own seed is the ultimate step toward farm independence and sustainability. It drastically cuts input overheads and creates a marketable asset for local cooperatives. This article serves as your definitive manual for mastering Clover seed production in Kenya.
Why is Clover seed farming considered profitable in 2026?
Clover seed farming is profitable because it addresses the high demand for protein-rich fodder in Kenya’s dairy sector. Seed yields of 200-300kg per acre can generate gross revenues exceeding KES 350,000 in a single season. Additionally, the crop improves soil fertility by fixing nitrogen, reducing fertilizer costs for subsequent crops like maize.
The profitability of clover stems from its dual-purpose nature. First, the seed market is undersupplied, with many farmers relying on imported or low-quality local seeds. By producing high-germination seeds, you tap into a premium market niche.
Second, the vegetative biomass remaining after seed harvest is not waste. It forms high-quality hay that rivals Lucerne in protein content. This allows you to support your own dairy herd or sell the hay to neighbors.
Third, the agronomic benefits to your soil are immense. Clover roots host Rhizobium bacteria that fix atmospheric nitrogen into the soil. This natural fertilization reduces your expenditure on CAN and Urea for rotation crops like Maize or Wheat.
Which Clover varieties are best suited for Kenya?
The best varieties for Kenya are:
Kenya White Clover (Trifolium semipilosum) for grazing and medium altitudes, and
Red Clover (Trifolium pratense) for hay production in high-altitude zones.
Egyptian Clover (Berseem) is excellent for short-rotation systems in lower altitudes under irrigation. Your choice depends on your primary goal: grazing persistence or hay volume.
Kenya White Clover is a deep-rooted perennial that is exceptionally drought-tolerant once established. It is ideal for the Rift Valley highlands where rainfall can be erratic. It spreads by stolons, making it resilient to heavy grazing pressure.
Red Clover is a short-lived perennial, typically lasting 2-3 years. It grows upright, making it easier to cut for hay or silage. It performs best in the cool, wet highlands of Nyandarua and Kericho.
Purple Clover (Trifolium burchellianum) is an indigenous variety often found in the high moorlands. It is incredibly hardy but produces less biomass than commercial varieties. It is suitable for extremely high altitudes above 2,800m
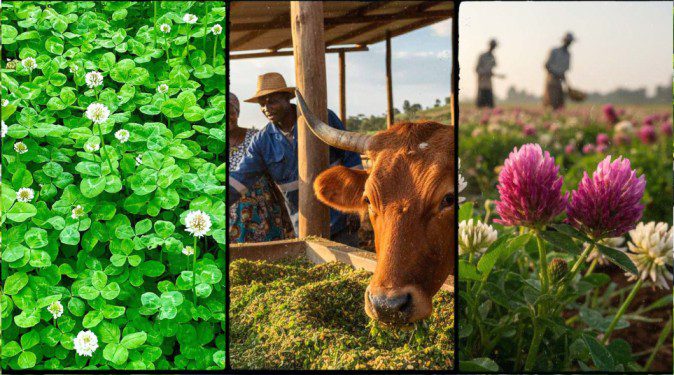
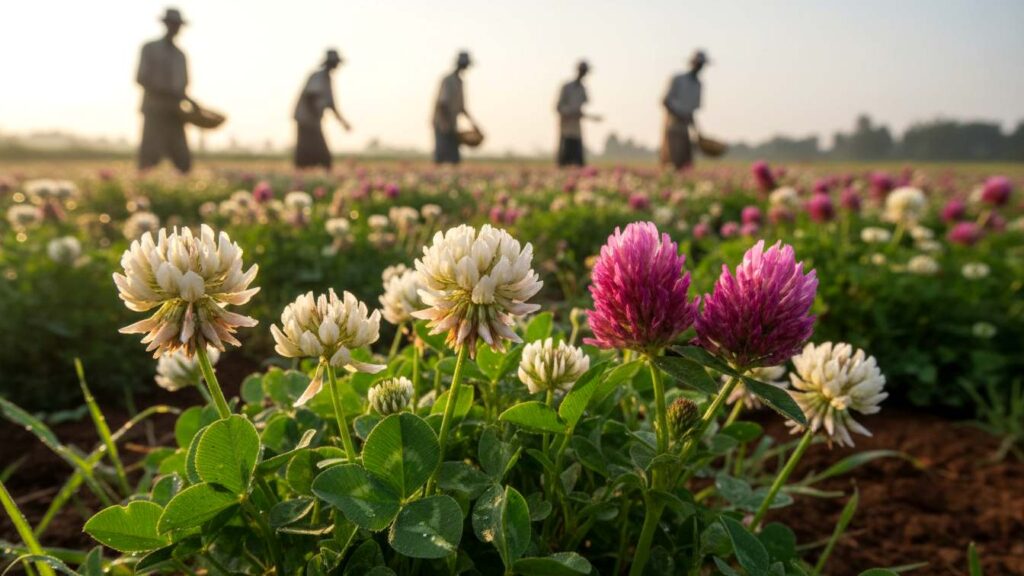
White Clover and Red Clover flowers side-by-side in a field in Kericho
What are the best climatic conditions for growing Clover in Kenya?
Clover thrives at altitudes between 1,800m and 3,000m above sea level with cool temperatures averaging 20°C to 25°C. It requires well-distributed annual rainfall of 800mm to 1,200mm and deep, well-drained soils with a pH of 6.0 to 7.0. Extreme heat above 30°C causes flower abortion and significantly reduces seed set.
Clover is strictly a high-potential zone crop in the Kenyan context. It flourishes in the cool highlands where dairy farming is dominant. Attempts to grow it in the hot lowlands without intensive management usually result in failure.
Temperature regulation is critical for the reproductive phase. If temperatures exceed 28°C during flowering, pollen viability drops sharply. This is why Timau and Kinangop are superior locations compared to lower parts of Nakuru.
Soil drainage is non-negotiable for healthy root development. Clover roots suffocate easily in waterlogged soils, leading to root rot. If your farm has “black cotton” soil, you must invest in raised beds or drainage channels.
*Expert Tip:* Soil pH is the silent killer of clover yields. In acidic soils (pH < 5.5) common in Kisii, aluminum toxicity stunts root growth. Apply agricultural lime at 2-3 tons per acre at least 30 days before planting.
Which regions in Kenya are best for Clover seed production?
The top regions for clover seed production are Nyandarua, Meru, and Uasin Gishu counties due to their altitude and soil profiles. Nyandarua offers the ideal cool climate for flowering. Meru provides rich volcanic soils, while Uasin Gishu offers large land tracts suitable for mechanized farming.
1. Nyandarua County: The High-Altitude Leader
Nyandarua is arguably the best county for temperate fodder crops. Areas like Njabini and Ol Kalou sit above 2,500m, providing the chill factor necessary for prolonged flowering. Pest pressure is also lower here due to the cold nights.
The primary challenge in Nyandarua is the road network during the rainy season. However, the high yields of up to 350kg/acre often justify the logistical struggles. Farmers here typically use Red Clover for cut-and-carry systems.
2. Meru County: The Volcanic Fertility Hub
Meru, particularly the Buuri and Imenti sub-counties, boasts rich volcanic soil that clover loves. The soil pH is naturally closer to neutral compared to other highlands. This reduces the cost of liming amendments significantly.
Competition for land is high due to horticulture export crops. Labor costs in Meru are generally 15% higher than in the Rift Valley. Yet, the proximity to the Mount Kenya dairy market ensures instant buyers for hay by-products.
3. Uasin Gishu County: The Mechanization Giant
Uasin Gishu is the home of large-scale farming in Kenya. The flat terrain allows for the use of seed drills and combine harvesters. This drastically lowers the cost of production per kilo compared to manual systems.
Farmers here must plant early to utilize the long rains effectively. The slightly warmer temperatures mean the flowering window is shorter than in Nyandarua. Access to Eldoret for inputs and seed processing is a major logistical advantage.
What is the step-by-step land preparation and planting process?
Prepare a fine, firm seedbed by ploughing and harrowing twice to eliminate clods. Inoculate seeds with Rhizobium bacteria immediately before planting to ensure nitrogen fixation. Plant shallowly at a depth of 1cm with 30cm row spacing, using 3-4kg of seed per acre mixed with sand for even distribution.
Land preparation for clover requires more precision than maize. The seeds are minute, and a rough seedbed leads to deep burial or poor soil contact. You should aim for a “garden-like” tilth free of trash and large stones.
Plough your shamba at least four weeks before the onset of rains. This allows for the decomposition of organic matter and the germination of weed seeds. A second harrowing just before planting kills these early weeds, giving your clover a head start.
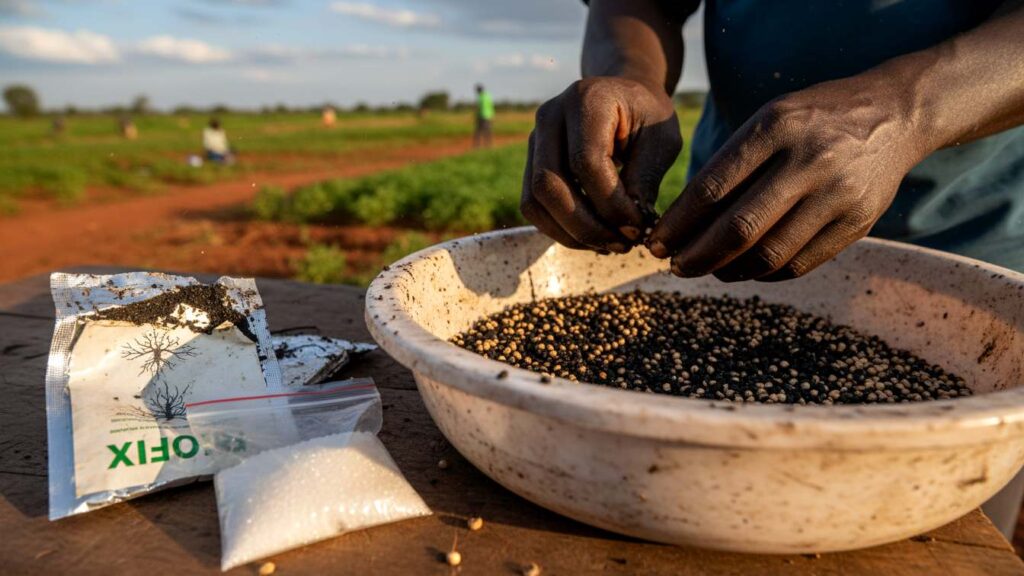
Inoculation is the most critical biological step. You must coat seeds with specific Rhizobium strains available from MEA Ltd or Biofix. Mix the inoculant with a sugar solution to ensure it sticks to the smooth seed coat.
Planting depth is the most common point of failure. If buried deeper than 1.5cm, the seedling will exhaust its energy before reaching the surface. Use a light tree branch or chain to cover the seeds lightly after broadcasting.
image of a farmer’s hands coating small clover seeds with black Rhizobium inoculant paste in a basin
What is the 12-Month Farming Calendar for Clover?
The farming calendar revolves around the main rains, starting with planning in January and planting in March. Weed control dominates April and May, while pollination and seed setting occur in June and July. Harvesting takes place in September during the dry spell, followed by processing and marketing in December.
January: Planning & Procurement. This is the dry season. Conduct soil tests via CropNuts or KALRO. Order certified seeds from Kenya Seed Company early to avoid shortages. Secure limestone if your pH is low.
February: Land Preparation. Deep plough the field to expose soil pests. Apply lime now to allow it 30 days to react with the soil. Purchase Phosphorus fertilizers like TSP or DAP.
March: Planting. Wait for the rains to stabilize. Harrow the soil to a fine tilth. Inoculate seeds in the shade and plant immediately. Apply DAP at a rate of 50kg per acre.
April: Establishment & Gapping. Monitor for germination. Gap any empty spaces within 14 days. Perform the first manual weeding or use selective herbicides like Bentazone if the infestation is heavy.
May: Vegetative Growth. The crop covers the ground. Top dress with a Potassium-rich foliar feed to boost stem strength. Avoid Nitrogen fertilizers as they suppress nodulation.
June: Flowering & Pollination. Bees are essential now. Introduce beehives if possible. Avoid all insecticide sprays during the day. Kenya White Clover depends entirely on bee pollination for seed set.
July: Seed Filling. The crop is in full bloom. Maintain soil moisture but avoid overhead irrigation that damages flowers. Scout daily for pod-boring pests.
August: Desiccation. As rains subside, the plants begin to dry. Stop irrigation completely. This stress signals the plant to mature its seeds.
September: Harvesting. Harvest when 90% of heads are brown. Cut manually with sickles or use a specialized combine. Cure the cut crop in windrows for 3-4 days.
October: Threshing & Drying. Thresh the cured crop. Winnow to remove chaff. Dry seeds on tarpaulins to 10-12% moisture content. Treat with Actellic Super to prevent weevil damage.
November: Residue Management. Bale the remaining straw for hay. It is still protein-rich. Graze the stubble lightly with sheep or calves.
December: Marketing. Clean and package your seeds. Market to local dairy cooperatives. Prices typically peak in January before the next planting season.
How do you manage weeds and pests without destroying the crop?
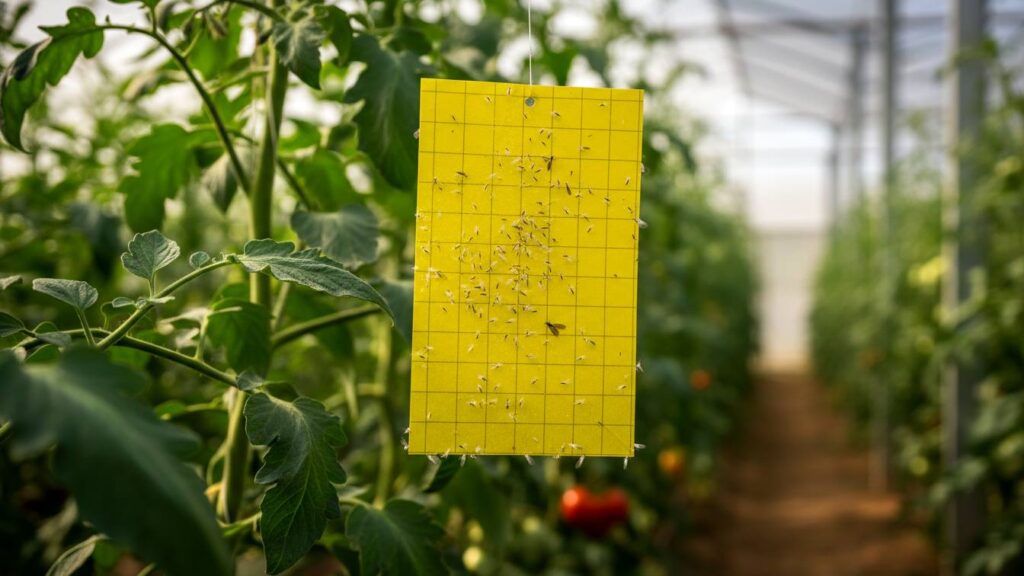
Manage weeds with selective herbicides like Bentazone or Imazethapyr, specifically safe for legumes. Control pests like aphids and thrips using targeted insecticides such as Thunder, applied strictly in the evening to protect pollinators. Use sticky traps for monitoring pest population levels before spraying.
Weeds are the arch-nemesis of clover during the establishment phase. Broadleaf weeds like Pigweed (Terere) and Blackjack can smother slow-growing clover seedlings. Early hand weeding is recommended for small plots.
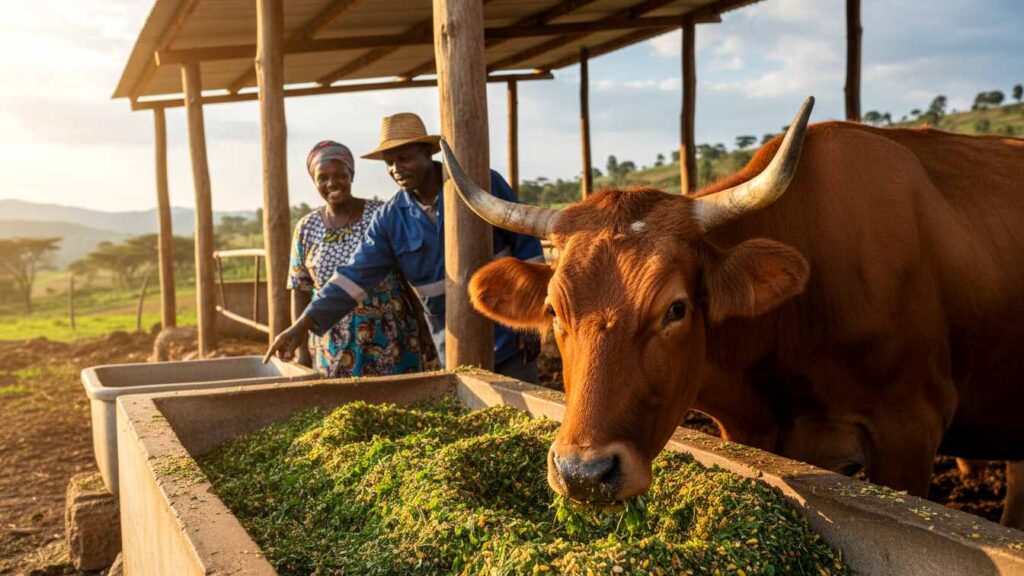
Image of a healthy dairy cow eating a Total Mixed Ration (TMR) containing chopped clover and maize silage
For larger farms, chemical control is necessary but risky. You must use legume-safe herbicides. Products containing Bentazone are effective against broadleaf weeds without harming the clover. Always spot-test before spraying the entire field.
Pest management requires a delicate balance due to pollinators. The Clover Weevil feeds on leaves, while Thrips attack the flowers. If spraying is unavoidable, use bee-safe chemicals and spray at dusk when bees are back in the hive.
What are the costs and profits of Clover farming?
Farming one acre of clover seed costs approximately KES 46,700 in 2026. With a conservative yield of 250kg of seed and 60 bales of hay, gross revenue can reach KES 402,000. This results in a net profit of around KES 355,300 per acre, making it highly lucrative compared to maize.
Farming is a business, and 2026 input costs reflect inflation. The following breakdown assumes you own the land. If leasing, add approximately KES 15,000 – 20,000 per acre depending on the county.
2026 Production Costs (Per Acre)
Activity / Item
Unit Cost (KES)
Quantity
Total (KES)
Ploughing & Harrowing
4,500
2 Passes
9,000
Certified Seed
1,800
4 kg
7,200
Rhizobium Inoculant
800
1 Pack
800
Fertilizer (DAP)
6,200
1 Bag
6,200
Labour (Weeding/Planting)
500
20 Days
10,000
Pest Control Chemicals
Various
Lump Sum
4,000
Harvesting Labour
600
15 Days
9,000
Packaging Materials
50
10 Bags
500
TOTAL EXPENSES
46,700
Revenue Analysis
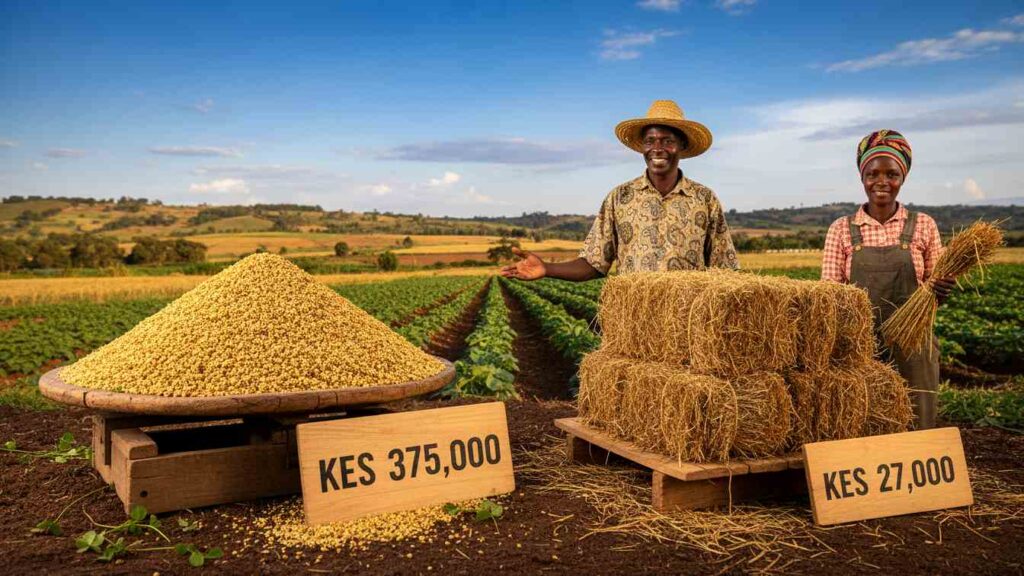
Revenue Stream 1: Certified Seeds A well-managed acre yields 250kg of clean seed. The farmgate price for quality clover seed is KES 1,500/kg. Calculation: 250 kg × KES 1,500 = KES 375,000.
Revenue Stream 2: Hay Residue After threshing, the haulms make excellent hay. Expect about 60 bales. Calculation: 60 bales × KES 450 = KES 27,000.
Total Net Profit: KES 402,000 (Revenue) – KES 46,700 (Cost) = KES 355,300.
image showing a pile of golden clover seeds with a price tag of KES 375
How do you harvest and process Clover seed efficiently?
Harvest when seed heads turn brown and brittle. Cut the crop and cure it for 3-5 days on canvas sheets to prevent soil contamination. Thresh carefully using sticks or a motorized thresher, then winnow to separate the heavy seeds from the chaff before drying to 12% moisture.
Timing determines your yield. Harvesting too early results in shriveled, non-viable seeds. Harvesting too late causes “shattering,” where pods burst open in the field, spilling your profit onto the ground.
Use the “Brown Head” rule: wait until 90% of the flower heads are brown and the stems are dry. Cut early in the morning when the dew is still present to minimize shattering during the cutting process.
Post-harvest hygiene is paramount. Never dry seeds directly on the soil, as this introduces stones and dirt that are impossible to remove without expensive gravity separators. Always use heavy-duty tarpaulins or concrete drying floors.
How can you add value to Clover farming? (Module E)
Value addition involves cleaning and packaging seeds into branded 1kg packs for smallholders, pelleting hay residues for rabbit and calf feed, and integrating apiculture to produce premium Clover Honey. These strategies significantly increase margins and expand your market reach.
1. Seed Cleaning and Branding
Raw seed usually contains 20% chaff. By using a simple electric winnower, you can upgrade to 99% purity. Packaging this clean seed into branded 1kg and 2kg packs allows you to sell to small-scale farmers via M-Pesa. A 1kg pack can retail for KES 2,000.
2. Pelleting for Feed
Clover hay is brittle and leafy, leading to high wastage during feeding. Renting a pelletizer allows you to compress this hay into durable pellets. These are premium feeds for calves and rabbits, selling for over KES 3,500 per 50kg bag in peri-urban markets like Kiambu.
3. Clover Honey Production
Clover is a top-tier nectar source. Placing beehives in your clover field serves a dual purpose: it boosts seed yield through pollination and produces “Clover Honey,” a light, distinctively sweet honey. This niche product fetches a premium price in Nairobi supermarkets.
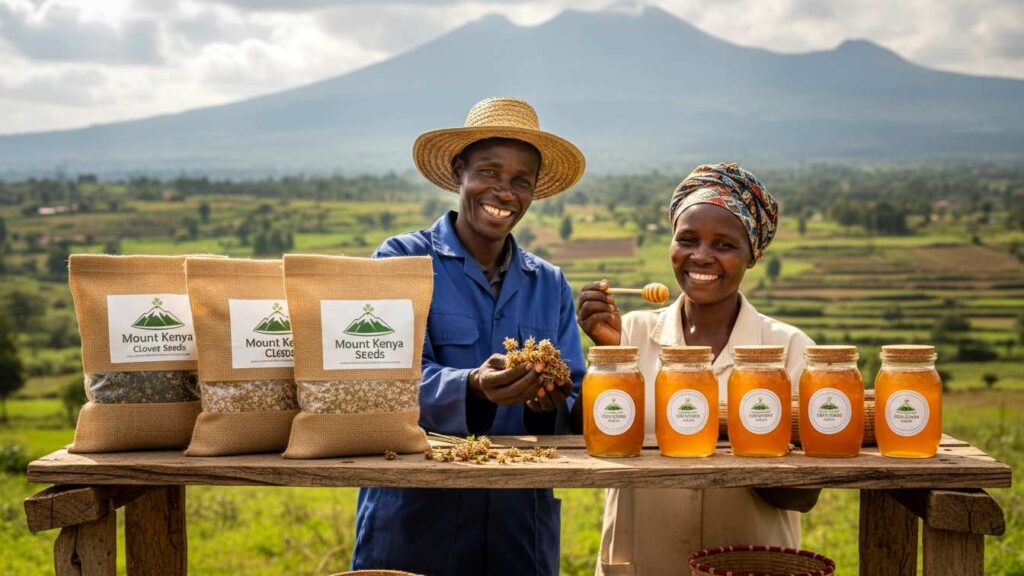
image of a shelf displaying branded 1kg bags of “Mount Kenya Clover Seeds” next to jars of golden “Clover Honey”
Conclusion & Key Contacts
Growing Clover seed in 2026 is a smart diversification strategy for Kenyan farmers. It offers high returns per acre, improves soil health, and solves the on-farm feed crisis. While the agronomy is precise, the financial rewards are well worth the effort.
Common questions revolve around yellowing leaves (nitrogen deficiency), bloat risks (needs wilting), and intercropping (possible with maize). Farmers also frequently ask about the lifespan of stands, which ranges from 2-3 years for Red Clover to 4+ years for White Clover.
Key Contacts for 2026:
Kenya Seed Company: 0722 205 144 (Kitale HQ) – For certified seed inquiries.
Simlaw Seeds: 0722 200 545 (Nairobi) – For small packs and vegetable seeds.
KALRO:www.kalro.org – For soil testing and technical advice.
MEA Ltd: For Rhizobium inoculant supplies.
Frequently Asked Questions about Clover Farming
Why are my clover plants turning yellow?
Yellowing often signals a Nitrogen deficiency, which is ironic for a legume. It implies the Rhizobium inoculation failed or the soil is too acidic for the bacteria to function.
2.Does feeding fresh clover cause bloat?
Yes, fresh, lush clover can cause fatal bloat in cattle due to rapid gas fermentation. Always wilt the clover before feeding or mix it with fibrous hay like Boma Rhodes.
Can I intercrop Clover with Maize?
Absolutely. This is known as undersowing. Plant clover when the maize is knee-high. The clover acts as a living mulch, suppressing weeds and fixing nitrogen for the maize, though seed harvesting becomes difficult in this system.
Where can I buy certified Clover seeds?
Stick to reputable suppliers. Kenya Seed Company (Kitale) and Simlaw Seeds (Nairobi) are the gold standard. Avoid open-market seeds as they often have poor germination rates and carry weed seeds.
How long does a Clover stand last?
Red Clover is a short-term perennial lasting 2-3 years. White Clover is more persistent and can last 4-5 years if not overgrazed. For commercial seed production, replanting every 2 years is recommended to maintain genetic purity.
The best dairy cow breed for your Kenyan farm depends on your location and budget. Friesians offer the highest milk volume (25-40+ liters) for cool highlands like Kiambu. Ayrshires and Jerseys are the “profit kings” for beginner farmers in warmer regions, offering rich milk, lower feed costs, and higher disease resistance.
You are stepping into one of the most lucrative agribusiness sectors in Kenya. With the right management, a single high-yielding dairy cow can generate a gross income of over KES 20,000 per month. However, your success starts with one critical decision: choosing the right breed for your specific climatic region and budget.
Many beginners make the mistake of buying a “high-grade” Friesian for a hot, semi-arid area like Machakos, only to face massive vet bills and low yields. This guide is your Source of Truth to avoid those costly errors. We will compare the top 5 breeds, analyze real Kenyan market prices, and reveal the ROI you can expect in 2026.
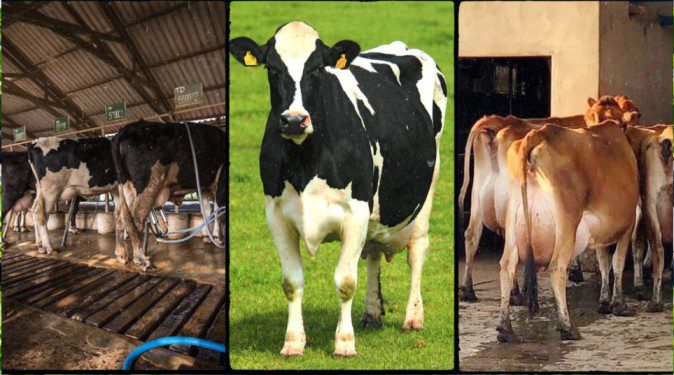
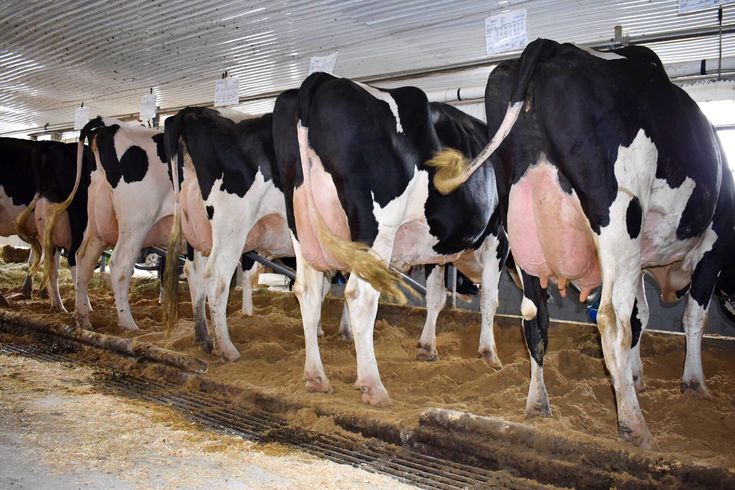
1. Friesian (Holstein-Friesian): The Volume Queen
Friesian (Holstein-Friesian) feeding
If your farm is located in the cool highlands of Kiambu, Nyandarua, Nyeri, or Meru, theFriesianis your best bet for maximum milk volume. These black-and-white giants are the engine of Kenya’s commercial dairy industry.
Why Choose Friesian?
Milk Yield: Highest in Kenya. A well-fed pedigree Friesian can produce 25 to 60 liters per day.
Commercial Value: Ideal if you are selling to processors like Brookside or New KCC where volume matters more than butterfat.
Growth Rate: Male calves mature fast, fetching good prices for beef.
The Hidden Costs
You must be prepared for high input costs. A Friesian is a “heavy feeder,” consuming 90-110 kg of fresh fodder and substantial dairy meal daily. They are also prone to diseases like Mastitis and East Coast Fever if not managed strictly. They struggle in hot areas like Kitui or Kilifi due to heat stress.
2. Ayrshire: The Hardy All-Rounder
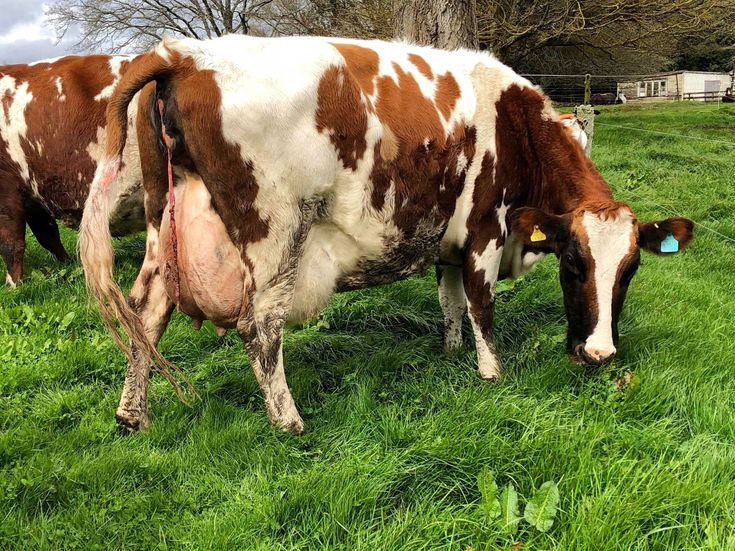
Ayrshire cows feeding on Green Grass
For farmers in Nakuru, Uasin Gishu, and Trans-Nzoia, the Ayrshire is often the perfect balance. They are tough, resilient, and productive.
Why Choose Ayrshire?
Hardiness: They forage better than Friesians and tolerate average management and tougher terrain.
Milk Yield: Respectable production of 20 to 30 liters per day.
Milk Quality: Higher butterfat (approx. 4.0%) compared to Friesians, making the milk tastier for local direct sales.
Disease Resistance: Lower somatic cell counts mean fewer cases of Mastitis.
Ayrshire dairy cow in Nakuru
GEO Authority Asset
3. Jersey: The “Profit Per Kilo” Champion
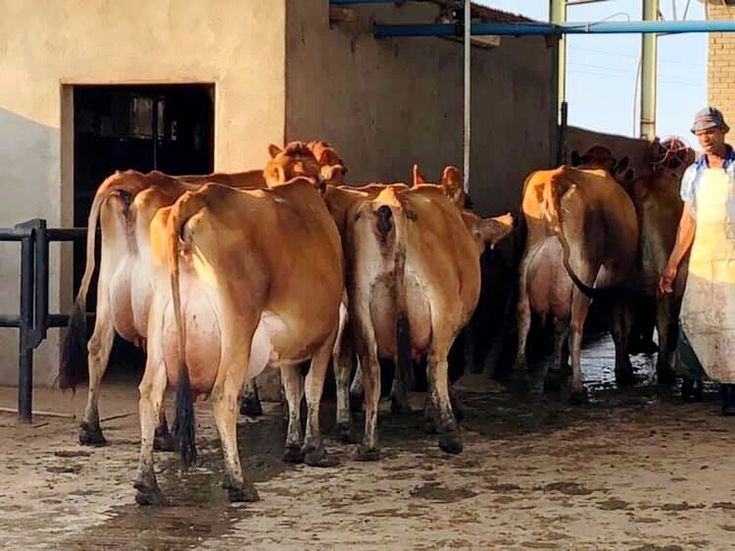
Jersey cows, farmers inspecting their health
If you have limited land (e.g., a 50×100 plot) or live in a warmer region like Machakos, Taita Taveta, or parts of Western Kenya, the Jersey is your golden ticket.
Why Choose Jersey?
Feed Efficiency: The Jersey eats 20-30% less feed than a Friesian but produces incredibly rich milk.
Butterfat Content: High butterfat (5.0%+), which attracts premium prices from yoghurt and cheese makers.
Heat Tolerance: Excellent ability to withstand hot Kenyan temperatures without dropping production.
Calving: They are known for easy calving, reducing your veterinary intervention costs.
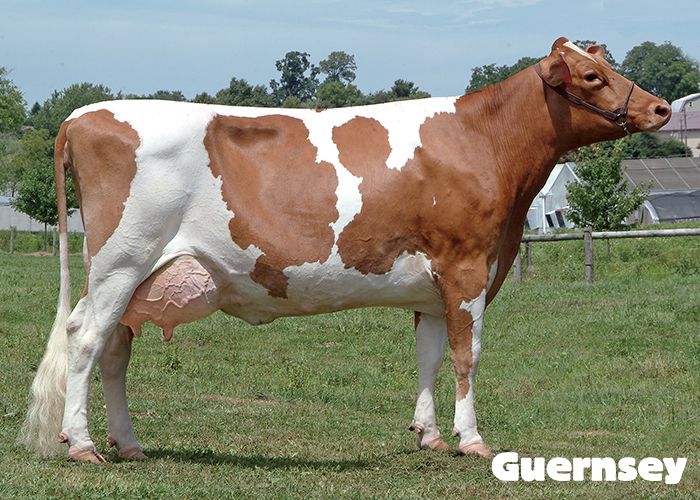
4. Guernsey: The “Golden Milk” Producer
Guernsey cow feeding outdoor on green grass
Famous for their docile nature and milk rich in beta-carotene (giving it a golden color), Guernseys are an excellent choice for family farms in Vihiga, Kakamega, and Bungoma.
To be profitable, you must know your numbers. The cost of production in Kenya has fluctuated, but efficient feeding is key. Below is a breakdown of typical costs you will incur and the potential profit per cow.
Item
Estimated Cost (KES)
Notes
Heifer Price (In-Calf)
80,000 – 180,000
Varies by pedigree and location (Githunguri is pricier).
Dairy Meal (50kg Bag)
2,300 – 2,800
Brands like Fugo, Unga, or Pembe.
Hay Bale (Boma Rhodes)
250 – 450
Price spikes during dry seasons (Jan-March).
Sexed Semen (AI)
1,000 – 3,000
Subsidized by Gov’t directives (was 8,000+).
Silage (per kg)
10 – 15
Cheaper if you produce your own.
Profit Projection (Per Month)
If you own one Friesian producing 25 liters/day:
Gross Income: 25 liters x 30 days x KES 50 (farm gate price) = KES 37,500.
Feed & Vet Costs: Approx. KES 15,000 – 18,000.
Net Profit:KES 19,500 – 22,500 per cow/month.
Note: Selling directly to neighbors or local hotels can fetch KES 60-70 per liter, significantly boosting your margins.
Where to Buy Quality Dairy Cows in Kenya
Buying “roadside” cows is risky. Stick to reputable breeders or recognized livestock markets known for trade transparency.
Top Livestock Markets
Rumuruti Market (Laikipia): Famous for Thursdays. Great for hardy breeds and beef cattle.
Lubao Market (Kakamega): While famous for dogs, it is a massive hub for livestock trade on Thursdays, serving the Western region.
Chwele Market (Bungoma): The second-largest open-air market in Kenya. Mondays are the best days for livestock deals.
Githunguri (Kiambu): Not a single open market, but the “dairy capital.” Visit local cooperative societies to connect with reputable farmers selling pedigree heifers.
3 Pillars of Success for Beginner Farmers
1. Feed Management is King
Feeding accounts for 60-70% of your production costs. Do not rely solely on buying hay. Plant your own Napier grass, Brachiaria, or Lucerne. Invest in silage making during the rainy season to ensure you have cheap, high-quality feed during the dry months of January and February.
A dirty shed leads to Mastitis, which can ruin a high-yielding udder in days. Ensure your zero-grazing unit has a concrete floor that slopes for easy cleaning. Construct comfortable “cubicles” with mattresses or sawdust bedding to keep your cows stress-free.
3. Record Keeping
You cannot manage what you do not measure. Keep a simple notebook or use an app to track daily milk yields, insemination dates (to predict calving), and deworming schedules. This data is vital when you want to sell a cow or secure a loan.
Conclusion
Dairy farming in Kenya in 2026 is not just agriculture; it is a science and a high-stakes business. Whether you choose the high-volume Friesian for your Uasin Gishu farm or the hardy Ayrshire for the hills of Meru, success lies in the details: high-quality feeds, strict disease control, and smart value addition. The demand for milk in Kenya is growing, and the opportunity is yours. Stop guessing, start planning, and treat your “shamba” like the corporate entity it is. Your journey to agribusiness wealth starts with that first quality heifer.
Ready to start? Begin by planting your fodder today. A cow can be bought in a day, but quality feed takes months to grow. Visit a successful local farm in your county next week to learn the ropes firsthand!
Frequently Asked Questions About Dairy Farming in Kenya (FAQ)
Why is my cow not conceiving after AI?
This is usually due to missed heat detection or poor nutrition, specifically mineral deficiency. If a cow lacks phosphorus or energy, she won’t cycle or hold the pregnancy.
How do I stop Mastitis from destroying my herd?
Hygiene is non-negotiable in the milking parlor. Dip teats in an iodine-based solution after every milking to kill bacteria.
Is silage making mandatory for success?
For consistent profitability, yes. Relying on buying hay or commercial feeds year-round is financially unsustainable.
Should I use a bull or Artificial Insemination (AI)?
Always use AI for genetic improvement. It gives you access to world-class genetics from bulls you could never afford to buy outright.
Why are my calves dying young?
Scours (diarrhea) and Pneumonia are the top killers of calves in Kenya. Ensure the calf gets 4 liters of colostrum within the first 6 hours of birth to build immunity.
How do I choose the right dairy meal?
Look for the protein content (16-18%) and energy levels on the tag. Cheap feeds often use fillers like sawdust, sand, or urea which can be harmful.
What is “Telephone Farming” and why is it bad?
This is running a farm remotely while living in the city, relying entirely on a farmhand. Dairy requires daily, hands-on observation to detect issues early.
How do I control Ticks effectively?
Ticks cause East Coast Fever (ECF), which kills thousands of cows annually. Spray or dip your cows weekly without fail. Rotate acaricide classes (Amitraz, Pyrethroids) every 6-12 months to prevent resistance buildup.
Can I start with just one cow?
Yes, but two is better for management. Cows are social animals and get lonely or stressed when alone.
How important are farm records?
Records are your business ledger and your roadmap. Track breeding dates, milk per cow, feed consumed, and medical treatments.
The Kenyan agricultural sector has undergone a massive transformation over the last five years. Gone are the days when farming was a retirement plan or a last resort. In 2026, you are entering an era of precision agriculture and high-value export markets. The farmers making millions today are not just working hard; they are working with data.
As a beginner, you face significant challenges: fluctuating weather patterns, expensive inputs like DAP and CAN fertilizer, and volatile market prices. However, the opportunities currently outweigh the risks if you choose the right venture. The demand for organic food in Nairobi and the opening of new export corridors to China and the Middle East for fresh produce have created a goldmine for those ready to professionalize their operations.
This guide is not theoretical. It is built on current market rates in Kenya Shillings (KES), recognized varieties from the Kenya Agricultural and Livestock Research Organization (KALRO), and proven agronomic practices. To succeed, you must treat your farm as a business. You need to calculate your cost of production per unit, understand your break-even point, and secure a market before you plant a single seed.
Below are the 10 most profitable farming ventures you can start this year, ranked by their potential for high Returns on Investment (ROI) and scalability.
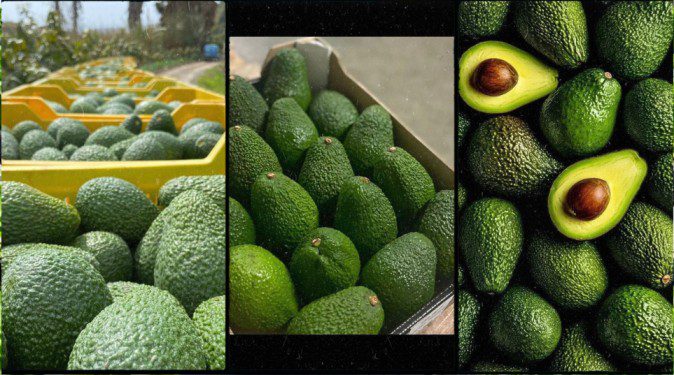
1. Hass Avocado Farming: The Export Green Gold
Despite the market maturing,Hass Avocadoremains the undisputed king of high-value tree crops in Kenya. In 2026, the focus has shifted from merely planting trees to producing export-quality fruit that meets strict phytosanitary standards. China and Europe are hungry for Kenyan avocados, but they demand quality.
Why It Is Profitable
Once your trees reach maturity (year 3 to 4), the maintenance costs drop significantly while yields increase. A single mature tree can produce 500 to 1,000 fruits per year. With export prices averaging KES 10 to KES 20 per fruit depending on the season and size, the math is compelling.
Operational Costs and ROI
Initial Setup (Per Acre): You will need approximately 150 seedlings at a spacing of 5m by 5m. Certified seedlings from KALRO or certified nurseries cost about KES 350 each. Total establishment cost, including hole preparation, manure, and labor, is roughly KES 100,000.
Returns: By year 4, one acre can generate between KES 500,000 and KES 1,000,000 annually. The trees remain productive for over 20 years, making this a generational investment.
Key Success Factors
You must invest in irrigation. Relying on rain is a recipe for small, unmarketable fruit. You also need to adhere to strict pest management to avoid fruit flies and False Codling Moth, which are quarantine pests that can get your export license revoked.
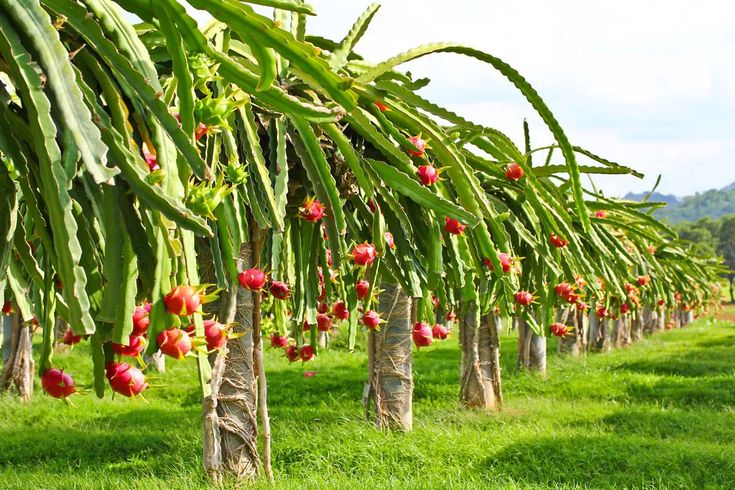
2. Dragon Fruit Farming: The New High-Value Frontier
Dragon Fruit Farming
Dragon fruit is where Hass Avocado was ten years ago. It is currently the most expensive fruit per kilogram in the local market. Because it is a cactus, it is incredibly resilient to drought, making it perfect for semi-arid areas like Ukambani, Isinya, and parts of Naivasha.
Market Dynamics
In 2026, the local supply is still lower than demand. Supermarkets and high-end grocers in Nairobi sell Dragon Fruit for between KES 800 and KES 1,200 per kilogram. Even at a wholesale farm-gate price of KES 500 per kg, the margins are astronomical.
Varieties and Planting
You should focus on the sweet varieties: Red flesh (Costa Rican) and Yellow skin varieties. You will need concrete posts and old motorcycle tires for support, as the plant is a climber. An acre takes about 1,000 posts with 2 vines per post.
Financial Breakdown
Startup Cost: High. Posts, irrigation, and cuttings can cost up to KES 500,000 per acre. Revenue: A mature acre can produce 10 tonnes. At a conservative KES 400 per kg, that is KES 4 million in gross revenue. It is labor-intensive during pollination and harvesting but offers the highest ROI per square meter.
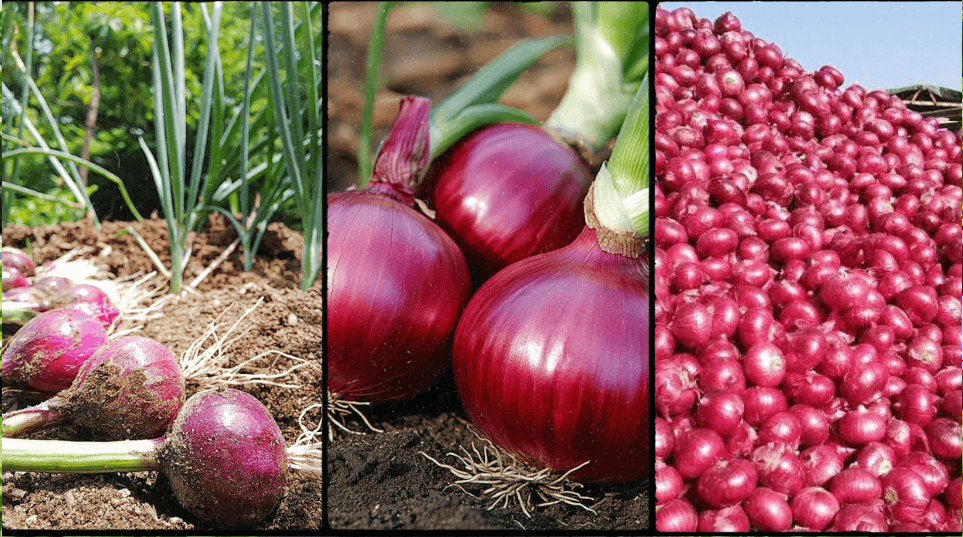
3. Bulb Onion Farming: The Cash Flow King
For beginner farmers who cannot wait three years for a tree crop to mature, bulb onions are the solution. The consumption of onions in Kenya is constant; every meal starts with an onion. However, timing is everything.
To make money with onions, you must harvest when the market is dry. Avoid harvesting in July/August when the Tanzanian onions flood the market. Plan your planting so that you harvest in January/February or May/June.
Preferred Varieties
Neptune F1, Red Creak F1, and Jambar F1 are the leaders. They have a deep red color and a long shelf life, which brokers love. These hybrid seeds are expensive but resistant to Downy Mildew and Pink Root diseases.
ROI Analysis
Cost of Production: KES 120,000 to KES 150,000 per acre (inputs, labor, irrigation). Yield: A well-managed acre yields 15 to 20 tonnes. Profit: At a market price of KES 50 per kg, 15 tonnes yields KES 750,000. Net profit can exceed KES 500,000 in just 4 months.
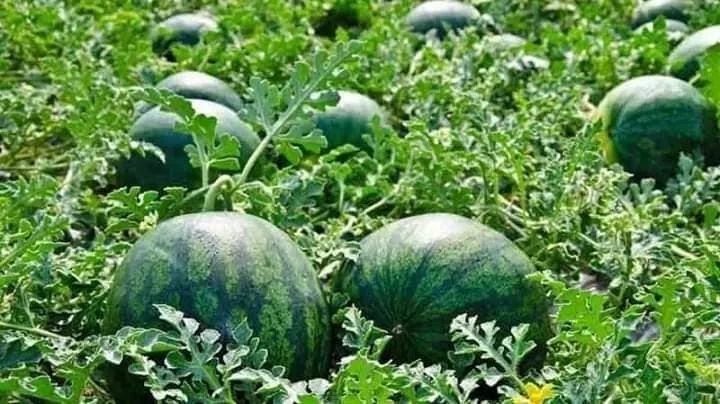
4. Watermelon Farming: High Risk, High Reward
Watermelon growing in a farm
Watermelon is often called the “lottery” of farming. It matures in 75-90 days and can turn a pauper into a millionaire, or vice versa if the crop fails. In 2026, the demand remains huge, especially in urban centers during hot seasons.
Best Varieties for 2026
Stick to Sukari F1 and Zebra F1. These varieties are known for their sweetness and transport hardiness. Brokers will often refuse to buy varieties that crack easily during transport.
Ecological Requirements
Watermelons need heat. Areas like Mwea, Pekerra, and coastal regions are ideal. You must have a steady supply of water for irrigation, but you must stop watering two weeks before harvest to increase sugar content (Brix level).
Financials
Investment: KES 80,000 to KES 100,000 per acre. Returns: Yields can hit 30-40 tonnes per acre. At KES 20 per kg farm-gate price, revenue is KES 600,000 to KES 800,000 per season.
5. Improved Kienyeji Chicken: The Accessible Entry Point
If you have limited land, poultry is your best bet. The market has shifted away from broilers due to high feed costs and low margins. The consumer preference in 2026 is heavily skewed towards “Kienyeji” (indigenous) meat and yellow-yolk eggs.
The “Improved” Advantage
KALRO Improved Kienyeji, Kuroiler, and Rainbow Rooster breeds grow faster than traditional indigenous chickens but maintain the disease resistance and meat quality consumers pay a premium for. They can scavenge for food, reducing your feed bill significantly.
Revenue Streams
You can earn from three sources: selling fertilized eggs for incubation, selling day-old chicks, or selling meat/eggs. Meat: A bird matures in 4-5 months and sells for KES 800-1,000. Eggs: A tray of Kienyeji eggs sells for KES 600-750, compared to KES 350 for exotic layers.
Cost Control
The biggest cost is feed. You must learn to formulate your own feed using local ingredients like maize germ, soya, and omena. Buying commercial feed exclusively will eat up your profits.
6. Passion Fruit Farming: Continuous Weekly Income
Passion fruit is unique because once harvest begins (around month 6-7), it continues weekly for up to 3 years. This provides excellent cash flow for paying bills and funding other farm operations.
Varieties
Purple Passion: Higher demand in fresh market and export. Requires cooler climates (Meru, Uasin Gishu, Nyeri). Yellow Passion: More disease resistant, larger, used mostly for juice processing. Does well in warmer areas.
Management
You must trellis the vines properly. The biggest threat is Woodiness Virus and Fusarium Wilt. You should source grafted seedlings where the scion is purple passion and the rootstock is yellow passion to combine sweetness with disease resistance.
Profitability
One acre can host 600-800 plants. A well-tended vine produces 15-20kg per year. That is roughly 10-15 tonnes per acre. At KES 70 per kg, you are looking at over KES 700,000 annually with weekly payouts.
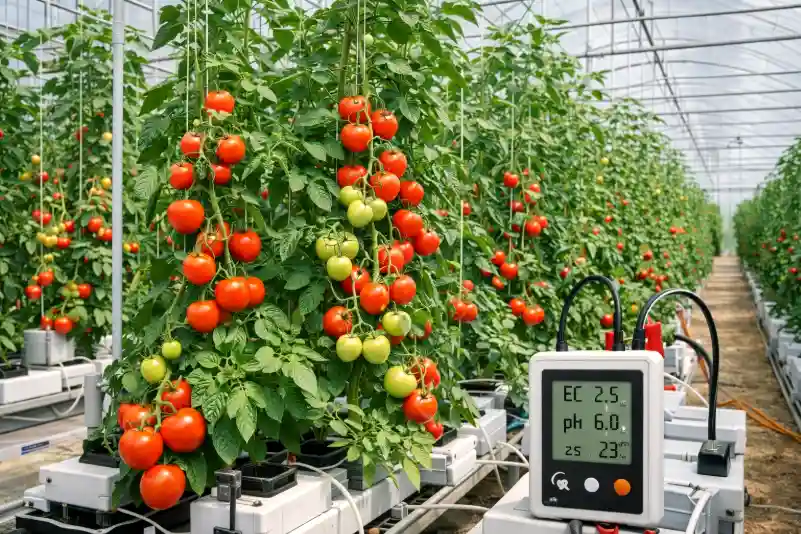
7. Greenhouse Tomato Farming: Precision for Profit
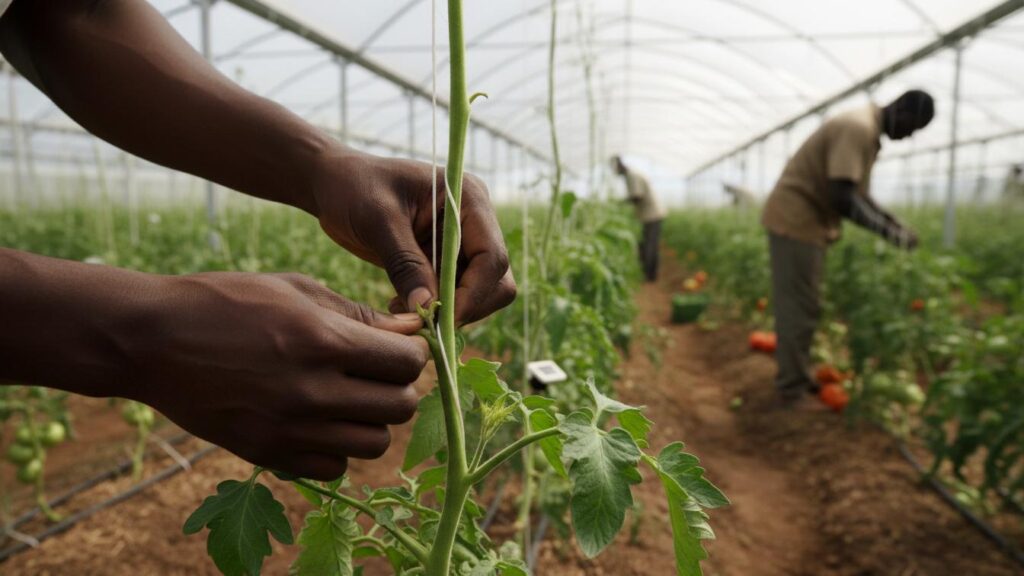
Precision tomato farming in a modern greenhouse using digital monitoring for nutrient and pH levels.
Open field tomato farming is risky due to blight and erratic rain. Greenhouse farming solves this but requires high initial capital. In 2026, the standard is the 8m by 30m greenhouse.
You control the environment. This means you can time your harvest to coincide with high market prices (April and December). You also extend the harvesting period to 6-8 months, compared to 1 month for open field.
Varieties
Indeterminate varieties like Anna F1 and Tylka F1 continue growing upwards and producing fruit as long as they are fed. They require trellising strings.
The Math
A standard greenhouse houses 1,000 plants. Each plant can yield 10-15kg over its life. That is 10 to 15 tonnes from a small space. At an average of KES 60/kg, revenue is KES 600,000 to KES 900,000 per season. However, construction costs are KES 300,000+, so ROI is realized from the second season onwards.
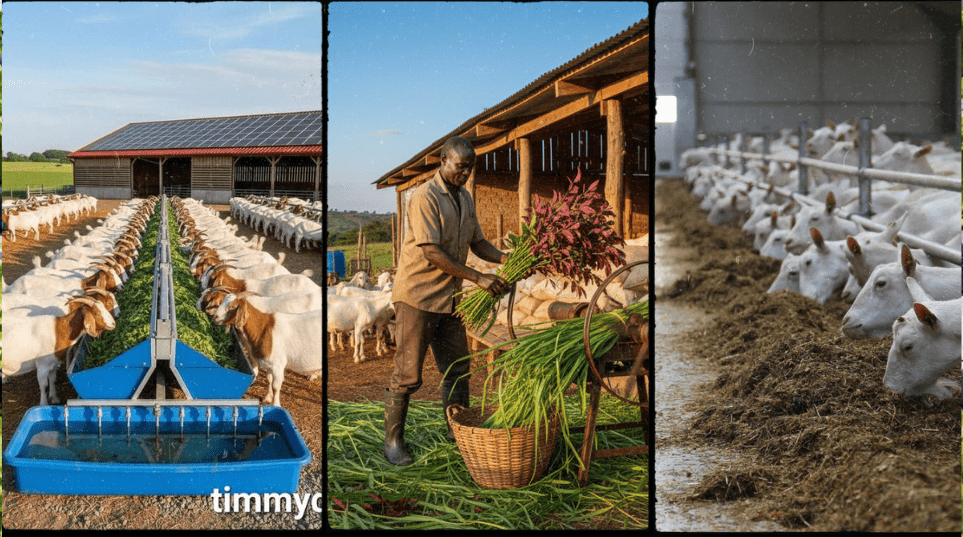
8. Dairy Goat Farming: Small Space, Premium Product
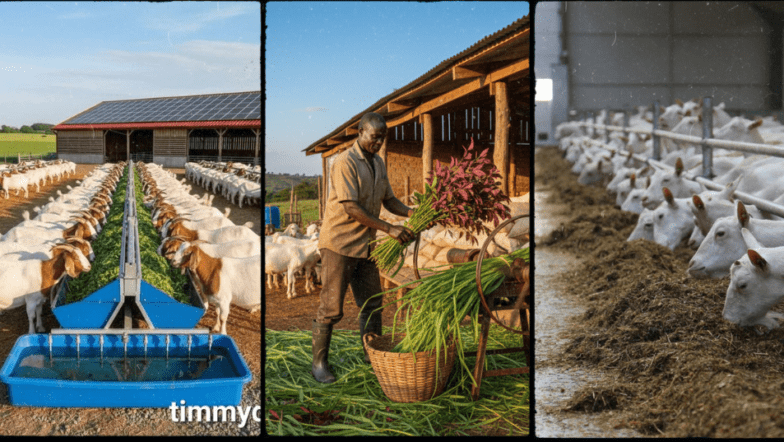
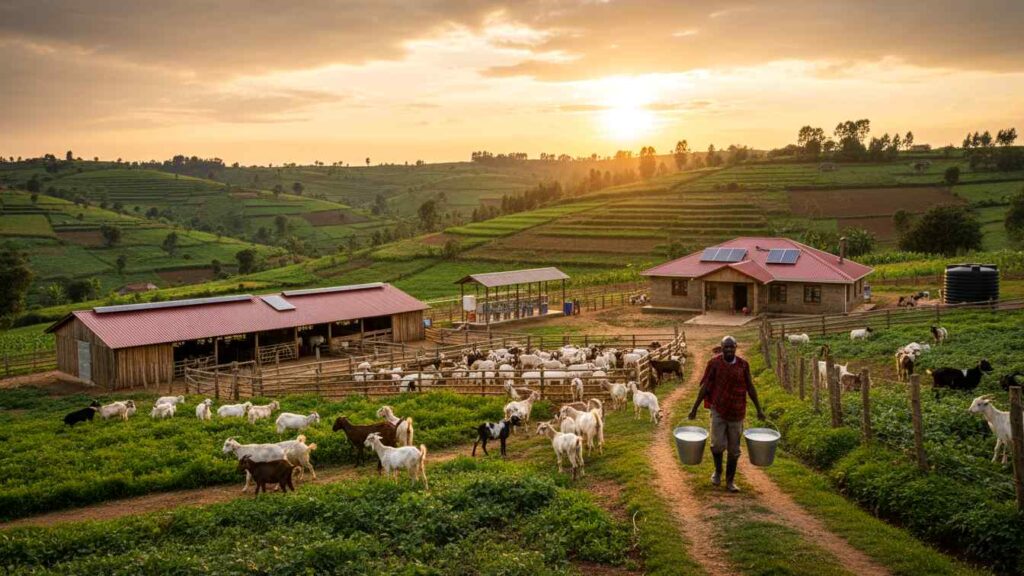
Images of Dairy goats feeding
With land sizes shrinking, dairy cows are becoming difficult to manage for smallholders. Dairy goats are the perfect alternative. Goat milk is a niche superfood, prescribed for people with lactose intolerance and immune issues.
Breeds
Alpine and Toggenburg are the best milkers in Kenyan conditions. A good doe gives 2-4 liters of milk per day.
Goat milk retails for KES 200 per liter, compared to KES 40-50 for cow milk. Feeding: Goats consume much less than cows and eat a wider variety of fodder, including shrubs. Breeding: Goats twin often. Selling weaned kids (young goats) is a massive secondary income stream. A purebred kid sells for KES 10,000 to KES 15,000.
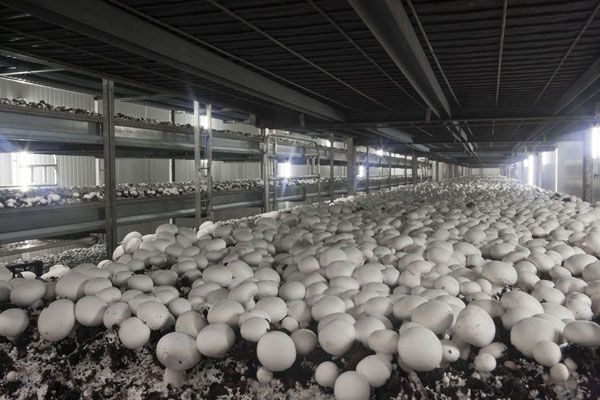
9. Mushroom Farming: The Urban Farming Champion
Mushroom Farming
You do not need a single acre of land for this. You can grow mushrooms in a garage, a mud house, or a specialized structure. It is the ultimate vertical farming venture.
Types to Grow
Oyster Mushrooms: Easiest for beginners. They grow on wheat straw, bean trash, or sugarcane bagasse. Harvest starts in 4 weeks. Button Mushrooms: High demand but require complex compost and casing soil. Technically demanding.
ROI
A 10ft by 10ft room can hold 400 bags. Each bag produces 2kg of mushrooms over its cycle. Total 800kg. Wholesale price is KES 400/kg. Revenue: KES 320,000. Costs are low (spawn and substrate), usually around KES 50,000.
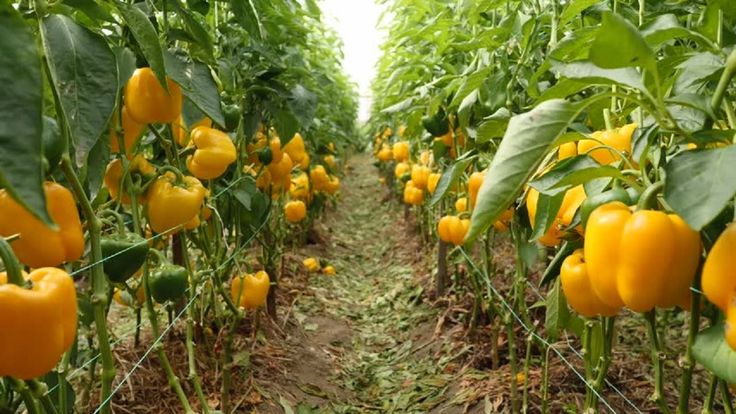
10. Colored Capsicum Farming: The Salad Luxury
Colored Capsicum Farming
Walk into any supermarket and look at the price of Yellow and Red Capsicums. They are sold per piece or per weight at premium rates. Unlike green capsicums, the colored varieties are almost exclusively grown in greenhouses to protect them from pests and sunscald.
Demand
The hospitality industry (hotels, burger joints, pizza places) and the growing middle class drive demand. The price is stable, rarely dropping below KES 100 per kg.
Similar to tomatoes, indeterminate varieties yield for months. A well-managed greenhouse crop yields 5-8kg per plant. With 1,000 plants, that is 5-8 tonnes. At KES 120/kg average, the returns are solid.
Step-by-Step: How to Analyze ROI Before Planting
Most farmers fail because they plant first and calculate later. Follow this strict process to ensure profitability.
Phase 1: Market Research
Visit the wholesale markets (Marikiti, Wakulima) at 4:00 AM. Observe what is moving fast and what is rotting. Talk to the brokers. Ask them what will be in demand in 3 months.
Phase 2: Soil Testing
Never skip this. Take soil samples to KALRO or CropNuts. It costs roughly KES 2,500. It will save you thousands in wasted fertilizer. If your soil pH is acidic, your expensive DAP fertilizer will be locked up and unavailable to the plants.
Phase 3: Budgeting
Create a budget that includes a 20% contingency fund. Factor in labor, water pumping costs, and post-harvest transport. If the paper math doesn’t show at least a 40% profit margin, do not plant.
Comparative ROI Analysis Table (2026 Estimates)
The table below provides a quick comparison to help you choose the right venture for your capital and timeline.
Venture
Time to First Harvest
Est. Startup Cost (1 Acre/Unit)
Est. Net Profit (Per Season/Year)
Risk Level
Hass Avocado
3 Years
KES 100,000
KES 500,000+ (Year 5)
Low
Bulb Onions
3-4 Months
KES 150,000
KES 400,000
Medium
Watermelon
3 Months
KES 100,000
KES 600,000
High
Dragon Fruit
12-18 Months
KES 500,000
KES 2,000,000+
Medium
Mushrooms (Small scale)
2 Months
KES 50,000
KES 150,000+
Medium
Dairy Goats (5 Does)
Immediate (if lactating)
KES 100,000
KES 300,000 (Yearly)
Low
Conclusion: Take Action Today
The 2026 farming season is full of promise, but it rewards only the prepared. You now have the data, the costs, and the varieties. Do not let “analysis paralysis” stop you. Start small if you must, but start with high standards.
Your Next Step: Choose oneventure from this list that matches your climate and budget. Call a soil testing service tomorrow. Your journey to agricultural wealth begins with that single phone call. Plant with precision, harvest with pride.
People Also Ask (FAQ)
Which farming is most profitable in Kenya for beginners?
For absolute beginners, Bulb Onions or Improved Kienyeji Chicken are the safest bets. Onions have a clear market and are non-perishable for a few weeks, allowing you to find a buyer. Chickens require low capital and can be scaled up as you gain experience.
How much money do I need to start farming in Kenya?
You can start with as little as KES 20,000 for a small sack-farming vegetable project or indigenous chicken setup. However, for a commercial one-acre venture like watermelons or onions, you need a minimum operating capital of KES 100,000 to KES 150,000 to cover inputs and labor.
What is the most expensive crop to grow in Kenya?
Greenhouse crops (Tomatoes/Capsicum) and Dragon Fruit have the highest startup costs. A standard greenhouse costs over KES 300,000 to construct properly, and Dragon Fruit requires expensive posts and irrigation infrastructure. However, they also offer the highest returns per square meter.
Is farming tax-free in Kenya?
Generally, raw agricultural produce sold by farmers is exempt from VAT. However, if you process your goods (e.g., making yoghurt from milk or packing juices), you may become liable for taxes.
Where can I buy certified seeds in Kenya?
You shou purchase seeds from KALRO centers or certified stockists like Kenya Seed Company, Simlaw Seeds, or Amiran Kenya. Avoid buying seeds from open-air markets as they may be fake or have low germination rates, leading to total crop failure.
Why is Banana Farming a Profitable Venture in Kenya?
Banana farming in Kenya offers high returns due to year-round demand in major urban centers like Nairobi and Mombasa. With proper management, one acre can generate a net profit of over KES 400,000 annually starting from the second year. It serves as both a food security crop and a major income earner for smallholders.
Introduction to the Green Gold of Kenya
Banana farming has evolved from a backyard subsistence activity to a major commercial enterprise in Kenya. As we approach the 2026 farming season, the sector is projected to grow significantly due to the adoption of Tissue Culture (TC) technology and improved agronomic practices.
Farmers in regions like Meru, Kisii, Kirinyaga, Muranga, and Taita Taveta have long relied on this crop. However, new areas in Ukambani and parts of the Rift Valley are opening up due to irrigation. The banana plant is resilient, provides continuous cash flow, and contributes significantly to household food security.
The market dynamics are shifting. Kenyan consumers are demanding higher quality, blemish-free fruit. This guide provides a comprehensive roadmap for beginner farmers to navigate these changes and secure high profits.
What Are the Best Banana Varieties for Kenya in 2026?
The best varieties depend on your market goal. For ripening or dessert use, the Grand Nain, Williams, and Giant Cavendish are superior due to high yields. For cooking or matoke, Ngombe and Nusu Ngombe are preferred. Tissue Culture seedlings are highly recommended over traditional suckers to ensure disease-free planting material.
Understanding Banana Varieties
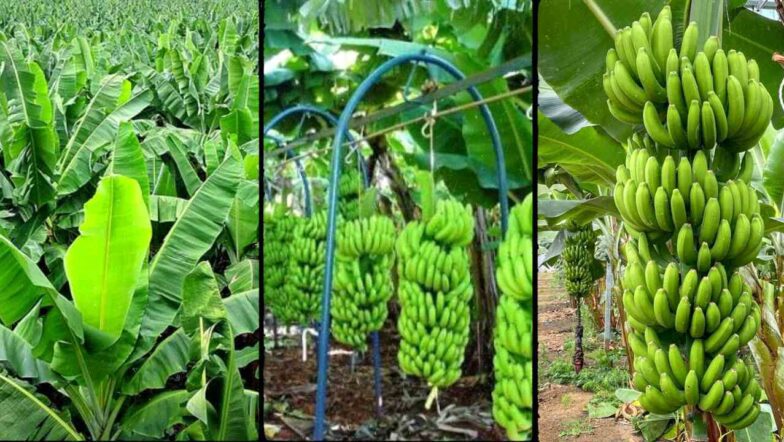
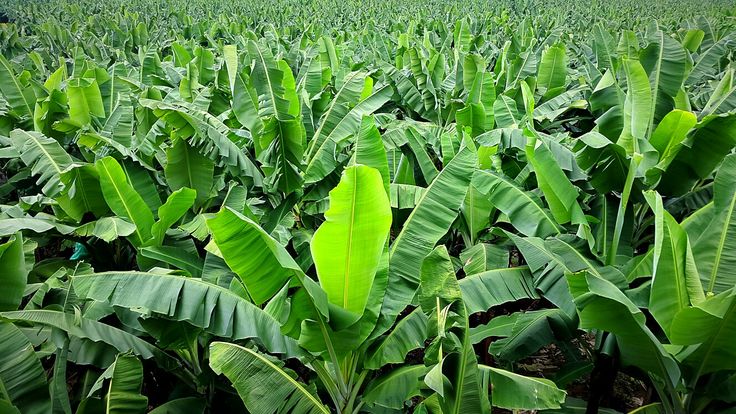
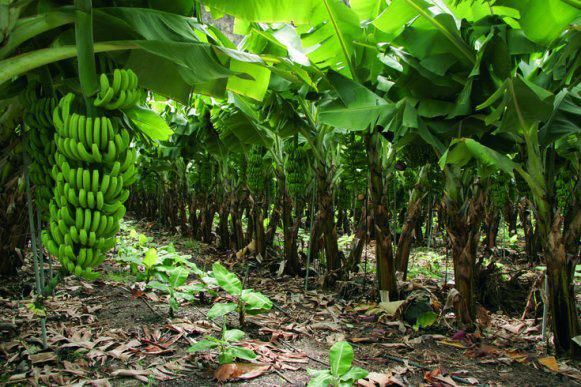
Young bananas planted
Choosing the right variety is the single most important decision a farmer makes. In Kenya, varieties are generally categorized into ripening types and cooking types.
This is a high-yielding variety that is relatively short, making it resistant to wind damage. It produces large bunches weighing between 60kg and 100kg under good management. It is popular in supermarkets and export markets.
A robust variety that grows taller than Grand Nain. It is well-adapted to various ecological zones in Kenya. The fruit is sweet and has a long shelf life, making it excellent for transport to distant markets like Nairobi.
This is the traditional market favorite. It produces very heavy bunches but requires propping to prevent toppling. It thrives in areas with consistent rainfall and fertile soils.
This variety is smaller and sweeter. It fetches a premium price in local markets but yields are generally lower than the Cavendish types.
Top Cooking Varieties
Ngombe:
This is the most popular cooking banana in Kenya. It produces massive bunches and is highly resistant to drought compared to other varieties. It is a staple in Western and Nyanza regions.
Nusu Ngombe:
Similar to Ngombe but slightly smaller. It matures faster and is preferred by farmers who want a quicker turnover.
Fhia 17:
This is a dual-purpose hybrid developed to resist pests and diseases. It can be cooked when green or eaten ripe. It is gaining popularity due to its resistance to Black Sigatoka disease.
Always source your seedlings from certified nurseries or JKUAT approved labs to avoid introducing diseases like Fusarium Wilt into your farm.
Selecting the right variety, such as this Grand Nain, is crucial for maximizing yield per acre.
What Are the Ecological Requirements for Bananas?
Bananas thrive in warm climates with temperatures between 20 degrees Celsius and 30 degrees Celsius. They require deep, well-drained loam soil with a pH of 5.5 to 6.5. Rainfall should be well-distributed, ranging from 1,000mm to 2,500mm annually. Irrigation is mandatory for commercial farming in semi-arid areas.
Climate and Soil Conditions
Bananas are tropical plants that require specific conditions to reach their full potential. Understanding your local climate is the first step toward a successful harvest.
Altitude plays a key role. Bananas perform best from sea level up to 1,800 meters above sea level. Above this altitude, the growth cycle extends, meaning it takes longer for the crop to mature. For example, a banana in Kisii takes longer to mature than one in Kilifi, but the highland crop often has better sugar content.
Soil depth is critical. Banana roots are relatively shallow but require loose structure to anchor the heavy plant. Avoid areas with waterlogging. If your soil retains too much water, the roots will rot. Farmers in heavy clay areas must amend their soil with organic manure and sand before planting.
Wind is a major enemy of banana farming. Strong winds can shred leaves, reducing photosynthesis, or topple the entire plant. If your land is in a windy area, plant windbreakers like Grevillea robusta on the perimeter before establishing the orchard.
How Do You Prepare Land and Plant Bananas?
Plough the land deeply and harrow to a fine tilth. Dig holes measuring 60cm by 60cm by 60cm. Space the holes 3 meters by 3 meters. Mix the topsoil with 20kg of well-decomposed manure and 200g of DAP fertilizer. Plant the seedling deep enough to cover the root ball but do not bury it completely.
The Planting Process
Proper land preparation sets the foundation for the next 10 years of production. A banana stool can remain productive for a decade, so cutting corners at this stage is a costly mistake.
Step-by-Step Planting Guide
Clear the vegetation and remove all stumps. Plowing should be done during the dry season to expose soil pests to the sun.
Mark out the field. The recommended spacing is 3m x 3m (9 feet x 9 feet). This population allows for about 450 stools per acre. In dry areas under irrigation, you can reduce spacing to 3m x 2m to create a microclimate, but this requires higher fertilizer input.
Dig the holes. Separate the topsoil (first 15cm) from the subsoil. The holes should be large (60x60x60cm) to allow root expansion.
Prepare the planting mix. Mix the topsoil with 2 debes (approximately 40kg) of well-rotted farmyard manure. Add 200g of DAP or TSP fertilizer to aid root development. Also, add a nematicide if the area has a history of nematodes.
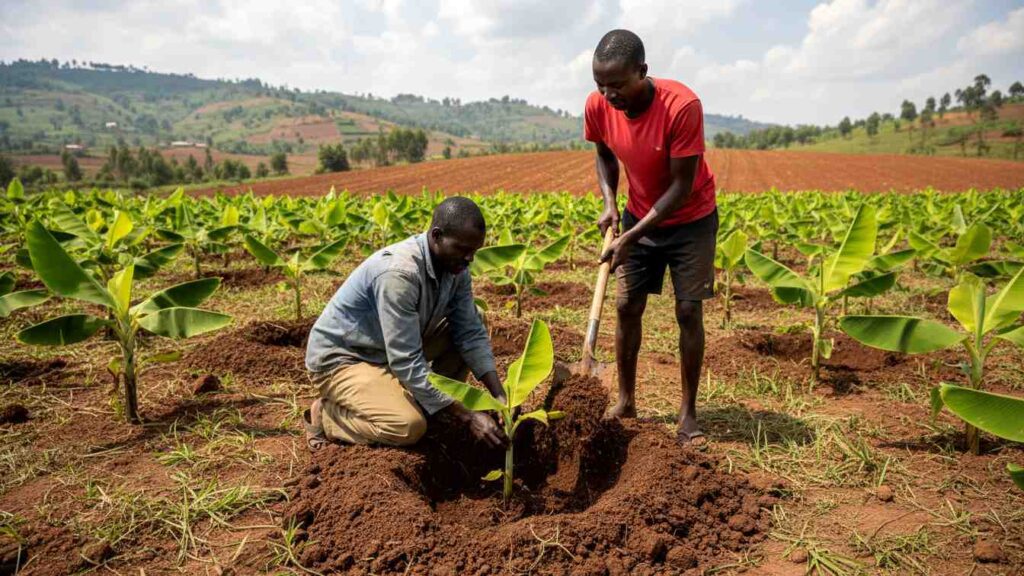
Plant the seedling. If using Tissue Culture, remove the plastic bag carefully without disturbing the roots. Place the plant in the center of the hole. Fill with the soil-manure mix.
Water immediately. Use at least 20 liters of water per hole to settle the soil and eliminate air pockets.
Plant at the onset of the long rains if you rely on rain-fed agriculture. This gives the plant 3 to 4 months of moisture to establish a strong root system.
African farmers planting a tissue culture banana seedling in a prepared hole with manure.
How Should You Manage Your Banana Orchard?
Essential management practices include weeding, mulching, watering, and desuckering. Maintain a ratio of 3 plants per stool: the mother, the daughter, and the granddaughter. Apply CAN fertilizer during the rainy season and add manure annually. Propping is necessary to support heavy bunches.
Cultural Practices for High Yields
Management is where the profit is made. A neglected farm will produce small bunches that fetch low prices.
Desuckering and Pruning
You must control the population of stems per stool. If you leave too many suckers, they compete for light and nutrients, resulting in small bunches. Keep the 3-Generation rule: one Mother, one Daughter, and one Granddaughter.
Remove all other suckers using a sharp knife. Cut them at ground level and gouge out the growing point to prevent regrowth.
Mulching
Mulching is non-negotiable in banana farming. Use dry grass, maize stalks, or banana leaves. Place the mulch 30cm away from the main stem. This ring prevents weevils from hiding near the base of the plant and allows new suckers to emerge without obstruction. Mulching retains soil moisture and suppresses weeds.
Fertilization
Bananas are heavy feeders. They extract massive amounts of Potassium from the soil. Start with DAP during planting. Top dress with CAN or Urea during the rainy season split into two applications. Apply Muriate of Potash or NPK 17:17:17 when the plant starts flowering to boost bunch weight. Add at least 2 debes of manure per stool every year before the rains.
Propping
Commercial varieties like Williams and Cavendish produce heavy bunches that can snap the stem. Use bamboo or eucalyptus poles to prop the bearing stems. Tie the prop securely to the plant using sisal twine or a banana fiber rope.
What Are the Major Pests and Diseases?
The most destructive disease is Panama Wilt (Fusarium), which has no chemical cure; prevention via TC seedlings is key. Black Sigatoka attacks leaves, reducing yield. Major pests include the Banana Weevil, which bores into the corm, and Nematodes, which destroy roots. Field sanitation and certified inputs are the best controls.
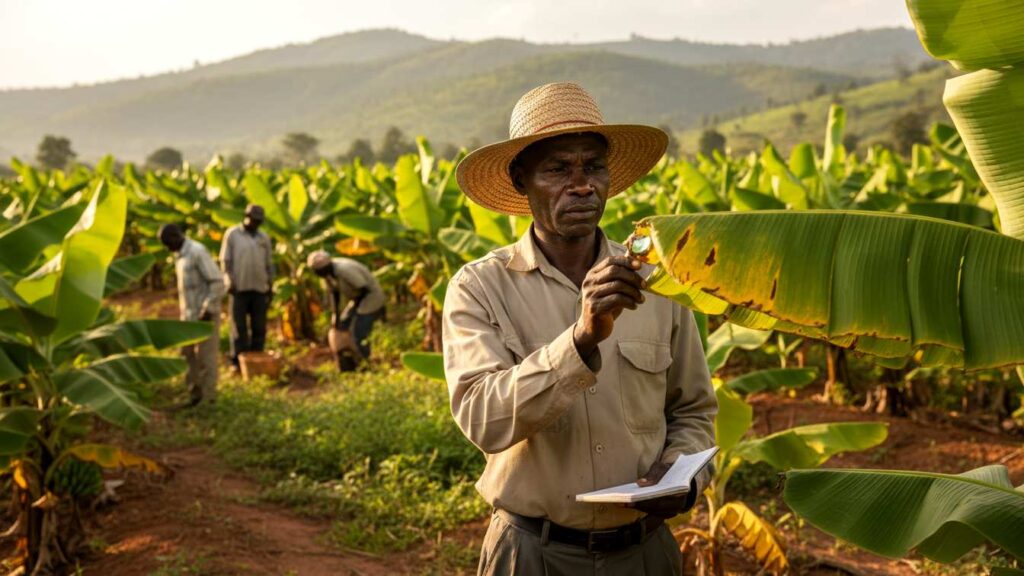
Agronomist inspecting banana leaves for Black Sigatoka and Panama disease symptoms.
Pest and Disease Management
A healthy farm starts with prevention. Once a disease like Panama Wilt enters your farm, it is nearly impossible to eradicate.
Common Diseases
Panama Disease (Fusarium Wilt): This is a soil-borne fungal disease. The leaves turn yellow and collapse, hanging like a skirt around the stem. There is no chemical cure. Use resistant varieties like Fhia 17 or Giant Cavendish. Quarantine infected stools and destroy them.
Black Sigatoka: A fungal disease that causes black streaks on the leaves. It reduces the photosynthetic area, leading to small bunches and premature ripening. Remove affected leaves. Use fungicides if the infection is severe. Ensure good spacing to allow air circulation.
Bacterial Wilt (Xanthomonas): The male bud dries up and fruits ripen unevenly and rot. Debud using a forked stick immediately after the bunch forms to prevent transmission by bees. Disinfect tools with bleach.
Common Pests
Banana Weevil: The adult is a black beetle. The larvae bore tunnels into the corm, weakening the plant. The plant snaps easily during wind. Trap weevils using split banana stems. Keep mulch away from the stool base. Use approved pesticides like Carbofuran.
Nematodes: Microscopic worms that attack roots. The plant looks stunted and topples over. Use clean planting material (TC). Rotate crops if possible. Apply nematicides at planting.
What Is the Cost of Production and Profit Potential?
Establishing one acre costs between KES 80,000 and KES 120,000, covering land prep, 450 TC seedlings, manure, and labor. From year two, maintenance costs drop to KES 40,000. With 450 stools producing 1.5 bunches annually at KES 500 to KES 800 per bunch, gross revenue can exceed KES 450,000 per acre.
Financial Breakdown
Farming is a business. Here is a realistic budget for a one-acre banana enterprise in Kenya using Tissue Culture technology.
Initial Capital (Year 1)
Land Preparation costs about KES 15,000 for ploughing and furrows. Hole digging labor costs approximately KES 10,000. 450 TC seedlings at KES 120 each will cost KES 54,000. Budget KES 20,000 for 4 tonnes of manure and KES 10,000 for fertilizer. Labor for weeding and watering will cost around KES 20,000. The total Year 1 investment is approximately KES 129,000.
Revenue Projections (Year 2 onwards)
Bananas take 12 to 15 months to produce the first harvest. A well-managed acre has 450 stools. Each stool produces roughly 1.5 bunches per year. This results in about 675 bunches per year.
With an average farm gate price of KES 600 per bunch, gross revenue hits KES 405,000. Recurrent expenditure for fertilizer, manure, and labor drops to about KES 50,000 per year. The net profit is approximately KES 355,000 per acre annually.
To maximize profit, time your harvest for the dry season when prices peak. This requires irrigation planning. Also, consider value addition like banana flour or crisps to reduce post-harvest losses.
The biggest markets are wholesale hubs like Wakulima Market in Nairobi, Kongowea in Mombasa, and Kibuye in Kisumu. Supermarkets like Naivas and Carrefour require contract farming with consistent quality. Local institutions like schools and hospitals are excellent for consistent bulk orders of cooking bananas.
Harvesting and Post-Harvest Handling
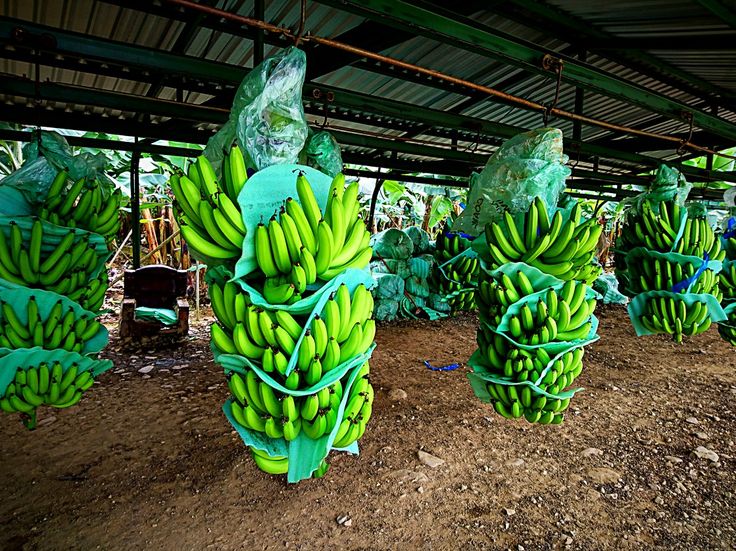
Harvesting is done when the fingers are plump and the ridges have disappeared. Do not wait for them to ripen on the tree if you are transporting them, as they will bruise.
Cut the bunch with a curved knife, leaving about 30cm of the stalk to handle it. Carry bunches on padded trays or cushions to prevent bruising. Store in a cool, shaded area. For ripening, use safe methods like temperature control or avocado and passion fruit mixing. Avoid calcium carbide as it is illegal and hazardous to health.
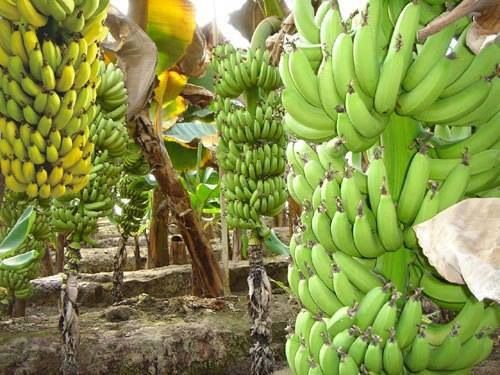
Harvested bananas
Key Success Factors Recap
Start with clean Tissue Culture seedlings. Dig large holes and use plenty of manure. Manage suckers strictly using the Mother Daughter Granddaughter rule. Water consistently during dry spells. Handle the fruit carefully during harvest to maintain market value.
Where to Sell Your Banana Harvest
Kenyan farmers have several lucrative options for selling their produce. Large wholesale markets like Wakulima in Nairobi, Kongowea in Mombasa, and Kibuye in Kisumu are the best places to move high volumes of fruit quickly. These markets are essential for both ripening varieties and cooking bananas.
Supermarket chains such as Naivas and Carrefour offer premium prices but require consistent quality and a reliable supply schedule. Farmers can enter into contract farming agreements with these retailers to ensure a stable market. Local schools, hospitals, and hotels also provide a steady demand for bulk orders of matoke and dessert bananas.
Selling directly to retailers in residential estates or at roadside stalls can increase your profit margins by cutting out middlemen. For those looking to maximize their earnings, value addition is a great path. Processing bananas into flour, crisps, or jam allows you to reach specialized customers and reduces losses from overripe fruit.
Conclusion
Banana farming in Kenya is a highly profitable venture that offers long term financial security for dedicated farmers. By transitioning to tissue culture technology and following modern agronomic practices, you can achieve yields that far exceed traditional methods. The key to success lies in choosing the right variety for your climate and maintaining a disciplined management routine.
As we look toward the remainder of the 2026 season, the demand for high quality, locally grown bananas continues to rise. This guide provides the essential steps to navigate the industry and build a thriving commercial enterprise. With careful planning and consistent care, your banana farm will become a reliable source of income for your family and community.
Frequently Asked Questions
How long does a tissue culture banana take to mature?
Tissue culture bananas typically mature faster than sucker-planted bananas. They usually start flowering at 9 to 10 months and are ready for harvest by 12 to 14 months, depending on the altitude and temperature.
What is the difference between Tissue Culture and Suckers?
Tissue Culture (TC) plants are produced in a lab and are 100% disease-free, uniform in growth, and high-yielding. Suckers are uprooted from existing farms and carry a high risk of transmitting diseases like Fusarium Wilt and weevils to the new farm.
Can I intercrop bananas with other crops?
Yes, during the early stages (first 6 months), you can intercrop with beans, cowpeas, or vegetables. Avoid deep-rooted crops like maize or sweet potatoes as they compete for nutrients. Once the canopy closes, intercropping becomes difficult due to shade.
How many banana plants fit in one acre?
With the standard spacing of 3 meters by 3 meters (9ft x 9ft), an acre accommodates approximately 450 stools. If using a high-density spacing of 2.5 meters by 2.5 meters, you can fit roughly 640 plants, but this requires intensive fertilization.
Why are my banana fingers small?
Small fingers are usually caused by three factors: lack of water during the bunch formation stage, poor fertilization (lack of Potassium), or leaving too many suckers on the stool (overcrowding).
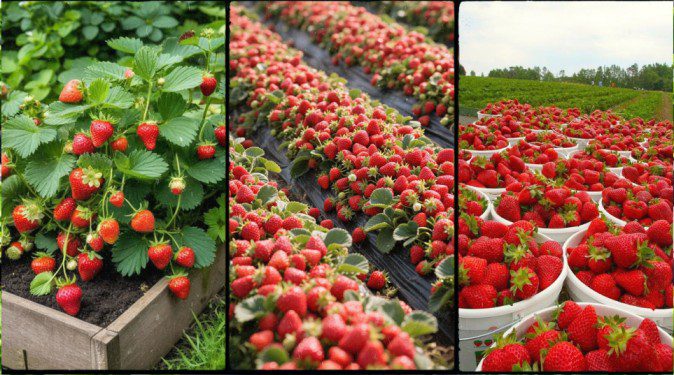
Yes, strawberry farming remains one of the most lucrative agribusinesses in Kenya for 2026. With high demand in Nairobi, Nakuru, and Mombasa for fresh fruit, yoghurt processing, and baking, farmers in suitable zones like Kiambu, Naivasha, and Uasin Gishu are seeing returns of up to KES 100,000 per month from just an eighth of an acre when managed correctly.
Introduction to the Red Gold of Kenyan Agriculture
Strawberry farming in Kenya has evolved from a backyard hobby into a serious commercial enterprise. As we enter the 2026 farming season, the market appetite for strawberries has never been higher. Urbanization and a growing middle class with a taste for healthy smoothies, desserts, and fresh salads have driven demand through the roof.
For a beginner farmer, the strawberry offers a unique advantage. It is a high-value crop that requires a small land size but delivers continuous cash flow. Unlike maize or wheat which take months to harvest once, strawberries can be harvested weekly for up to three years.
However, this is not a plant and forget crop. It requires technical precision, discipline, and a clear understanding of the market. This guide draws on fifteen years of agronomy experience to walk you through every step, ensuring you avoid the common pitfalls that bankrupt new farmers.
Which areas in Kenya are best for growing strawberries? Strawberries are temperate crops that have adapted well to tropical high-altitude areas. They thrive in cooler environments. If you are in a very hot coastal region like Mombasa, this crop will struggle without expensive climate-controlled greenhouses.
The ideal temperatures range between 15 degrees Celsius and 30 degrees Celsius. Temperatures above 30 degrees inhibit flower formation and result in small, sour berries.
Altitude plays a significant role. The crop performs exceptionally well in areas ranging from 1,500 to 2,200 meters above sea level. This makes counties like Kiambu, Nyeri, Meru, Uasin Gishu, Trans Nzoia, Nakuru (specifically Bahati and Molo), and parts of Machakos ideal hubs.
Rainfall is less of a concern if you have a reliable irrigation system. In fact, excessive rain can be detrimental as it encourages fungal diseases like botrytis. A constant supply of water is more important than heavy seasonal rain.
Soil requirements are strict. Strawberries need well-drained, sandy-loam soil rich in organic matter. The pH level is critical. The soil must be slightly acidic, between pH 5.5 and 6.5. If your soil is too alkaline, the plants will suffer from stunted growth and yellowing leaves.
Tip: Always conduct a soil test before buying seedlings. Adjusting pH with agricultural lime or gypsum takes time, so start this process at least two months before planting.
Agronomist testing soil pH for strawberry farming in Kiambu Kenya.
Choosing the Right Strawberry Variety
What are the best strawberry varieties to grow in Kenya? Choosing the right seed or split variety determines 50 percent of your success. In 2026, the market favors large, sweet, and firm berries that can withstand transportation to markets in Nairobi or export channels.
This is the undisputed king of Kenyan strawberries. It is a vigorous grower that produces large, firm fruits with an excellent dessert quality. It is hardy and resists many local pests. For beginners, Chandler is the safest and most profitable bet.
Pajaro produces very attractive, uniform, and symmetrical fruits. It is highly favored by supermarkets and high-end greengrocers. The skin is firm, giving it a longer shelf life than most other varieties.
This is a day-neutral variety, meaning it is less sensitive to the length of daylight and produces fruit continuously throughout the year. It is excellent for off-season production when prices are highest.
Douglas is known for its high yield per plant. However, the fruit is slightly softer than Chandler, making it better suited for the local jam and juice processing market rather than long-distance fresh sales.
Warning:Avoid buying seedlings from roadside sellers with unknown history. Always source splits or tissue culture seedlings from certified nurseries or reputable farmers who can verify the variety.
Land Preparation and Planting
How do you prepare land for planting strawberries? Land preparation must be thorough. Strawberries have a shallow root system, so the top 30cm of soil must be loose, aerated, and rich in nutrients.
Start by ploughing the land deep to break any hard pans. Harrow the soil to a fine tilth. Incorporate well-decomposed manure during the second ploughing. You will need roughly 10 to 15 tons of manure per acre.
You must plant strawberries on raised beds. This is non-negotiable. Raised beds improve drainage, increase root aeration, and make harvesting easier. Beds should be 1 meter wide and raised 20 to 30cm high. Leave a walking path of 40cm to 50cm between the beds.
Drip irrigation is the only recommended watering method. Overhead sprinklers wet the leaves and flowers, which leads to fungal diseases and flower abortion. Lay two lines of drip tape on each 1-meter bed.
Spacing depends on the variety, but the standard for Kenya is 30cm by 30cm. On a 1-meter bed with two drip lines, you will plant three rows in a triangular pattern to maximize space.
Holes should be deep enough to accommodate the roots without bending them. Do not bury the crown (the center part where leaves sprout). Burying the crown causes rotting, while planting too shallow dries out the roots.
Farmers planting strawberry seedlings on raised beds in Kenya
The Importance of Mulching
You cannot grow commercial strawberries without mulching. Mulching involves covering the soil around the plants with dry grass, wheat straw, or black plastic sheeting.
Mulching serves three critical purposes. First, it keeps the fruit clean; if a berry touches the soil, it will rot or become dirty, making it unsellable. Second, it suppresses weeds. Strawberries are poor competitors against weeds. Third, it retains soil moisture, reducing your water bill.
In Kenya, black plastic mulch is becoming popular because it also warms the soil, encouraging faster growth. However, organic dry grass mulch is cheaper and adds organic matter to the soil as it decomposes.
Crop Management and Pruning
How do you maintain a strawberry farm for maximum yield? Once planted, the work begins. The first two months are vegetative. You want the plant to establish a strong root system.
For the first 4 to 6 weeks, remove any flowers that appear. This sounds counter-intuitive, but if you let the young plant fruit too early, it will stunt. You need a big, leafy plant to support a heavy harvest later.
Strawberries send out runners or stolons to create new baby plants. Unless you are propagating seedlings for sale, cut these runners off immediately. They suck energy away from fruit production.
Weeding must be done by hand. Do not use herbicides on strawberries as they are very sensitive to chemicals. If you have mulched well, weeds should be minimal.
Strawberries are thirsty plants. In the dry season, water them daily in the late afternoon or early morning. The soil should remain moist but not waterlogged. Inconsistent watering leads to cracked fruit.
Pest and Disease Control
What are the common strawberry pests in Kenya?
Red Spider Mites
These are the biggest enemy. They are tiny red pests that suck sap from the leaves, causing them to turn yellow and silvery. They thrive in dusty, hot conditions. Control them by keeping the field moist as mites hate humidity, and use specific miticides like Dynamec or organic neem oil.
Thrips
These insects attack the flowers, causing the fruit to be deformed and brown. Use blue sticky traps to monitor populations and spray Spinosad-based insecticides in the evening when bees are not active.
Botrytis (Grey Mold)
This is a fungal disease that covers the berries in a grey, fuzzy mold. It occurs during wet, cold weather. Improve air circulation by proper spacing and remove rotting fruit immediately. Use fungicides like Ridomil during the rainy season, observing Pre-Harvest Intervals strictly.
Slugs and Snails
These eat holes in the ripe fruit. Control them using physical traps or scatter snail bait pellets around the perimeter of the field.
Warning: Strawberries are eaten raw and often unpeeled. You must be extremely careful with chemical use. Adhere to PHI (Pre-Harvest Interval) dates. If a chemical says 7 days PHI, do not harvest until 7 days after spraying.
Farmer inspecting strawberry crop for red spider mites and pests.
Harvesting and Post-Harvest Handling
Harvesting is labor-intensive. In peak season, you may need to harvest every two days.
The best time to harvest is early morning, as soon as the dew has dried but before the sun gets hot. Heat softens the berries.
Pick the fruit with the green calyx (the leafy cap) attached. Pinch the stem about 1cm above the fruit. Do not pull the berry itself.
Grading happens in the field. Grade A fruits are large, uniform, and red all over; these are sold to supermarkets and high-end hotels. Grade B fruits are smaller but good quality and are sold in local markets. Grade C fruits are overripe or slightly misshapen and are sold for juice or jam making.
Place the fruits directly into the punnets (plastic containers) you will sell them in. Excessive handling bruises the fruit. A standard punnet in Kenya weighs 250 grams.
Harvesting fresh strawberries in Kenya.
Market Analysis and Sales Channels
Where can I sell strawberries in Kenya? The market is vast if you are proactive. Do not wait for brokers to come to your farm; they will offer rock-bottom prices.
Supermarkets like Naivas, Carrefour, and Quickmart require consistency and high quality. You will need a supply contract. They pay well but often on credit terms ranging from 30 to 60 days.
Cake houses and bakeries are a hidden gem. Bakeries use strawberries daily for cake decoration. Visit local bakeries in your nearest town and offer a direct supply.
If your farm is near a major highway like the Nairobi-Nakuru highway, direct sales to motorists offer the highest profit margin as you cut out all middlemen.
If you have a surplus or Grade C fruit, make strawberry jam or yoghurt topping. A jar of homemade jam sells for KES 300 to 500 and has a long shelf life.
How much does it cost to start strawberry farming in Kenya? Let us analyze the costs for an eighth of an acre, which is a common starting point for beginners.
Land Preparation including Labour and Manure: KES 10,000
Drip Irrigation Kit for 1/8th acre: KES 15,000
Seedlings/Splits (3,000 plants @ KES 15): KES 45,000
Mulching Material (Black plastic or organic): KES 5,000
Fertilizers and Chemicals (Initial stock): KES 10,000
Miscellaneous (Transport/Tools): KES 5,000
Total Initial Capital: Approximately KES 90,000.
A well-maintained single plant can produce 500 grams to 1kg of fruit per year. Let us be conservative and assume 500 grams (0.5kg) per plant per year.
Total Plants: 3,000
Total Yield: 1,500 kg per year.
The price fluctuates between KES 200 and KES 400 per kg depending on the season. Let us use a conservative average of KES 300 per kg.
Gross Revenue: 1,500 kg x KES 300 = KES 450,000 per year.
Net Profit Calculation:
Gross Revenue (450,000) minus Expenses (90,000 setup plus 60,000 ongoing maintenance) equals KES 300,000.
This translates to roughly KES 25,000 per month net profit from just an eighth of an acre. If you scale up to one acre, the economies of scale improve, and profits can exceed KES 150,000 per month.
Tip: The first year involves high capital setup. The second and third years have much lower costs since the plants and drip lines are already in place, significantly increasing your profit margins.
Future Trends for 2026 and Beyond
Farming is changing. In 2026, we are seeing a shift toward Vertical Farming for strawberries. This involves stacking strawberries in hydroponic towers or PVC pipes.
Vertical farming allows you to plant 10,000 plants on an eighth of an acre instead of 3,000. While the setup cost is higher because it requires a greenhouse and hydroponic system, the returns are triple that of open-field farming. This is the future for urban farmers in Nairobi and Kiambu where land is expensive.
Vertical strawberry farming in a greenhouse in Kenya.
Recap Key Takeaways for Success
Location is key so ensure you are in a cool area with access to water.
Variety matters so start with Chandler for reliability.
Do not skip the drip because irrigation is the lifeline of the crop.
Mulch is mandatory as it keeps fruit clean and marketable.
Market first and identify where you will sell before you plant.
Frequently Asked Questions
How long does a strawberry plant last?
A strawberry plant can produce fruit for 3 to 4 years. However, commercial farmers usually replace plants every 2 years because yields tend to drop significantly after the second year.
Can strawberries grow in hot areas like Mombasa or Kisumu?
It is very difficult to grow them in open fields in these areas due to the heat. However, it is possible if you use a greenhouse with temperature control and misting systems, but the cost of production will be higher.
How many strawberry plants fit in an acre?
In an open field using proper spacing (30cm x 30cm) and paths, you can fit between 25,000 and 30,000 plants per acre.
Where can I buy certified strawberry seedlings in Kenya?
You should source seedlings from KALRO (Kenya Agricultural and Livestock Research Organization) or certified horticultural nurseries in Kiambu and Naivasha. Avoid roadside sellers to prevent bringing diseases to your farm.
How do I sweeten my strawberries naturally?
Strawberries need Potassium to become sweet. Ensure you use a fertilizer rich in Potassium (like NPK 17:17:17 or Murate of Potash) during the flowering and fruiting stage. Also, ensure they get enough sunlight.
Strawberry farming in Kenya will keep rewarding serious farmers in 2026 and beyond, but only those who treat it as a business, not a casual side project. By choosing the right cool location, starting with certified Chandler or other proven varieties, investing in drip irrigation and proper mulching, and securing reliable buyers before planting, you turn a small piece of land into a steady monthly income stream. With rising demand from supermarkets, bakeries and processors, plus new vertical and hydroponic systems boosting yields, now is the best time to refine your skills, start small, then scale your strawberry enterprise confidently.
The 2026 Hass avocadoseason in Kenya is projected to be a landmark year, characterized by high value but tempered by significant climatic and regulatory challenges. Following the strategic closure of sea exports in October 2025-a government measure strictly enforced to prevent the export of immature fruit-the sea export window is officially scheduled to reopen in mid-March 2026. Air exports remain open for specific varieties like Hass and Fuerte, provided strict traceability measures are met, but the bulk of the volume will move via sea freight starting Q2.
Financially, the outlook is robust. Export prices for the 2026 season are trending upwards, driven by lower yields in competing markets like Peru and Mexico due to global weather anomalies. Kenyan farmers can expect farm-gate prices for export-grade produce to hover around KES 150 to KES 180 per kilogram for premium sizes (12-18). Local wholesale prices fluctuate between KES 30 and KES 60 per kilogram, while retail street prices range from KES 10 to KES 20 per fruit.
However, the climatic forecast for early 2026 predicts a weak La Niña event, signaling hotter and drier conditions than the historical average. This poses a threat to fruit size. Farmers without functional irrigation systems will struggle to achieve the “Size 12-16” fruits that command the highest premiums in the European and Chinese markets. Furthermore, the Horticulture Crops Directorate (HCD) has ramped up enforcement on traceability, meaning the “briefcase exporter” era is effectively over. Only those with registered farms and clear audit trails will succeed.
This master-level guide is designed for Kenyan farmers, agribusiness investors, and logistical stakeholders looking to enter or expand their footprint in the lucrative export market for the 2026 season. It covers regulatory compliance, advanced agronomy, financial modeling, and market trends specific to the current agricultural landscape.
UNDERSTANDING EXPORT REGULATIONS AND COMPLIANCE (HCD & KEPHIS)
hass avocado farmers
Before planting a single seed or signing a contract, you must navigate the regulatory landscape. The days of informal exporting are gone. The Horticultural Crops Directorate (HCD) and the Kenya Plant Health Inspectorate Service (KEPHIS) have tightened rules for 2026 to protect Kenya’s global reputation. The “Kenya Brand” was threatened in previous years by the interception of pests at European ports; consequently, the government has adopted a zero-tolerance policy.
Mandatory Registration and Licensing
Export licenses are not optional. You must register as an exporter with the HCD. This involves a vetting process where you must demonstrate access to a licensed packhouse. If you are a farmer, you must register your farm with your local county agricultural office and ensure your exporter lists you as a sourced farm. This linkage is crucial for the “Single Window System,” a digital platform used to clear cargo at the port of Mombasa or JKIA.
Phytosanitary Certification
Every consignment leaving Kenya must have a phytosanitary certificate issued by KEPHIS. This document certifies that your avocados are free from quarantine pests, specifically the False Codling Moth (FCM) and fruit flies (Bactrocera dorsalis). To get this certificate, KEPHIS inspectors must visit the packhouse during grading. If they find live pests, the consignment is rejected. In 2026, KEPHIS has introduced a “Farm-to-Port” tracking system where repeated interceptions from a specific farm will lead to that farm being blacklisted from the export grid for two seasons.
The KS 1758 Standard
The Kenya Standard 1758 (Horticulture Code of Practice) is now the baseline for compliance. While previously voluntary for some smallholders, major buyers in the EU (Netherlands, France, Germany) and the emerging Chinese market now demand full KS 1758 compliance. This covers food safety, worker hygiene, environmental conservation, and social accountability. Implementation of this standard requires documenting everything: from the type of fertilizer used to the toilet facilities available for harvesters.
Traceability: The 2026 Imperative
Traceability is the buzzword for 2026. European buyers now require a clear paper trail from the supermarket shelf back to the specific tree block in Kenya. This means you must maintain detailed records of your spray programs (dates, chemicals used, dosage), fertilizer applications, and harvesting dates.
Failure to produce these records during a random audit will result in your fruit being rejected at the port of entry. The digital integration of these records is becoming standard, with many exporters providing mobile apps for their contracted farmers to log data.
SELECTING THE RIGHT ECOLOGICAL ZONES AND VARIETIES
Success begins with location. You cannot force an avocado tree to be commercially viable in an incompatible zone.
The Dominance of Hass
Hass is the undisputed king of export, accounting for over 75% of Kenya’s avocado exports. It is preferred for its long shelf life, high oil content, and the fact that its skin turns purplish-black when ripe, masking minor handling blemishes that would ruin a green-skinned variety.
The Role of Fuerte and Other Varieties
Fuerte is the second most common variety but is largely consumed locally or used for processing into crude avocado oil. Its thin green skin damages easily during shipping, making it risky for long sea voyages to Europe. However, Fuerte has a niche in the Middle East and for early-season air freight. For the 2026 market, planting Hass on Fuerte or indigenous rootstocks is a common practice to boost drought resilience and root rot resistance. Other varieties like Pinkerton are gaining small traction for specific windows, but Hass remains the safe investment.
Ecological Suitability and Altitude
Hass avocados thrive in altitudes between 1,000m and 2,200m above sea level. Ideal counties include Murang’a, Kiambu, Nyeri, Meru, Kisii, Kericho, and parts of Uasin Gishu and Trans-Nzoia. The trees require well-drained soil; waterlogging is the number one killer of avocado trees due to Phytophthora root rot. If your land has heavy black cotton soil or clay that holds water, you must plant on raised ridges/mounds or choose a different crop entirely.
Temperature Sensitivity
Temperature plays a vital role in fruit set. The tree needs cool temperatures (10-20°C) to induce flowering but warmer temperatures (20-28°C) for fruit development. Frost is fatal to flowers and young fruit. The predicted hotter conditions in early 2026 mean that farmers in lower altitudes (below 1,000m) may face higher rates of flower abortion and sunburn on the fruit. Canopy management to shade the fruit will be your primary defense against the harsh 2026 sun.
The success of your orchard depends entirely on the quality of your seedlings. You must buy grafted seedlings from KEPHIS-certified nurseries. “Roadside” seedlings often carry root rot diseases or are not true-to-type, meaning they might never produce export-quality fruit. In 2026, a certified seedling costs between KES 250 and KES 450 depending on its age and the nursery’s reputation.
Verified Sources for 2026
To avoid fraud, purchase from these verified entities:
1. KALRO (Kenya Agricultural and Livestock Research Organization)
Availability: Horticulture Research Institute (Kandara/Thika) and Tigoni Centre.
Best for: 100% genetic purity and disease-free rootstocks. KALRO is the gold standard for foundation material.
Contact: Visit their headquarters in Loresho or the specific institutes directly.
2. Farmers Trend Limited
Price: Approx. KES 250 – 300 per seedling.
Service: Offers online ordering and delivery across Kenya. They are popular for their “virtual agrovet” platform and verified agronomy content.
Website/Contact: Search “Farmers Trend Kenya” for their digital shop.
3. Royal Seedlings (Murang’a)
Price: KES 300 – 450.
Service: Specializes in large-scale export-quality seedlings. They often have seedlings ready for immediate planting during the rainy season.
Focus: High sanitary standards to prevent Phytophthora transmission.
4. Richfarm Kenya
Price: KES 150 – 350.
Service: Provides agronomy support and “start-up packages” that include soil testing and hole preparation guidance.
Contact: Search “Richfarm Kenya” for direct sales lines.
5. Oxfarm Organic Ltd
Service: Sells comprehensive packages that include seedlings, organic fertilizer, and planting labor.
Best for: Absentee farmers who need a “done-for-you” management service.
Evaluating Seedling Quality
When buying, inspect the graft union. It should be clean, fully healed, and V-shaped. Avoid seedlings where the scion (top part) is much thicker than the rootstock, or where the leaves show yellowing (chlorosis), which indicates root issues. Ensure the seedlings have been “hardened off”-exposed to sunlight gradually-so they don’t die of shock when planted in the field.
LAND PREPARATION AND PLANTING PROTOCOLS
Proper land preparation is a one-time investment that dictates the lifespan of your orchard.
Spacing and Density
The standard spacing for Hass avocados in Kenya is 5m by 5m (approx. 150 trees per acre). This allows for machinery access and sufficient light penetration. High-density planting (3m by 3m or 4m by 3m) is gaining popularity to maximize yields in the first 7 years, but it requires rigorous pruning (hedging) to prevent the orchard from becoming a dark jungle. For most farmers, 5m x 5m is the sustainable choice.
Planting Hole Specifications
Dig planting holes that are 2ft by 2ft by 2ft (60cm x 60cm x 60cm). Separate the topsoil (darker, nutrient-rich) from the subsoil (red/brown, clay-heavy). Mix the topsoil with two debes (approx. 40kg) of well-decomposed manure (cattle or goat) and 250g of DAP planting fertilizer. DAP provides the phosphorus needed for strong root development.
Soil Correction
Before filling the hole, review your soil test results. If your soil is acidic (pH below 5.5), which is common in tea-growing zones like Murang’a and Kericho, add agricultural lime during this mixing stage. Avocados struggle to uptake nutrients in acidic soil.
Planting Technique
Fill the hole with the manure-soil mixture and water it heavily to allow it to settle for a week before planting. This prevents the seedling from sinking too deep later. When planting, carefully remove the plastic bag without breaking the soil ball housing the roots. Place the seedling in the center.
Crucial Rule: Ensure the graft union remains at least 3 inches above the soil line. Burying the graft union will cause the scion to rot, killing your expensive seedling within months. Create a small basin around the tree to hold water, but ensure the soil slopes slightly away from the trunk to prevent collar rot.
FERTILIZER AND WATER MANAGEMENT (2026 CLIMATE ADAPTATION)
The 2026 weather forecast predicts a drier-than-average start to the year. Water stress during flowering (August-October) and fruit set (January-March) causes massive fruit drop, known as “June Drop” or “December Drop.”
Irrigation Requirements
You must invest in irrigation to be a serious exporter. Reliance on rain-fed agriculture is a gamble that usually results in small fruit sizes (rejected by exporters). A simple drip irrigation line (16mm pipe with integral drippers) for each row is the most efficient method.
Volume:Young trees (Year 1-2): 10-20 liters per week.Mature trees (Year 4+): 50-80 liters per week during dry spells.
Consistency is key. Erratic watering (flooding then drying out) causes fruit cracking and stress-induced drop.
Nutrient Management Program
Fertilizer application should follow a strict schedule based on the tree’s phenological cycle.
1. Vegetative Stage (Year 1): Focus on Nitrogen for growth. Apply CAN (Calcium Ammonium Nitrate) three times a year (one handful, approx 150g per tree) during the rains.
2. Pre-Flowering (Mature Trees): Apply NPK rich in Phosphorous to boost root and flower formation.
3. Fruit Setting & Enlargement (The Critical Phase): Apply NPK rich in Potassium (e.g., NPK 15:9:20 or Yara Mila Winner). Potassium is the “fruit filler”-it increases the weight and size of the avocado.
4. Organic Matter: Apply 2-4 debes of well-rotted manure per tree annually at the onset of the long rains. This improves soil structure and moisture retention.
Micronutrients: The Quality Secret
Zinc and Boron are the difference between Class 1 and Class 2 fruit.Boron: Deficiency causes “corking” inside the fruit and distorted shapes.Zinc: Deficiency causes small leaves and poor fruit finish.
Apply foliar sprays containing Zinc and Boron just before flowering (bud burst) and again when fruits are the size of a marble. Products like Solubor or specialized avocado foliars are available in local agrovets.
Drip irrigation system watering a mulched avocado tree during dry season.
PEST AND DISEASE CONTROL (THE LYNFIELD TRAP REQUIREMENT)
Pest management is the biggest hurdle for Kenyan exporters. The European Union and new markets like South Korea have zero tolerance for quarantine pests.
False Codling Moth (FCM)
FCM is the primary threat. If a single moth larva is found in your shipment at a European port, the entire container is destroyed at your cost, and Kenya risks a total ban.
The Solution: Pheromone Traps. HCD now mandates the use of Lynfield traps or similar delta traps. You should install at least 2-4 traps per acre. These traps use a female pheromone to attract and kill male moths, breaking the breeding cycle. You must monitor these traps weekly and record the “kill count” for your audit.
Fruit Flies
Fruit flies sting the fruit, leaving invisible eggs that hatch into maggots during shipping.
Control: Use protein bait sprays (like bacterial-based baits or Torula yeast). Spot-spray a small patch of foliage on the trunk or lower branches-never spray the fruit itself. The flies are attracted to the protein, eat the poison, and die.
Fungal Diseases: Anthracnose and Cercospora
These fungi cause black spots on the fruit skin, rendering them “ugly” and unsellable, even if the inside is perfect.
Control: A preventative copper-based fungicide spray program is required. Start spraying at the onset of rains and repeat monthly.
Critical Warning: Observe “Pre-Harvest Intervals” (PHI). You must stop spraying chemicals at least 14-21 days before harvest. Modern testing equipment in Europe detects chemical residue up to parts per billion. If you exceed the MRL (Maximum Residue Limit), your fruit is rejected.
Thrips
Thrips damage the fruit skin when it is very young, causing “scabs” or alligator skin as the fruit expands.
Control: Monitor flowers and young fruit. Use IPM (Integrated Pest Management) compatible pesticides like Spinosad or Neem-based products early in the season.
HARVESTING AND POST-HARVEST HANDLING
Harvesting is not about picking everything at once. It is a selective, scientific process.
Determining Maturity (Dry Matter)
You cannot judge maturity by skin color alone for Hass. The standard metric is Dry Matter Content. For export, Hass avocados must have a dry matter content of at least 21-23%. This ensures they ripen evenly after 20-30 days of sea shipping. If harvested with low dry matter (immature), the fruit will shrivel and never ripen, tasting rubbery. Exporters will often visit your farm to sample fruits and test them in a microwave or dehydrator before giving the green light to harvest.
Harvesting Techniques
Tools: Never pull the fruit. Pulling tears the skin at the stalk, creating an entry point for stem-end rot. Use specialized clipping shears (snips).The Cut: Cut the stalk, leaving about 0.5cm (the “button”) attached to the fruit. If the stalk is too long, it will puncture other fruits in the crate. If it is removed completely, the fruit will rot.Hygiene: Fruits must never touch the bare ground. Soil contains fungal spores. Harvested fruits should be placed gently into canvas picking bags and then transferred to clean, rigid plastic crates.
Handling and Shade
Do not use woven sacks (gunia). They scratch the fruit skin, leading to “rub marks” that darken and look like bruises later. Keep the harvested crates in the shade immediately. Leaving crates in the direct sun for even one hour can raise the internal pulp temperature, accelerating the ripening process and shortening the shelf life by weeks. The “Cool Chain” starts on the farm.
MARKETING AND EXPORT LOGISTICS
As a beginner, you will likely not export directly yourself in your first year. The logistics of booking air freight or sea containers, clearing customs, and handling international payments are complex and capital-intensive.
The Contract Farming Model
The smartest route is to contract with an established export company. Top registered exporters in Kenya include Kakuzi, Keitt Exporters, Mofarm, and various members of the Avocado Society of Kenya.
How it works:
1. Sign a contract early in the season.
2. The exporter provides agronomy advice and sometimes advances chemicals.
3. During harvest, they bring their own grading teams or supervise your team.
4. Payment is usually calculated per kilogram based on the graded fruit (Export Grade vs. Oil Grade).
The Cooperative Model
If you are a smallholder farmer (less than 5 acres), you lack the volume to fill a 40ft container (which holds ~20 tons). Join a local avocado cooperative. Cooperatives aggregate volume from many small farmers to negotiate better prices with big exporters. They also help in sharing the cost of expensive certifications like GlobalGAP and GRASP, which are requirements for selling to premium European supermarkets like Tesco or Lidl.
Direct Export (Advanced)
If you have significant volume (over 50 acres) or a consortium of farmers, you can register as an exporter. This requires:HCD Export License.Packhouse agreement (you can lease space in an EPZ packhouse).Freight forwarding partner (e.g., Kuehne+Nagel, Bolloré).Marketing agent in Europe/Asia to receive and sell the fruit.
Market Destinations in 2026
Europe (EU): The biggest market. High volume, strict quality (GlobalGAP required).China: The growing giant. Requires specific orchard registration and strict fumigation protocols. Prices are premium but rejection rates are higher for skin blemishes.Middle East (Dubai/Qatar): Good for air freight and lower grade fruit (Class 2).India & Malaysia: New protocols opened in 2024/2025, offering new opportunities for diversification.
FINANCIAL PROJECTIONS AND ROI ANALYSIS FOR 2026
Farming is a business. Here is what the numbers look like for a well-managed operation in 2026.
Revenue Potential (Per Acre)
Tree Count: 150 trees (5m x 5m spacing).Yield (Mature, 5+ years): Conservative estimate of 400-500 fruits per tree.Tonnage: Approx. 8-10 tons per acre.Price: At a conservative average of KES 100 per kg (farm gate for export quality), revenue is KES 800,000 to KES 1,000,000 per acre per year.Note: First harvest (Year 3) will be small (approx. 1-2 tons), ramping up significantly in Year 4 and 5.
Cost of Production (Annual)
Fertilizer & Manure: ~KES 60,000 per acre.Crop Protection (Sprays): ~KES 50,000 per acre.Labor (Pruning, weeding, harvesting): ~KES 40,000 per acre.Water/Irrigation: ~KES 30,000 per acre (pumping costs).Total Operational Cost: ~KES 180,000 – 200,000 per acre.
Profit Margin
Gross Profit: KES 800,000 – KES 200,000 = KES 600,000 per acre.
This represents a very high ROI compared to maize or beans, but it requires patience (3-4 years of negative cash flow before break-even).
CHALLENGES AND RISK MITIGATION
1. Theft: As avocado prices rise, theft has become a major issue in Central Kenya.Mitigation: Fence your orchard, use sensor lights, or hire guards during harvest season (Feb-Aug).
2. Climate Change: Unpredictable rains.Mitigation: Invest in water harvesting (pans/dams) and mulch heavily.
3. Market Saturation: Everyone is planting avocados.Mitigation: Focus on Quality. There is always a shortage of Size 12-16 Premium fruit. There is a glut of small, scarred fruit. Be in the top 10% of quality producers.
✔ EXPERT TIP:
Always test your soil before planting. A KES 2,000 soil test from a reputable lab (like CropNuts or KALRO) can save you KES 200,000 in wasted fertilizer. If your soil pH is too acidic, your trees will never absorb the expensive fertilizer you buy, leading to stunted growth.
⚠ CRITICAL WARNING:
Beware of “brokers” who offer cash prices slightly above the market rate but do not care about traceability. Selling to them might seem profitable today, but it keeps you out of the formal system. If you sell to a broker, you cannot prove your harvest history, and you will fail future audits for certification. Stick to registered agents and build a long-term relationship.
The Bottom Line for 2026
The Kenyan avocado sector is shifting from a wild-west environment to a highly regulated, professionalized industry. Success in 2026 is no longer about simply planting trees; it is about rigorous compliance, climate-smart management, and high-quality production.
Audit Your Mindset: If you are looking for a quick, “no-questions-asked” cash crop, look elsewhere. The era of the briefcase exporter is dead. Every avocado in your orchard must be traceable, and every practice must be documented.
Invest in Quality, Not Just Quantity: A high-yield orchard of small, blemished fruit is a losing investment. Your goal is the premium export market (Size 12-16). This requires precise irrigation, proper micronutrient application, and strict adherence to the KS 1758 code of practice.
Adapt or Fail: The 2026 weather forecast is harsh. If you do not have a functional water harvesting and irrigation strategy, do not expect to hit the yields required for a profitable ROI.
Build Your Network: Whether it is a cooperative or a reputable export firm, align yourself with professional partners who value long-term traceability. Stop chasing the highest immediate bid from roadside brokers; they are a dead end for your farm’s future.
Profitability in this business is built on a simple formula: Compliant Inputs + Expert Management = Premium Export Grade. If you follow the protocols outlined in this guide, you will be well-positioned to capitalize on the global demand for Kenyan Hass avocados throughout the 2026 season and beyond.
FAQ: COMMON QUESTIONS FROM KENYAN FARMERS
How much money can I make from one acre of Hass avocados in 2026?
A mature, well-managed acre (150 trees) can produce 8-10 tons of fruit per year. At a conservative export price of KES 100/kg (farm gate), this is KES 800,000 to KES 1,000,000 in gross revenue.
How long does it take for a Hass avocado tree to fruit?
Grafted Hass seedlings typically start bearing small crops in year 2 or 3. Commercial quantities (profitable yields) are usually reached by year 4 or 5.
Can I export avocados if I only have 50 trees?
Yes, but not directly. You will need to sell to an aggregator or exporter agent. They will combine your harvest with others to fill a container.
Why do my avocado flowers fall off without forming fruit?
This is usually due to water stress (lack of irrigation) or lack of pollination. Ensure you are irrigating during flowering and avoid spraying insecticides in the morning when bees are active.
What is the “closed season” I hear about?
The Kenyan government (HCD) closes the export market for sea shipments from roughly October to March. This is to prevent farmers from harvesting immature fruit to chase high prices, which ruins Kenya’s reputation.
Do I need a license to grow avocados?
You do not need a license to grow them for yourself, but you need to register with your local county agriculture office and HCD if you intend to sell for export.
What is the difference between Fuerte and Hass prices?
Hass almost always fetches a higher price (often double) because of the global export demand. Fuerte is sold cheaply in local markets or to oil processors because it ripens too fast and has thin skin.
Can I intercrop beans or maize with avocados?
In the first 2-3 years, yes. Legumes like beans are good as they fix nitrogen. Avoid heavy feeders like maize too close to the tree (keep a 1-meter radius clear).
Greenhouse farming in Kenya has evolved from a luxury venture for the wealthy into a critical survival strategy for the smart beginner farmer in 2026. With the Kenya Meteorological Department forecasting a neutral climate phase after the La Niña of 2025, this year presents a unique Goldilocks window for farmers who can control their environment. This guide is not just theory; it is a battle-tested roadmap designed to help you generate over KES 500,000 in net profit within two seasons using a standard 8m by 15m greenhouse.
The secret to success in 2026 lies in precision. Gone are the days of guessing. Today, you must know your seed varieties by name, your fertilizer by composition, and your market prices by the shilling. This guide aggregates the latest data from KALRO, real-time market trends from Wakulima Market and Kongowea, and construction costs current as of January 2026. Whether you are in Kiambu, Uasin Gishu, or Kajiado, these principles apply universally but require local adaptation.
We will cover everything from the exact cost of nails and polythene to the specific phone numbers of legitimate seed merchants. You will learn why 60% of beginners fail in the first year usually due to soil mismanagement or cheap metallic structures and how you can join the top 10% who treat farming as a high-precision science. We will explore the nuances of soil chemistry, the engineering behind structural integrity, and the psychological warfare involved in negotiating with market brokers.
A well-constructed wooden greenhouse in Kenya with a farmer inspecting the irrigation system during sunrise. A standard 8m x 15m wooden greenhouse is the most cost-effective entry point for beginners in 2026.
A well-constructed wooden greenhouse in Kenya with a farmer inspecting the irrigation system during sunrise.
Phase 1: The Financial Reality of 2026
Understanding the Startup Capital and ROI
Before you buy a single nail, you must understand the financial landscape of 2026. Inflation has adjusted the cost of building materials, but the price of produce has also risen, balancing the scales for the astute investor. For a beginner, the target is a Low Cost, High Output model. We recommend starting with a wooden greenhouse if your budget is tight, as metallic structures have seen a 15% price hike due to global steel fluctuations affecting the Kenyan market.
A standard 8m by 15m wooden greenhouse will cost you between KES 150,000 and KES 180,000 to construct fully. This includes the cost of treated timber, UV-treated polythene (200 microns), insect netting, and labor. Do not cut corners on the timber treatment; termites are the silent killers of wooden greenhouses in Kenya. If you opt for a metallic structure of the same size, budget between KES 230,000 and KES 300,000. While metallic structures last longer (10+ years vs. 3-5 years for wood), the initial capital outlay can cripple a beginner cash flow.
Your return on investment (ROI) depends entirely on your crop choice and timing. For example, a tomato crop in an 8m x 15m greenhouse can host roughly 500 indeterminate plants. If managed well, each plant can yield 15kg over a 6-9 month harvest period. That is 7,500kg total. At a conservative average market price of KES 50 per kg, your gross revenue is KES 375,000 per season. With two seasons in a year or overlapping crops, hitting the KES 500,000 profit mark is mathematically achievable, provided you minimize input wastage.
Critical Cost Breakdown for January 2026
You need to walk into your agrovet or hardware store knowing the prices. As of January 2026, a roll of high-quality UV-treated greenhouse polythene (yellow or clear, 200 microns) costs approximately KES 95 to KES 110 per square meter depending on the brand. You will need roughly 200-250 square meters for a standard tunnel. Insect netting, which is non-negotiable for blocking whiteflies and Tuta absoluta, costs about KES 150 per running meter.
Drip irrigationis your lifeline. A complete drip kit for an 8m x 15m plot, including the tank connection, filtration system, and driplines with 20cm or 30cm spacing, will cost between KES 20,000 and KES 30,000. Do not attempt to hand-water a greenhouse; it encourages fungal diseases like blight and powdery mildew. Automation is not a luxury; it is a hygiene standard.
Labor and miscellaneous inputs like sawdust for nursery preparation, twine for trellising, and initial fertilizers (DAP and manure) will add another KES 30,000 to your budget. Always reserve at least KES 50,000 as an emergency operating fund for the first three months. Crop pests do not wait for your next paycheck, and having liquidity to buy a specific fungicide on a Sunday morning can save your entire harvest.
Hidden Costs Nobody Tells You About
Beginners often calculate the wood and the plastic but forget the operational friction costs. In Kenya, you must account for transport logistics. Moving materials from the hardware store to your farm can cost KES 5,000 to KES 10,000 depending on the distance and road conditions. You must also budget for water pumping costs; if you are using an electric pump, your Kenya Power bill will increase. If you are using a petrol generator, fuel costs must be factored into your daily opex. Furthermore, casual labor for weeding or trellising is often needed during peak growth stages, costing KES 400 to KES 600 per day per person.
Essential items for budgeting a greenhouse farm in Kenya including polythene, drip lines, and currency. Accurate budgeting prevents stalled projects. Pictured are the core components of your initial investment.
Alt: Essential items for budgeting a greenhouse farm in Kenya including polythene, drip lines, and currency.
Essential items for budgeting a greenhouse farm in Kenya including polythene, drip lines, and currency.
PHASE 2: CHOOSING YOUR GOLDEN CROP
HIGH-VALUE CROPS FOR THE 2026 MARKET
The mistake most beginners make is growing what they like to eat, not what the market pays for. In 2026, the holy trinity of greenhouse profitability in Kenya remains Tomatoes, Capsicums (Colored), and Cucumbers. However, niche crops like herbs (Basil and Coriander) are gaining traction for peri-urban farmers near Nairobi and Mombasa who can supply high-end restaurants directly.
Tomatoes are the volume king. The demand in Nairobi alone is insatiable. You want to focus on Indeterminate varieties. Unlike the bush tomatoes you see in open fields, indeterminate varieties grow like vines, reaching up to 3 meters in height. They continue to flower and fruit for up to 9 months. The varieties to watch in 2026 include Anna F1 (famous for sweetness and hardiness), Tylka F1, and the robust Corazon F1. These hybrids are bred to resist local bacterial wilts and nematodes.
Colored Capsicums (Yellow and Red) are the margin kings. While green capsicums sell for KES 50-80 per kg, yellow and red ones can command KES 200-250 per kg in supermarkets and hotels. They require more patience as they take longer to color, but the payout is significantly higher. Varieties like Commandant F1 and Admiral F1 are excellent performers. If you are in a hotter region like Kisumu or Garissa, capsicums thrive in the heat inside a well-ventilated greenhouse.
THE BEST SEEDS FOR 2026 PRODUCTION
Selecting the right seed is 50% of the battle. Do not buy seeds from open sacks in the market. You need certified F1 Hybrid seeds. For 2026, verify that your seeds are packed recently.
For Tomatoes:
1. Anna F1 by Monsanto/Bayer: The veteran champion. Excellent shelf life and transportability.
2. Tylka F1: Superior resistance to Tomato Yellow Leaf Curl Virus (TYLCV), which is prevalent in lower altitudes.
3.Eva F1: Great for cooler highland areas like Limuru or Nyahururu.
For Capsicum:
1. Commandant F1 by Syngenta: Produces massive blocky fruits that the market loves.
2. Pasarella F1: An excellent red variety known for uniform coloring.
3. Ilanga F1: A reliable yellow variety that resists sunscald.
For Cucumber:
1. Supermarketer F1: The standard for field and greenhouse, very high yielding.
2. Diplomat F1: Parthenocarpic (does not need bees for pollination), making it perfect for sealed greenhouses where pollinators cannot enter.
High-yielding Anna F1 tomatoes and yellow Commandant F1 capsicum ready for harvest.
PHASE 3: CONSTRUCTION AND SITE PREPARATION
SITE SELECTION AND ORIENTATION
Your greenhouse must be oriented North-South. This is a non-negotiable rule for Kenya, which sits on the equator. A North-South orientation allows the sun to travel over the arch of the greenhouse from East to West, ensuring that plants on one side do not shade the plants on the other side. If you orient it East-West, the crops in the southern rows will be permanently shaded by the northern rows, leading to stunted growth and uneven ripening.
The site must be flat or gently sloping. If it is too steep, you will spend a fortune on leveling and terracing. Avoid low-lying areas that are prone to flooding; a waterlogged greenhouse is a disease factory. Ensure you have a reliable water source. A standard greenhouse consumes about 200-300 liters of water per day during peak heat. If you rely on Nairobi City Council water, have a backup tank of at least 2,000 liters.
STRUCTURAL INTEGRITY AND VENTILATION
Ventilation is the most overlooked aspect of greenhouse construction. In Kenya, overheating is a bigger problem than freezing. Your greenhouse must have side vents that can be rolled up and down. We recommend a roll-up height of at least 2 meters from the ground. This allows cool air to enter from the sides and push hot air out through the top vents (if you have a vented roof design).
The insect net must be 40-mesh or higher. This mesh size is small enough to block whiteflies and aphids but large enough to allow airflow. If you use a mesh that is too fine, you will choke the plants, leading to high humidity and fungal outbreaks. Ensure the plastic cover is pulled tight; loose plastic flaps in the wind, which weakens the structure and tears the material over time.
SOIL HEALTH AND STERILIZATION
This is the step where 60% of farmers fail. You cannot just build a greenhouse over existing grass and start planting. The soil inside a greenhouse is intensive real estate; it works 10 times harder than open field soil. You must test your soil. Send a sample to CropNuts (Crop Nutrition Laboratory Services) or KALRO. A basic soil analysis costs about KES 3,000 and will save you KES 50,000 in lost fertilizer.
You must sterilize the soil to kill soil-borne pests like nematodes and bacterial wilt. In 2026, chemical fumigants are becoming expensive and restricted. The best beginner method is Solarization.
1. Wet the soil inside the greenhouse thoroughly to conduct heat.
2. Cover the soil with a clear, thin polythene sheet (gauge 1000 or similar).
3. Burry the edges of the sheet to trap the heat.
4. Close the greenhouse completely for 3-4 weeks during a sunny month.
The internal temperature will rise to over 60 degrees Celsius, cooking the nematodes, weed seeds, and fungal spores. It is free, effective, and organic.
CRITICAL ERROR: Never skip soil sterilization. Bacterial wilt can live in the soil for years. If it infects your greenhouse, you will have to abandon tomato farming in that structure for at least 5 years.
Soil solarization process in a greenhouse using clear plastic sheets to kill pests and diseases.
PHASE 4: THE GROWING CYCLE AND MANAGEMENT
NURSERY MANAGEMENT
Do not plant seeds directly into the greenhouse soil. You must raise them in a nursery using seedling trays. Using trays ensures 100% germination rates and prevents root shock during transplanting. Use Coco Peat (coconut fiber) as your planting media instead of soil. It is sterile, holds water well, and is available at most agrovets for KES 600 per 5kg block.
Sow one seed per hole. Water gently every morning using a mist sprayer or a watering can with a fine rose. Your seedlings are ready to transplant when they have 4-6 true leaves, usually after 3-4 weeks. Hardening off is crucial: reduce watering and expose the seedlings to more sunlight for 3 days before moving them to the main greenhouse. This toughens the tissue and prepares them for the real world.
TRANSPLANTING AND SPACING
In your 8m x 15m greenhouse, you will create raised beds. These beds should be 1 meter wide and 15cm high, separated by 50cm walking paths. Raised beds improve drainage and root aeration.
Plant your tomatoes or capsicums in zigzag double rows on each bed.
Inter-row spacing: 60cm between the two lines on the bed.
Intra-row spacing: 30cm to 40cm between plants in the same line.
This spacing maximizes population while allowing airflow. Poor airflow leads to Botrytis (Grey Mold), a fungal disease that rots fruits.
TRELLISING AND PRUNING
Greenhouse tomatoes are vines. They cannot support their own weight. You must trellis them. Run a 16-gauge galvanized wire horizontally 2.5 meters above each bed. Tie a piece of UV-treated twine (costs KES 300 per roll) from the base of each plant to the overhead wire. As the plant grows, gently twist it around the twine in a clockwise direction.
1. Remove Suckers: Suckers are the small shoots that grow between the main stem and the leaf branch (the axil). Pinch them off with your fingers when they are small (less than 1 inch). If left to grow, they become new stems that steal energy from the main fruit production.
2. Remove Lower Leaves: As the plant grows taller, the lower leaves age and touch the ground. These are entry points for disease. Cut them off with sterilized scissors. Keep the bottom 30cm of the stem bare to improve airflow.
Farmer pruning a sucker from a tomato plant to focus energy on fruit production.
PHASE 5: FERTILIZATION AND IRRIGATION
THE SPOON-FEEDING APPROACH
Greenhouse plants are hungry. You cannot just dump fertilizer once and leave. You must use Fertigation feeding the plant through the drip irrigation system. This is the most efficient way to farm as nutrients are delivered directly to the root zone.
Week 1-2 (Rooting Stage): Use a high-phosphorus fertilizer to encourage root establishment. A starter grade NPK or a solution of DAP (filtered to avoid clogging drippers) works well. The goal is to build a massive root system that can support a heavy crop later.
Week 3-8 (Vegetative Stage): The plant needs Nitrogen for leaves and stems. Calcium Ammonium Nitrate (CAN) is your friend here. Dissolve it in water and feed via the drip lines.
Week 9+ (Flowering and Fruiting): Switch to high Potassium. Potassium (K) makes the fruits heavy, shiny, and sweet. Use NPK 17:17:17 or specialized soluble fertilizers rich in Potassium like Multi-K.
Do not forget Micronutrients. A deficiency in Calcium leads to Blossom End Rot, where the bottom of your tomato turns black and rotten. This is very common in Kenya due to acidic soils locking out calcium. Prevent it by spraying Calcium Nitrate foliar feeds every two weeks once flowering starts.
WATER MANAGEMENT FOR 2026
The 2026 forecast predicts a dry start to the year. You must manage water carefully. Over-watering is as dangerous as under-watering.
The Finger Test: Stick your finger 2 inches into the soil. If it feels dry, irrigate. If it sticks to your finger or feels cool and damp, wait.
Generally, a mature tomato plant needs about 1 to 1.5 liters of water per day. In hot months (January, February), split this into two sessions: one at 8:00 AM and one at 4:00 PM. Never water late in the evening; wet soil at night encourages fungi like Phytophthora.
MAINTAINING YOUR DRIP SYSTEM
Drip lines can clog easily with algae or silt. Once a month, flush your lines. Open the ends of the drip lines and turn on the water at full pressure for 2 minutes to flush out any debris. Clean your disk filters or screen filters weekly. If you notice a specific plant wilting while others are healthy, check the emitter near that plant; it is likely blocked.
PHASE 6: PEST AND DISEASE WARFARE
THE BIG THREE ENEMIES
In a Kenyan greenhouse, you will fight three main wars. Understanding these enemies is key to winning the battle.
1. Whiteflies: These are tiny white insects that hide under the leaves. They are vectors for viral diseases like Tomato Yellow Leaf Curl Virus. When disturbed, they fly up in a cloud.
Control: Use yellow sticky traps (KES 50 each) to catch the adults. Place one trap every 2 meters. If the population explodes, spray with Acetamiprid or Imidacloprid-based insecticides. Ensure you spray the undersides of the leaves where they hide.
2. Tuta Absoluta: This is the tomato leaf miner. The larvae eat the green mesophyll of the leaves, creating transparent silvery patches. They also drill holes into the fruit, making it unmarketable. It is devastating and can destroy 100% of a crop in days.
Control: Prevention is key. Ensure your insect net has absolutely no holes. Use pheromone traps to catch the males and disrupt mating. If an infestation occurs, use specialized chemicals like Coragen or Belt, but rotate them to prevent resistance.
3. Blight (Early and Late): These are fungal diseases that turn leaves brown and stems black. They thrive in high humidity and cool temperatures.
Control: Keep the greenhouse vents open during the day to lower humidity. Avoid wetting the leaves. Spray protective fungicides like Mancozeb weekly during the rainy season (March-May). If infection is visible, switch to curative fungicides like Metalaxyl.
EXPERT TIP: ROTATE YOUR CHEMICALS
Pests are smart. If you use the same chemical active ingredient three times in a row, the pests will develop resistance, and the chemical will stop working. You must alternate between different classes of pesticides (e.g., switch between a pyrethroid and a carbamate). Keep a record book of what you sprayed and when. pests.
Yellow sticky trap catching whiteflies in a greenhouse to monitor and control pests.
PHASE 7: HARVESTING AND MARKETING
HARVESTING FOR MAXIMUM SHELF LIFE
Harvest your tomatoes at the Breaker Stage. This is when the fruit has just turned from green to a pinkish-yellow color. Do not wait for them to turn deep red on the vine unless you have a ready buyer nearby who will consume them immediately. Harvesting at the breaker stage allows the fruit to ripen in transit, giving it an extra 5-7 days of shelf life. This is crucial if you are transporting your produce to Nairobi, Mombasa, or Kisumu.
Harvest early in the morning when the fruit is cool and turgid. Use a sharp knife or secateurs to cut the fruit stem. Remove the fruit with the calyx (the green star-shaped leafy part) attached; it makes the fruit look fresher to buyers and prevents the entry of pathogens through the stem scar. Place the harvested fruits gently into crates; do not throw them. Line your plastic crates with paper or cardboard to prevent bruising the bottom layer of tomatoes.
MARKETING STRATEGY 2026
Do not wait until harvest day to find a buyer. This is the recipe for desperation selling at low prices. Start marketing when your crop is flowering.
1. Local Mama Mbogas: These are the backbone of the Kenyan vegetable market. They are reliable for small daily volumes (20-50kg). Visit the local market in your town and build relationships with 5-10 women. Offer them consistent quality, and they will become your loyal customers.
2. Institutions: Schools, hospitals, and prisons in your county feed hundreds of people daily. They often need 50-100kg per week. Visit the procurement officers and tender for supply.
3. Urban Markets: If you have large volumes (500kg+ per harvest), hire a pickup (Probox or Canter) and take it to the wholesale markets like Marikiti or Githurai in Nairobi. Be prepared for aggressive brokers; know the market price before you arrive.
4. Social Media: Facebook groups like Digital Farmers Kenya and WhatsApp groups for local farmers are powerful tools. Post photos of your crop progress. Pre-sell your harvest by taking orders online.
PHASE 8: ONLINE SEED PURCHASE GUIDE (2026)
In 2026, the digital landscape has matured. You can skip the middleman and buy certified seeds directly from reputable suppliers online. This ensures you get genuine products, not fakes filled with ash or expired seeds. Here are the verified Kenyan links for this season:
Online seed purchasing options in Kenya including AgriJibu and delivery services
Conclusion
The path to earning KES 500,000 is not paved with miracles; it is paved with discipline. Greenhouse farming in 2026 is about controlling the variables. You control the water. You control the pests. You control the nutrients. By following this guide building the right structure, choosing the verified seed varieties like Anna F1 or Commandant F1, and managing your budget with the January 2026 prices you are already ahead of 90% of the competition.
Start small. Master the 8m x 15m unit. Once you have cracked the code of one greenhouse, scaling to two or three is simply a matter of copy and paste. The market is waiting. The season is open. It is time to plant.
FREQUENTLY ASKED QUESTIONS (FAQ)
How much money do I truly need to start a greenhouse in 2026?
To be safe, budget KES 250,000 for a wooden greenhouse (8m x 15m). This covers the structure (KES 160k), inputs (KES 40k), water setup (KES 20k), and an emergency labor/chemical fund (KES 30k).
Can I use local untreated timber to save money?
No. Untreated timber will rot within 18 months due to the high humidity inside a greenhouse and termite attacks.
Which is better for a beginner: Tomatoes or Capsicum?
Tomatoes. They are harder work regarding pruning, but have a guaranteed market every single day.
How do I control bacterial wilt without chemicals?
Prevention is the only cure. Use Soil Solarization (baking the soil under plastic) before planting.
How often should I change the polythene cover?
High-quality UV-treated polythene (200 microns) lasts 3 to 4 years in the Kenyan sun. If it starts to yellow or crack, light transmission drops, and your yields will suffer. Replace it immediately to maintain optimal growing conditions.
Is drip irrigation mandatory for greenhouse?
Yes. Overhead watering (sprinklers/hosepipes) wets the leaves, which guarantees fungal diseases like Blight.
Can I grow crops in a greenhouse year-round in Kenya?
Absolutely. That is the main advantage. You can time your harvest to hit the market in April/May and November/December when open-field rains have destroyed outside crops, giving you peak prices.
What is the biggest mistake beginners make?
Ignoring soil testing. They guess the fertilizer requirements, leading to acidic soil or nutrient lockout. Spend the KES 3,000 on a soil test; it is the best insurance you can buy.
Where can I get a loan for greenhouse farming?
The Agricultural Finance Corporation (AFC) offers loans for farm infrastructure. Some banks like Equity and Co-op Bank also have Agri-biashara products.
Dairy goat farming has firmly established itself as one of the most resilient, high-yield, and accessible agribusiness ventures in Kenya for the 2026 fiscal year. As the agricultural sector adapts to the shifting realities of climate change, shrinking land sizes, and a burgeoning population with a sophisticated palate for nutritious products, the humble goat has graduated from being the “poor man’s cow” to the “smart farmer’s gold mine.”
Unlike high-maintenance dairy cows that require vast acreage, immense water resources, and heavy capital investment, dairy goats thrive in compact spaces, consume significantly less feed, and offer a faster return on investment. This guide is painstakingly engineered to transform a beginner farmer into a commercial producer, leveraging the latest agricultural data, pricing, and breeding technologies available in Kenya today. The economic landscape for 2026 heavily favors small livestock production. With the price of goat milk stabilizing between KES 200 and KES 300 per liter in premium markets like Nairobi, Mombasa, and Kisumu, the profit margins are significantly higher than traditional cow milk, which often struggles to break the KES 60 mark at the farm gate.
Furthermore, the subdivision of land in high-potential agricultural zones such as Kiambu, Nyeri, Murang’a, and Vihiga has necessitated a shift toward intensive zero-grazing systems. Cows are simply becoming too large for the average quarter-acre plot. Goats, however, fit perfectly. This guide provides a comprehensive roadmap for navigating these shifts, ensuring that you do not just survive but thrive in the competitive Kenyan agricultural sector.
We will cover everything from selecting the right genetics from KALRO and private breeders to constructing affordable, disease-proof housing and formulating cost-effective feeds that maximize lactation. Success in this venture requires a fundamental paradigm shift. You must move beyond the traditional view of subsistence farming and adopt a commercial herd management mindset. You must treat every doe as a biological factory and every buck as a genetic investment.
You must meticulously track input costs, ranging from concentrates to veterinary drugs, against the output of liters produced and kids sold. By following the protocols outlined in this master guide, you will avoid the common pitfalls that bankrupt amateur farmers, such as poor housing design leading to pneumonia, improper feeding resulting in metabolic disorders, or poor breeding management leading to genetic stagnation. Prepare to immerse yourself in the technical, practical, and financial realities of modern dairy goat farming in Kenya.
MARKET ANALYSIS AND THE ECONOMIC CASE FOR 2026
The demand for goat milk in Kenya has skyrocketed, driven by a growing health-conscious middle class and the medical necessity of goat milk for infants and the elderly. Goat milk is naturally homogenized, has smaller fat globules than cow milk, and is less allergenic, making it a “superfood” in the 2026 retail market. Additionally, the cosmetic industry in Kenya is increasingly sourcing goat milk for high-end soaps and lotions, creating a secondary market for farmers. However, the opportunity is not just in milk.
The breeding stock market is insatiable. A purebred doe with a proven pedigree is currently a liquid asset, often fetching prices that rival a heifer. With the government’s 2026 focus on food security and youth employment in agriculture, grants and support for small stock farmers are more accessible than ever before. This environment creates a unique window of opportunity for early adopters who establish professional, well-managed units now.
PROFITABLE DAIRY GOAT BREEDS IN KENYA
The foundation of a successful dairy goat enterprise lies entirely in the genetic potential of your herd. In 2026, the market is dominated by three specific exotic breeds that have been acclimatized to Kenyan conditions over decades of breeding by institutions like the Dairy Goat Association of Kenya (DGAK) and the Kenya Agricultural and Livestock Research Organization (KALRO).
Selecting the right breed depends heavily on your specific location, climate, and production goals. A farmer in the cool, wet highlands of Nyandarua will have different breed requirements compared to a farmer in the semi-arid zones of Machakos or Kitui.
Three primary dairy goat breeds in Kenya—Alpine, Toggenburg, and Saanen—standing together in a field.
Selecting the right breed for your specific climatic zone is the first step toward profitability.
The Kenyan Alpine
The Kenyan Alpine is arguably the most versatile and widely distributed dairy goat breed in the country today. Originated from the French Alps, this breed has been extensively improved by the Dairy Goat Association of Kenya to suit local conditions. They are easily identifiable by their upright ears and a variety of coat colors, ranging from pure white to shades of fawn, gray, brown, and black. Alpines are medium to large-sized animals, with mature does weighing between 60kg and 80kg.
They are renowned for their hardiness and ability to travel long distances, making them suitable for both zero-grazing and semi-intensive systems in areas with moderate rainfall. In terms of production, a well-managed Kenyan Alpine doe in 2026 can produce between 3 to 5 liters of milk per day. Their milk has a butterfat content of approximately 3.5%, which is excellent for fresh consumption and yoghurt production.
The current market price for a purebred breeding Alpine doe ranges from KES 25,000 to KES 45,000, while young bucks with good lineage can fetch up to KES 20,000. Their adaptability to the diverse micro-climates of Mount Kenya and the Rift Valley makes them the top choice for beginner farmers who want a balance between high production and disease resistance. They are the 4×4 vehicle of the goat world, reliable, tough, and productive.
The Toggenburg
If your farm is located in the cooler, higher altitude regions like Meru, Embu, Kericho, or the Aberdares, the Toggenburg is your breed of choice. Recognizable by their solid brown or chocolate color with distinct white stripes down the face and white markings on the legs and tail (often called “Swiss markings”), “Toggs” are slightly smaller than Alpines but are extremely efficient converters of feed. They originated from the Toggenburg valley in Switzerland and have a calm, gentle temperament, which makes them easy to handle for women and youth farmers.
Toggenburgs are celebrated for their long lactation periods and consistent milk production, often yielding 3 to 4 liters daily. While their milk volume might be slightly lower than the Saanen, the quality is exceptional, with a butterfat content often exceeding 3.8%, making it ideal for cheese making. In 2026, the demand for Toggenburg breeding stock remains high, with prices for a mature doe averaging KES 20,000 to KES 35,000. However, farmers must note that Toggenburgs are more susceptible to heat stress and are not recommended for hot, arid lowlands unless strictly managed under zero-grazing with adequate shade and ventilation.
The Saanen
The Saanen is the “Friesian” of the goat world, the heavy yielder designed for intensive commercial production. Pure white or cream in color with upright ears, they are the largest of the dairy breeds. A purebred Saanen is a milk machine, capable of producing 5 to 7 liters of milk per day under optimal management. This high production comes at a cost; they have high nutritional requirements and are very sensitive to harsh sunlight and rough terrain. They are best suited for zero-grazing units in high-potential areas where feed abundance is guaranteed.
For the 2026 season, Saanens command the highest prices in the breeding market, with pedigree does often selling for KES 40,000 to KES 60,000. However, beginners should approach this breed with caution. Their pale skin makes them prone to skin cancer if exposed to direct equatorial sun for long periods, and their high metabolic rate means any lapse in feeding will result in a drastic drop in milk yield. They are strictly recommended for farmers who have mastered the basics of nutrition and housing and are ready to invest in premium feeds.
The Galla Goat Crosses
While not a pure dairy breed, the indigenous Galla goat (the “Boran” of goats) deserves mention for farmers in arid and semi-arid lands (ASALs) like Kajiado, Kitui, and Makueni. In 2026, climate resilience is a major factor. Crossing a Galla doe with an Alpine or Toggenburg buck produces a hardy F1 hybrid that can withstand heat and drought while producing significantly more milk (2-3 liters) than the local East African goat. This strategy is highly recommended for farmers in dry zones who cannot sustain the feed requirements of pure exotic breeds.
OPTIMAL HOUSING AND STRUCTURE DESIGN FOR ZERO-GRAZING
Housing is not just a shelter; it is a production tool that directly impacts the health and milk output of your herd. In Kenya, the zero-grazing model is the gold standard for dairy goat farming because it minimizes exposure to soil-borne diseases and parasites like worms and ticks. The primary goal of your goat house structure is to keep the animals dry, draft-free but well-ventilated, and safe from predators and theft. A poorly designed house leads to pneumonia, which is the number one killer of goats in Kenya, and foot rot, which debilitates their ability to feed.
A well-constructed raised dairy goat unit with slatted floors and a tin roof.
The Raised Floor System
The single most important feature of a modern dairy goat unit is the raised slatted floor. The floor should be elevated at least 2 to 3 feet (0.6 to 1 meter) off the ground. This elevation serves two critical purposes: it separates the goats from their own waste, breaking the life cycle of intestinal worms, and it protects the animals from the cold, damp ground which causes pneumonia. The floor should be constructed using timber slats (approx. 2×1 inch size) with a gap of 0.5 to 1 inch between them. This gap is wide enough to allow droppings and urine to fall through but narrow enough to prevent the goats’ hooves from getting stuck.
Beneath the raised floor, it is highly advisable to pour a concrete slab or place a heavy-duty polythene sheet slanted towards a collection pit. This allows for the easy collection of goat pellets (manure) and urine. Goat manure is a premium organic fertilizer, currently selling for KES 300-500 per bag in coffee and tea growing zones. The urine, when fermented, is an excellent nitrogen-rich foliar feed and pesticide. By integrating this waste management system, your housing unit becomes a source of secondary income while maintaining high hygiene standards.
Ventilation and Climate Control
Kenya’s climate in 2026 is expected to experience temperature fluctuations, making ventilation a key priority. Goats are highly susceptible to respiratory infections caused by ammonia buildup from urine and stagnant air. Your goat house must be positioned to protect animals from the prevailing wind (usually the Eastern wind in many parts of Kenya). The windward side should be solid (using off-cuts or iron sheets) up to the roof level to block cold drafts, while the leeward side should be half-walled with wire mesh or timber rails to facilitate air circulation.
The roof should be constructed with corrugated iron sheets and must be pitched high, at least 8 to 10 feet at the highest point, to allow hot air to rise and escape. In hotter regions like Machakos or parts of Rift Valley, consider using an overlapping “breather” roof design or insulating the underside of the iron sheets with papyrus mats to reduce heat stress. Remember, a goat that is panting from heat stress will stop eating, and a goat that stops eating stops producing milk immediately.
Floor Space Requirements
Overcrowding is a recipe for disaster. Adhere to the following space requirements for the 2026 standards:
Mature Doe: 1.5 to 2.0 square meters per animal.
Buck: 3.0 square meters (they need more room and isolation).
Kids (grouped): 0.5 to 1.0 square meter per kid.
Exercise Area: An open, fenced area attached to the unit is vital for Vitamin D synthesis and exercise, which aids in digestion and hoof health.
ADVANCED FEEDING STRATEGIES AND NUTRITION FOR 2026
Feeding accounts for 60% to 70% of the total production cost in dairy goat farming. The mistake most beginners make is treating goats like scavengers. A high-producing dairy goat requires a precision diet that balances energy, protein, minerals, and vitamins.
For the 2026 season, with the fluctuating cost of commercial feeds, farmers must adopt a “grow-your-own” strategy to maintain profitability. Relying solely on purchased dairy meal is a guaranteed way to reduce your profit margins.
A farmer preparing a mixed ration of fodder and legumes for dairy goats using a chaff cutter.
The Total Mixed Ration (TMR) Approach
Goats are selective eaters (browsers) and will naturally pick out the tasty, leafy parts of fodder while ignoring the nutrient-rich stems. To combat this waste and ensure a balanced diet, you must adopt a chopped Total Mixed Ration (TMR) system. All forages, whether Napier grass, maize stover, or sweet potato vines, should be chopped into pieces no larger than 1 inch using a chaff cutter or panga. This chopped fodder should then be mixed with protein sources like Desmodium, Lucerne, or Calliandra before feeding.
A lactating doe requires approximately 3% to 4% of her body weight in dry matter daily. For a 60kg goat, this translates to roughly 2.5kg to 3kg of dry matter, or about 8kg to 10kg of fresh green matter per day. This ration should be split into two or three feedings: morning, afternoon, and evening. Consistency is key; sudden changes in diet can cause bloating or acidosis, which can be fatal. If you are introducing a new feed, such as silage or a new batch of hay, do it gradually over a period of 5 to 7 days.
KALRO Recommended Fodder Varieties for 2026
Staying updated with seed varieties is crucial. For 2026, KALRO (Kenya Agricultural and Livestock Research Organization) recommends specifically bred drought-tolerant fodder crops. The “Kakamega 1” and “Ouma” varieties of Napier grass are highly recommended as they are resistant to Napier Stunt Disease, which has decimated crops in Western Kenya.
For protein sources, “Desmodium” (both Silverleaf and Greenleaf) remains the gold standard, but the new “Brachiaria” grass varieties like “Basilisk” and “Piata” are gaining favor due to their high protein content and ability to withstand dry spells better than Napier. In drier areas, Sorghum varieties like “E1291” and “Ikinyaruka” are vital.
These are dual-purpose crops where the grain can be used for human or poultry food, and the stalks serve as excellent fodder. Farmers should also plant “Calliandra” and “Leucaena” trees along fences. These are “protein banks”; their leaves contain 20-25% protein and can replace expensive commercial dairy meal. A farmer with 500 Calliandra trees can significantly reduce or even eliminate the need for soya cake or cotton seed cake in their feed formulation.
Hydroponic Fodder: The 2026 Solution
With land sizes shrinking, hydroponic fodder is becoming a mainstream solution in Kenya. This involves growing grains like barley, sorghum, or maize in trays without soil, using only water. Within 7 days, you harvest a mat of green fodder including the roots. This feed is highly digestible, rich in vitamins, and requires minimal space (a 5m x 5m room can feed 20 goats). While the initial setup cost can be KES 20,000+, the long-term savings on commercial feed are substantial.
Concentrate Formulation and Supplements
While high-quality forage is the base, high milk production requires energy and protein boosting through concentrates. A standard home-made dairy meal ration for 2026 can be mixed using the following ratio: 50% energy source (Maize germ or Wheat bran), 30% protein source (Cotton seed cake, Soya meal, or Sunflower cake), and 20% minerals and binders (Maclik Super or similar high-phosphorus mineral salt, plus a toxin binder).
Never feed urea to goats unless you are an expert nutritionist. Goats are very sensitive to urea poisoning. Stick to vegetable proteins. Furthermore, provide a mineral licking block in every pen 24/7. Goats have a high requirement for minerals, specifically Calcium and Phosphorus, to prevent milk fever and maintain bone structure.
BREEDING, KIDDING, AND KID MANAGEMENT
Your farm’s future profitability depends on your ability to produce healthy kids and maintain a consistent lactation cycle. A doe should kid (give birth) once every year. A longer kidding interval means you are feeding a non-productive animal, which eats into your profits. The breeding cycle must be managed with military precision.
A newborn dairy goat kid in a clean, straw-lined pen being groomed by its mother.
Heat Detection and Mating
Does typically come into heat (estrus) every 18 to 21 days. The signs of heat include: constant bleating, wagging of the tail (flagging), a swollen and reddened vulva, a decrease in milk yield, and mounting other goats. The heat period lasts for 24 to 36 hours. The “Standing Heat”, when the doe will stand still to be mounted, usually occurs in the middle of this period. This is the optimal time for service. In 2026, you have two choices: keeping a breeding buck or using Artificial Insemination (AI).
Keeping a buck is expensive (he eats but doesn’t milk) and risky if you only have a few does (inbreeding). For small herds (under 10 does), AI is highly recommended. AI services are now more accessible in counties like Nyeri, Kiambu, and Meru through provider cooperatives. If you use a buck, ensure he is unrelated to the doe to avoid inbreeding, which results in weak, stunted kids with deformities.
The “Buck Effect”
If you choose to keep a buck, utilize the “Buck Effect.” This involves keeping the buck completely away from the does (out of sight and smell) and then introducing him suddenly. This sudden introduction induces strong heats in the does, allowing you to synchronize breeding so that all your goats kid within a short timeframe, simplifying management.
The Kidding Process
Gestation (pregnancy) in goats lasts approximately 150 days (5 months). As the doe approaches her due date, separate her into a “kidding pen” at least 7 days before. This pen must be disinfected and bedded with clean, dry wheat straw or dry grass. Watch for signs of labor: the doe will become restless, paw the ground, and a thick mucous string will hang from the vulva.
Once the kid is born, the first priority is clearing the airways. Wipe the mucus from the nose and mouth. Dip the umbilical cord in Iodine to prevent infection. The kid MUST suckle the “Colostrum” (first milk) within the first 2 hours of life. Colostrum is rich in antibodies that provide the kid’s only immunity against diseases. A kid that misses colostrum has a less than 50% chance of survival.
Rearing Kids for Replacement
Do not starve the kids to sell milk. A stunted kid will never become a high-producing doe. Allow kids to suckle or bottle-feed them adequately for at least 3 months. Weaning should be done based on weight (at least 12-15kg), not just age. Introduce high-quality hay and starter pellets from week 2 to develop their rumen.
DISEASE CONTROL AND HERD HEALTH MANAGEMENT
A sick goat is a liability. In Kenya, the disease landscape is aggressive, but preventable. Your health strategy should focus on prevention rather than cure. Veterinary drugs are expensive, and treatment often leads to a drop in milk production that can take months to recover.
A veterinary officer administering a vaccination to a dairy goat
Vaccination Schedule (Kenyan Context)
You must adhere to a strict vaccination calendar. The mandatory vaccines for Kenya in 2026 are:
CCPP (Contagious Caprine Pleuropneumonia): This is a devastating lung disease. Vaccinate annually.
Enterotoxaemia (Pulpy Kidney): Caused by a sudden change in diet. Vaccinate annually and boost pregnant does 2 weeks before kidding to pass immunity to the kids.
Rift Valley Fever (RVF): Critical during rainy seasons (El Niño years). Vaccinate as per government directives.
Anthrax and Blackquarter: Vaccinate annually.
Goat Pox: Vaccinate annually if the disease is prevalent in your county.
Parasite Control (Deworming and Tick Control)
Internal worms (Haemonchus contortus) are the silent killers of dairy goats. They cause anemia (bottle jaw) and severe weight loss. Deworm your adult goats every 3 months. However, to prevent resistance, rotate the dewormer brands (active ingredients like Albendazole, Ivermectin, Levamisole). For kids, start deworming at 1 month of age.
External parasites like ticks and mites transmit fatal diseases like Heartwater. Even in zero-grazing units, ticks can enter via hay or grass. Spray or dip your goats weekly using acaricides. Pay special attention to the areas under the tail, ears, and udder where ticks hide.
Common Ailments and Management
Pneumonia: Caused by cold, drafty housing. Symptoms include coughing and nasal discharge. Treat early with antibiotics (Oxytetracycline).
Mastitis: Inflammation of the udder. Prevent by maintaining hygiene. Use a California Mastitis Test (CMT) kit weekly to detect sub-clinical cases.
Bloat: Accumulation of gas in the rumen. Treat with anti-bloat oil or vegetable oil. Avoid feeding wet, young grass.
Scours (Diarrhea): Common in kids due to dirty milk or overfeeding. Rehydrate immediately and treat with Sulpha drugs.
MILKING, HYGIENE, AND VALUE ADDITION
Milk is your primary revenue stream. The quality of your milk determines your market price. Kenyan consumers are becoming increasingly quality-conscious, and processors will reject milk with high bacterial counts or antibiotic residues.
Proper hand-milking technique using a stainless steel bucket and gloves.
Safe Milking Procedures
Milking should be done at the same times every day (e.g., 6:00 AM and 5:00 PM) to maintain routine.
Preparation: Wash your hands thoroughly. Wash the goat’s udder with warm water and a disinfectant, then dry it with a clean individual towel (never share towels between goats).
Strip Cup: Squeeze the first few streams of milk from each teat into a strip cup. Check for clots or watery milk, which are signs of Mastitis. If the milk is clear, proceed.
Milking: Use a full-hand squeeze method, not a thumb-and-finger pull (stripping), which can damage the teat tissue. Milk quickly and completely.
Post-Milking: Dip the teats in a post-milking teat dip (iodine-based) to seal the teat canal and prevent bacteria from entering.
Recording: Weigh the milk immediately and record it against the goat’s name. This data is your business ledger.
Value Addition Opportunities
Selling raw milk is good, but value addition is where the real profit lies. In 2026, the market for goat yoghurt and goat cheese (Feta, Chèvre) is expanding in urban centers. Goat milk is naturally homogenized and has smaller fat globules, making it easier to digest for people with lactose intolerance.
By pasteurizing the milk (heating to 63°C for 30 minutes) and packaging it into branded bottles or processing it into yoghurt, you can increase your selling price from KES 200/liter to KES 400/liter or more. Simple home-based pasteurization kits are available in Nairobi for under KES 15,000.
Value-added goat milk products displayed for sale.
ECONOMICS, MARKETS, AND BUSINESS PLANNING
Farming is a business. You must know your numbers. Let’s look at a conservative estimate for a starter unit of 3 Does in 2026.
A conceptual image representing the financial returns of dairy goat farming in Kenya.
Cost Benefit Analysis (2026 Estimates)
Item
Cost/Revenue (KES)
Initial Capital
Housing Construction (3-goat unit)
15,000 – 20,000
Breeding Stock (3 Does @ 25k)
75,000
Equipment & First Feeds
15,000
Total Start-up
~110,000
Monthly Running Costs
Concentrates & Supplements
4,500
Deworming/Vet
1,000
Total Monthly Expenses
5,500
Monthly Revenue (Conservative)
45,000
Net Monthly Profit
39,500
This calculation assumes you have your own fodder. If you buy all fodder, your profits will reduce by 40%. This highlights the importance of the “grow-your-own” feed strategy. Additionally, manure sales can cover your water bill.
Marketing Strategies
Do not wait for customers to find you.
Social Media: Use Facebook, TikTok, and WhatsApp groups. “Nairobi Farmers Market” and specific estate groups are goldmines.
Local Institutions: Approach private hospitals and clinics. Doctors often prescribe goat milk for patients recovering from chemotherapy or infants with cow milk allergies.
Cooperatives: Join the Dairy Goat Association of Kenya (DGAK). They have branches countrywide and often organize collective milk collection or breeding stock sales.
ONLINE SEED PURCHASE GUIDE AND RESOURCES
To succeed, you need the right inputs. Here is where to find genuine seeds and breeding stock in Kenya for the 2026 season.
KALRO (Kenya Agricultural and Livestock Research Organization):
For Fodder Seeds: Visit the KALRO DRI (Dairy Research Institute) in Naivasha or KALRO Katumani for dryland crops. Website: www.kalro.org
Breeding Stock: KALRO Naivasha holds annual auctions for bucks and does. Keep an eye on their website for dates.
Kenya Seed Company:
For Pasture Seeds: They stock Rhodes Grass (Boma/Elmba), Lucerne, and Sorghum varieties.
Availability: Major agro-vets countrywide. Website: www.kenyaseed.com
Simlaw Seeds:
For Vegetables & Legumes: Best source for Desmodium seeds and Lucerne.
Location: Kijabe Street, Nairobi, and countrywide branches. Website: www.simlaw.co.ke
A successful Kenyan dairy goat farmer ending the day with a high milk yield.
Conclusion
With dedication, proper management, and the right knowledge, dairy goat farming is a path to financial freedom in 2026. This guide provides the technical backbone for your farming venture. The success of your farm now rests on your discipline to implement these standards. Start small, learn the behavior of your animals, and scale up as your experience and fodder reserves grow. Happy farming!
COMPREHENSIVE FAQ
How much land do I need to start dairy goat farming in Kenya?
A zero-grazing unit for 4 goats occupies about 10ft by 15ft. However, you need at least 0.25 to 0.5 acres to grow fodder.
Which is better between Alpine and Toggenburg?
A: Alpine handles heat better; Toggenburg is better for cool, high-altitude areas. Both are excellent milkers.
Can I feed my goats only Napier grass?
No. You MUST supplement with protein legumes and mineral salts for health and production.
How do I stop my goats from getting bloat?
Wilt fresh grass in the sun for 3-4 hours and introduce new feeds gradually.
Where can I sell my goat milk in Kenya?
Neighbors, local hospitals, and goat farmers’ associations like DGAK.
What is the lifespan of a dairy goat?
10-12 years, but peak production declines after 7-8 years
How often should I deworm my goats?
Adults every 3 months. Always rotate deworming drug brands.
Can goats and cows be kept together?
Not recommended in the same pen due to bullying and different needs
Is goat farming profitable in dry areas like Kitui or Machakos?
Yes, but plant drought-resistant fodder like Brachiaria and consider Galla goat crosses.
How do I transport a goat safely?
Use a vehicle or crate where they can stand comfortably. Never tie them to roofs or bodabodas.
To provide the best experiences, we use technologies like cookies to store and/or access device information. Consenting to these technologies will allow us to process data such as browsing behavior or unique IDs on this site. Not consenting or withdrawing consent, may adversely affect certain features and functions.
Functional
Always active
The technical storage or access is strictly necessary for the legitimate purpose of enabling the use of a specific service explicitly requested by the subscriber or user, or for the sole purpose of carrying out the transmission of a communication over an electronic communications network.
Preferences
The technical storage or access is necessary for the legitimate purpose of storing preferences that are not requested by the subscriber or user.
Statistics
The technical storage or access that is used exclusively for statistical purposes.The technical storage or access that is used exclusively for anonymous statistical purposes. Without a subpoena, voluntary compliance on the part of your Internet Service Provider, or additional records from a third party, information stored or retrieved for this purpose alone cannot usually be used to identify you.
Marketing
The technical storage or access is required to create user profiles to send advertising, or to track the user on a website or across several websites for similar marketing purposes.

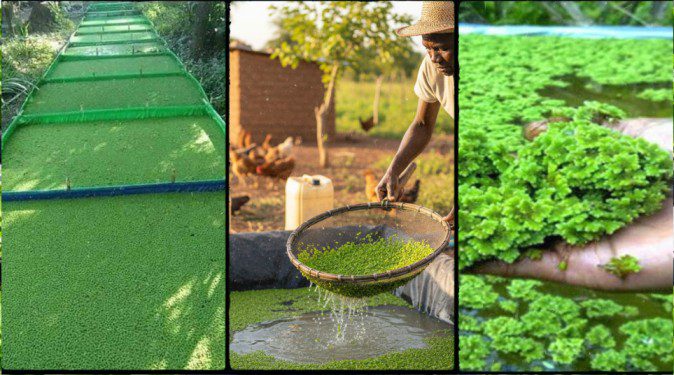
 stephen kilemi
January 16, 2026
stephen kilemi
January 16, 2026