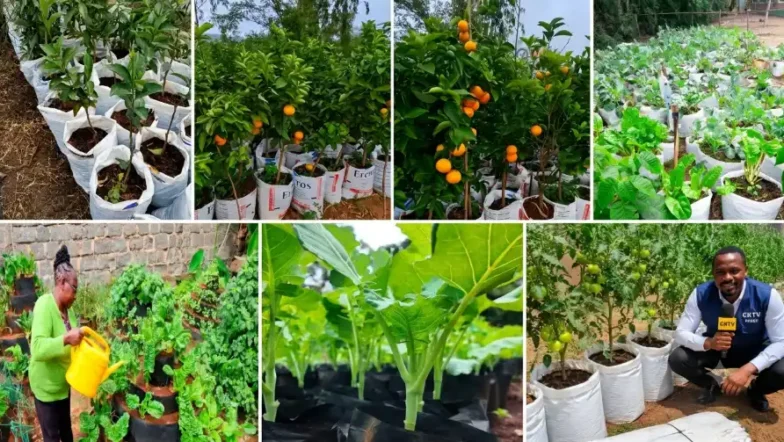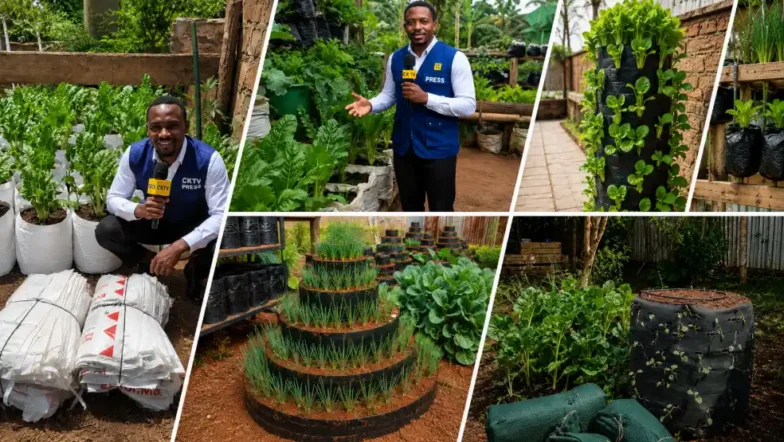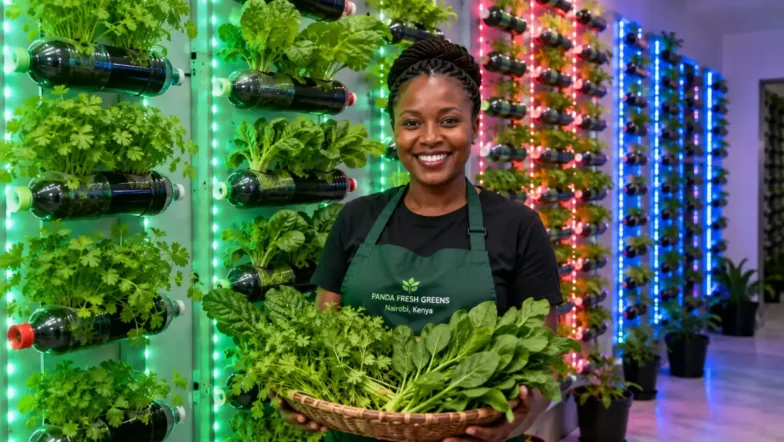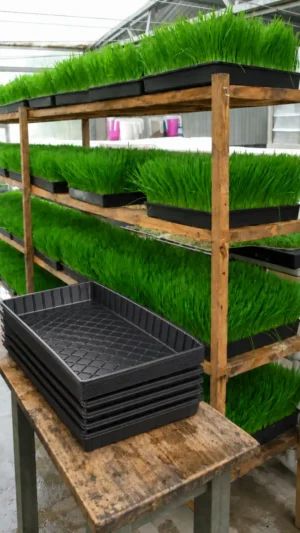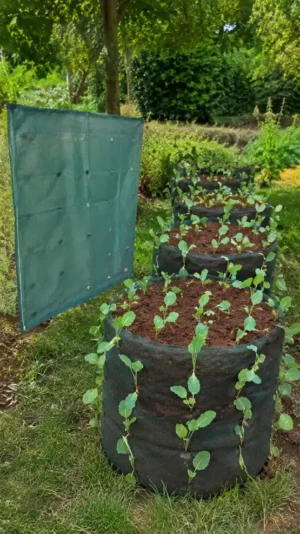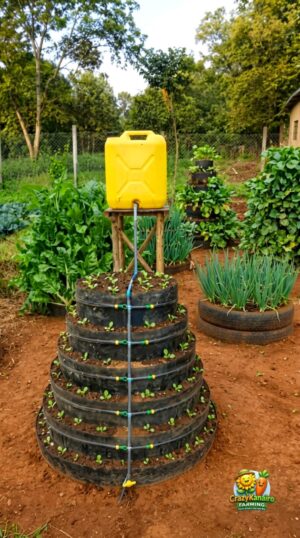
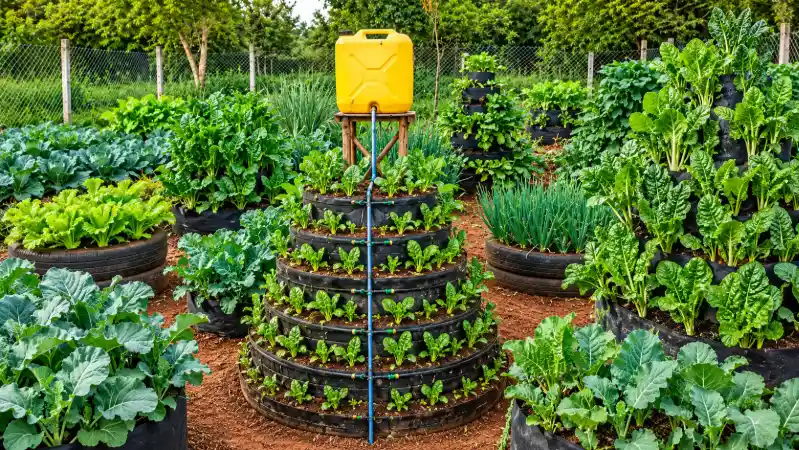

- Top Crops: Sukuma wiki, spinach, managu, terere, sagaa, dhania, tomatoes, and spring onions thrive best in domestic Kenyan spaces.
- Best Systems: White UV-treated grow bags, multi-storey vertical towers, and raised beds optimize water and soil performance.
- Organic Strategy: High-quality compost, well-decomposed animal manure, and Integrated Pest Management (IPM) replace expensive synthetic inputs.
Table of Contents
High household vegetable prices in markets like Wakulima in Nairobi, Kongowea in Mombasa, and Eldoret retail hubs have made self-sufficiency a priority for Kenyan families. Growing your own food in backyard plots, balconies, or estate compounds provides a direct source of clean, pesticide-free nutrition. This master organic guide offers a complete pathway from crop selection and soil design to vertical bag systems and ecological pest management, tailored specifically for Kenya’s diverse microclimates in 2026.
What Is a Kitchen Garden?
A kitchen garden is a localized food production system designed to supply a household with fresh vegetables, herbs, and small fruits. In Kenya, it spans conventional backyard soil beds, raised timber beds, space-saving white UV-treated grow bags, multi-storey vertical towers, and simple self-watering wick containers.
Read Also: 20 Best Vegetables and Dwarf Fruits to Grow in Sacks in Kenya 2026
A kitchen garden is not a scaled-down commercial farm. It is a highly managed, intensive cultivation zone optimized for daily or weekly harvesting. In urban and peri-urban Kenya, where land tenure is limited and plots are often paved, the modern kitchen garden has evolved beyond open-ground farming. Today, households in areas like Kasarani, Syokimau, or Milimani utilize vertical spaces, rooftops, and boundary walls.
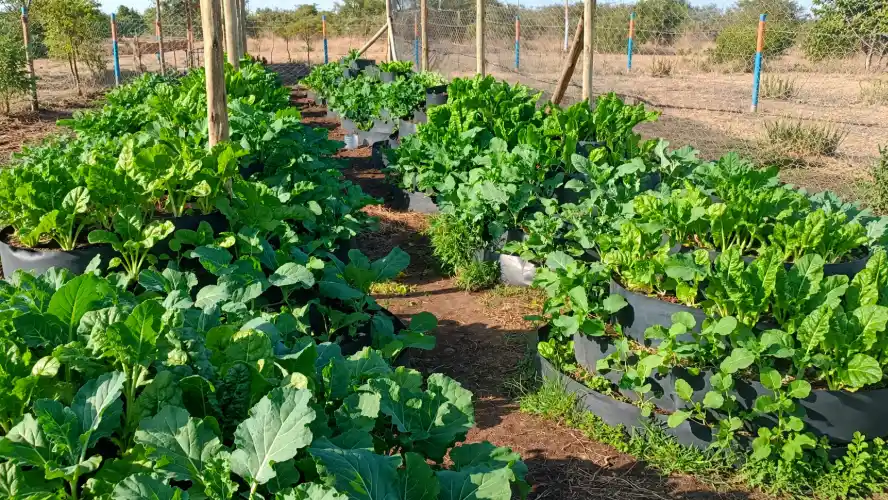
These specialized systems allow you to harvest fresh food continuously. By matching the right container or vertical structure to the correct vegetable variety, you can grow substantial yields without owning an acre of land. These systems optimize root aeration, minimize water loss, and keep weed competition to a minimum.
Why Kitchen Gardening Makes Sense in Kenya
Kitchen gardening reduces weekly food expenses, secures access to chemical-free produce, and maximizes small household spaces. By utilizing kitchen waste for compost and harvesting on demand, families insulate themselves from market price spikes and transport-related spoilage.
Relying on commercial food supply chains in Kenya exposes households to chemical residues from excessive synthetic pesticide use. Cultivating your own leafy greens and fruiting vegetables guarantees full control over soil inputs and water quality. It eliminates the risk of consuming crops irrigated with polluted urban run-off.
Financially, saving even KES 150 daily on sukuma wiki, dhania, and onions preserves household income that can be redirected elsewhere. Vegetable production also processes household waste. Biodegradable kitchen scraps, eggshells, and coffee grounds transform into rich organic nutrients through simple home composting, keeping local environments clean.
How to Choose Vegetables for Your Kitchen Garden
Select crops based on household consumption, available daily sunlight, water access, and spatial limits. Leafy greens tolerate partial shade and work well in vertical bags, whereas fruiting crops like tomatoes require full sunlight, deep root space, and strong physical support.
Before buying seeds or seedlings, evaluate your microclimate and spatial footprint. Cool highland areas like Limuru or Kericho support cabbage, spinach, and carrots exceptionally well. Hotter, semi-arid zones like Kitengela or Machakos require heat-tolerant options like cowpeas (kunde), capsicum, and spider plant (sagaa), or require shade netting and drip lines to thrive.
Read Also: 5 Best Space-Saving Grow Bags in Kenya: Types, Prices, Uses & Where to Buy
To help you plan, we have compiled a performance profile for twenty excellent home vegetables based on recent field observations and KALRO trials across Kenya.
| Vegetable | Difficulty | First Harvest | Best System | Space Needed | Harvest Type |
|---|---|---|---|---|---|
| Sukuma Wiki | Very Easy | 45-60 Days | Vertical Towers, Bags, Beds | Minimal | Cut-and-Come-Again |
| Spinach | Easy | 50-60 Days | Vertical Towers, Grow Bags | Minimal | Cut-and-Come-Again |
| Managu | Easy | 40-50 Days | Beds, Vertical Towers | Moderate | Continuous Plucking |
| Terere | Very Easy | 30-40 Days | Beds, Grow Bags, Towers | Minimal | Plucking or Whole |
| Sagaa | Moderate | 40-45 Days | Open Beds, Raised Beds | Moderate | Continuous Plucking |
| Dhania | Easy | 35-45 Days | Containers, Shallow Beds | Minimal | Whole Plant / Cut |
| Spring Onions | Very Easy | 60-70 Days | Grow Bags, Towers, Beds | Minimal | Continuous Plucking |
| Carrots | Moderate | 75-90 Days | Deep Raised Beds, Deep Bags | Moderate | One-time Pull |
| Tomatoes | High | 75-90 Days | Large Grow Bags, Open Beds | High (Needs Stake) | Continuous Pick |
| Capsicum | Moderate | 80-90 Days | Containers, Raised Beds | Moderate | Continuous Pick |
| Cabbage | Moderate | 85-110 Days | Raised Beds, Large Bags | High | One-time Cut |
| Lettuce | Easy | 45-60 Days | Vertical Towers, Containers | Minimal | Leaf-by-leaf / Whole |
| Cucumbers | Moderate | 60-70 Days | Trellised Pots, Open Beds | High (Climbing) | Continuous Pick |
| Bush Beans | Easy | 55-65 Days | Raised Beds, Medium Bags | Moderate | Multiple Picks |
| Swiss Chard | Easy | 50-60 Days | Vertical Towers, Grow Bags | Minimal | Cut-and-Come-Again |
| Red Onions | Moderate | 100-120 Days | Well-drained Raised Beds | Moderate | One-time Pull |
| Beetroot | Easy | 60-75 Days | Raised Beds, Deep Bags | Moderate | One-time Pull |
| Courgette | Moderate | 50-60 Days | Large Pots, Open Ground | High (Sprawling) | Continuous Pick |
| Chinese Cabbage | Easy | 55-70 Days | Raised Beds, Medium Bags | Moderate | One-time Cut |
| African Eggplant | Moderate | 75-90 Days | Large Pots, Raised Beds | Moderate | Continuous Pick |
The 20 Best Vegetables to Grow in a Kitchen Garden in Kenya
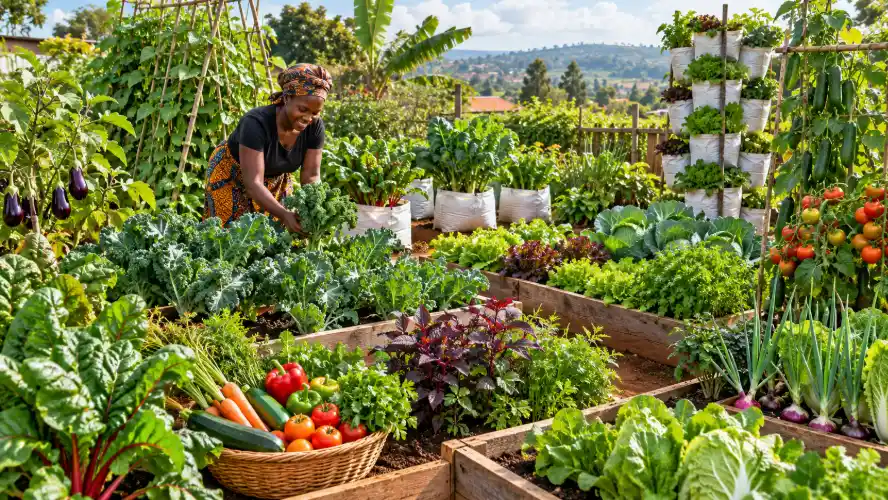
The twenty best vegetables combine reliable local performance, nutritional density, and suitability for urban growing. Prioritize indigenous greens like managu and terere alongside staples like sukuma wiki, spinach, and spring onions to build a highly productive domestic ecosystem.
1. Sukuma Wiki (Collard Greens)
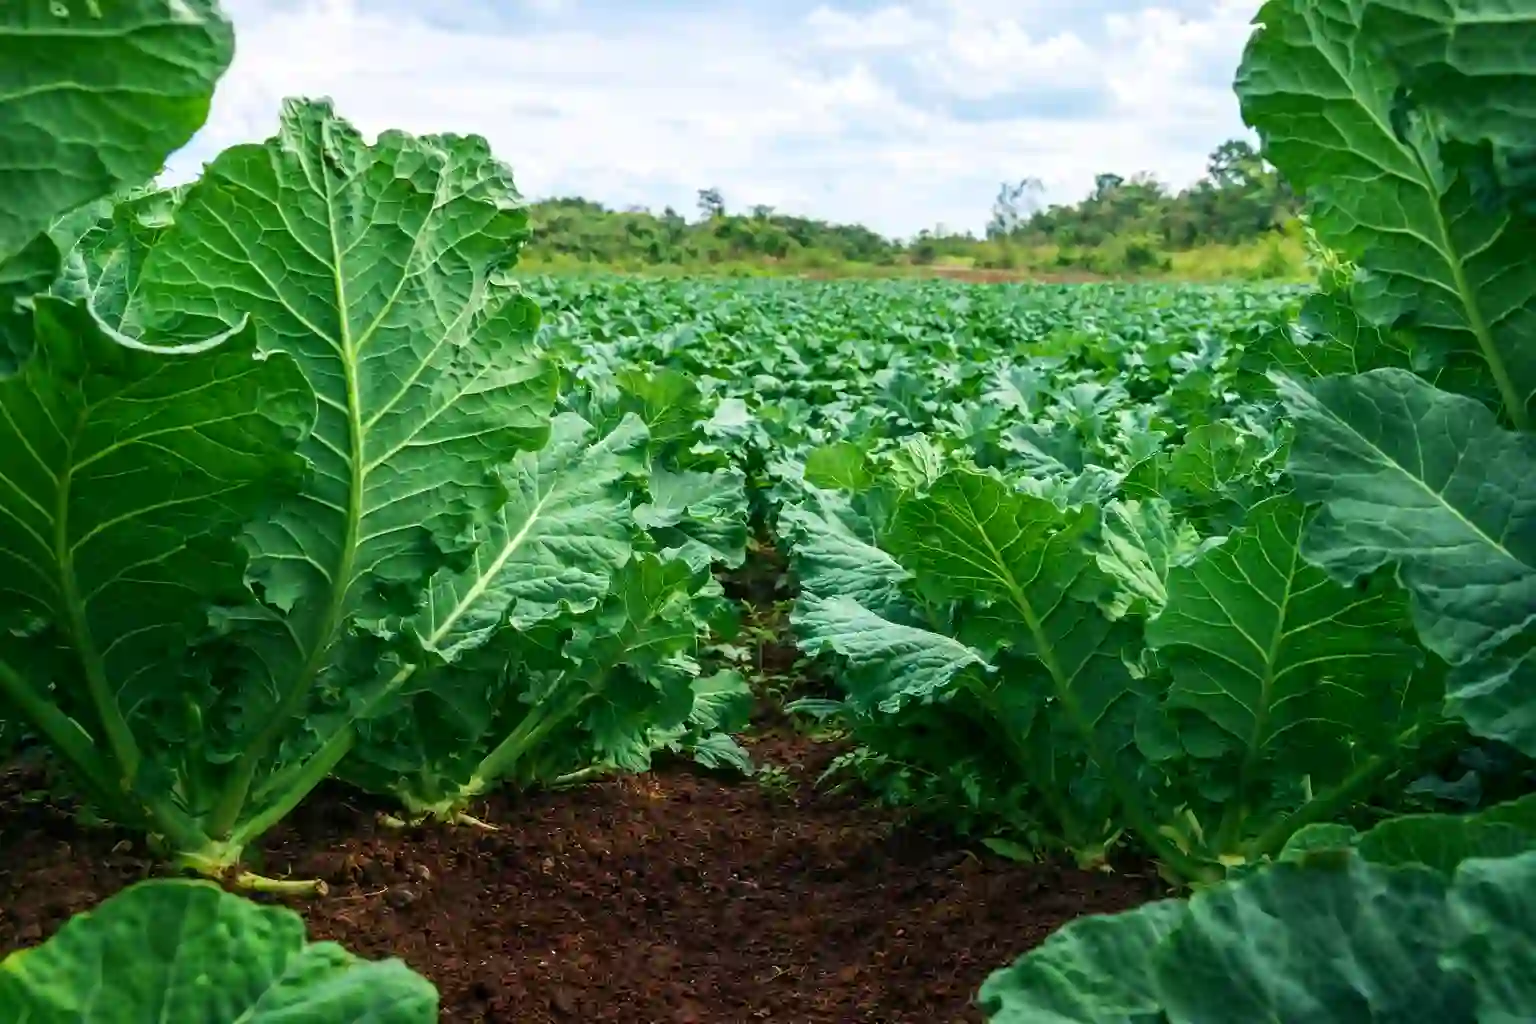
- Why grow it: Sukuma wiki is a fundamental Kenyan staple with a highly predictable growing habit and continuous weekly leaves.
- Best growing conditions: Cool to warm temperatures; performs across almost all Kenyan counties.
- Best kitchen-garden system: Multi-storey vertical towers, white UV-treated grow bags, or raised beds.
- Soil requirements: Loamy, organic-matter-rich soil with a pH of 6.0 to 7.5.
- How to plant: Raise in nurseries and transplant after 3 to 4 weeks.
- Spacing: 30 cm by 45 cm in open ground; 15 cm spacing in vertical towers.
- Watering: Keep the soil consistently moist but never waterlogged.
- Organic feeding: Apply well-decomposed chicken manure or compost tea every fortnight.
- Harvest time: Start picking external leaves 60 days after transplanting.
- How to harvest: Pluck lower mature leaves from the bottom upward, leaving the top growing tip.
- Common pests: Aphids and Diamondback moth caterpillars.
- Common diseases: Black rot and Downy mildew.
- Organic/IPM management: Intercrop with garlic or spray diluted neem oil on the undersides of leaves.
- Best tip: Avoid over-harvesting; always leave at least 5 to 6 active leaves on the stem to fuel growth.
- Sukuma Wiki: Best variety to choose: Thousand Headed, excellent for kitchen gardens because it gives repeated harvests over a long period.
2. Spinach
- Why grow it: High in iron and vitamins, spinach grows rapidly and produces tender leaves that fetch high market values.
- Best growing conditions: Thrives in cool, damp climates; benefits from partial afternoon shade in hot areas.
- Best kitchen-garden system: Multi-storey garden towers or medium-sized grow bags.
- Soil requirements: Well-drained, sandy loam rich in composted organic matter.
- How to plant: Nursery propagation followed by transplanting at the 4-leaf stage.
- Spacing: 25 cm by 30 cm in beds; single pocket placement in vertical bags.
- Watering: Water deeply in the morning to prevent daytime wilting.
- Organic feeding: High nitrogen demands; feed with composted sheep or cow manure.
- Harvest time: 50 to 60 days post-transplanting.
- How to harvest: Cut outer leaves gently at the base using a sharp knife.
- Common pests: Leaf miners and slugs.
- Common diseases: Damping-off in seedlings and Cercospora leaf spot.
- Organic/IPM management: Space plants properly to improve air circulation and hand-pick slugs at dusk.
- Best tip: Mulch heavily around spinach roots to keep the soil cool and prevent soil splash onto the leaves.
- Spinach: Best variety to choose: Fordhook Giant, a true spinach with fast growth, dark-green leaves and relatively good resistance to bolting.
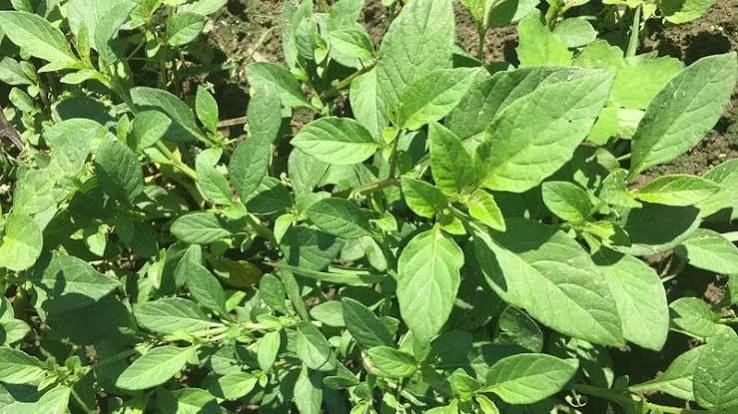
3. Managu (African Nightshade)
- Why grow it: A popular, highly nutritious indigenous green with excellent market demand and natural pest resistance.
- Best growing conditions: Warm climates; very resilient to dry spells once established.
- Best kitchen-garden system: Raised beds, open soil, or multi-storey towers.
- Soil requirements: Deep, fertile, well-draining soils with moderate organic matter.
- How to plant: Direct sow or raise in a nursery; transplanting ensures better spacing.
- Spacing: 30 cm by 30 cm.
- Watering: Moderate watering; dry soil causes premature flowering, which reduces leaf quality.
- Organic feeding: Supplement with well-composted farmyard manure at planting.
- Harvest time: 40 to 50 days from transplanting.
- How to harvest: Pinch off the top growing shoots to encourage bushy lateral branching.
- Common pests: Aphids and flea beetles.
- Common diseases: Early blight and bacterial leaf spot.
- Organic/IPM management: Use ash dusting to repel flea beetles and apply wood ash around root zones.
- Best tip: Pinch off early white flowers immediately to direct the plant’s energy into leaf production.
- Managu: Best variety to choose: Giant Night Shade, selected for large leaves, vigorous growth and suitability to Kenyan conditions.
4. Terere (Amaranth)
- Why grow it: Extremely fast-growing, highly nutritious, and exceptionally easy to establish.
- Best growing conditions: Performs best in warm, sunny locations; drought-tolerant.
- Best kitchen-garden system: Raised beds, containers, or vertical net bags.
- Soil requirements: Light, well-drained soils; highly adaptable to poorer soil profiles.
- How to plant: Direct seed shallowly; mix the tiny seeds with dry sand for even distribution.
- Spacing: Thin out to 15 cm between plants.
- Watering: Low to moderate water requirements.
- Organic feeding: Light application of compost; excessive nitrogen can cause nitrate buildup in leaves.
- Harvest time: 30 to 40 days.
- How to harvest: Uproot entire plants when thinning, or harvest top leaves continuously.
- Common pests: Webworms and stem borers.
- Common diseases: Damping-off and root rot.
- Organic/IPM management: Avoid waterlogging and rotate with non-related crop families.
- Best tip: Harvest when the leaves are young and tender for the best culinary flavor.
- Terere: Best variety to choose: Amaranthus Dubius, a fast-growing leafy amaranth commonly supplied for East African production.
5. Sagaa / Spider Plant
- Why grow it: Rich in calcium, vitamin C, and iron, sagaa is an iconic indigenous vegetable.
- Best growing conditions: Thrives in warm, sunny areas with minimal frost risk.
- Best kitchen-garden system: Raised ground beds or wide-mouthed clay pots.
- Soil requirements: Free-draining sandy loams with moderate organic fertility.
- How to plant: Direct sowing is highly recommended as sagaa has delicate roots.
- Spacing: Thin to 20 cm apart.
- Watering: Water moderately; avoid waterlogged roots to prevent yellowing.
- Organic feeding: Mix compost thoroughly into the topsoil prior to planting.
- Harvest time: 40 to 45 days.
- How to harvest: Snap off tender leaf petioles and young shoots regularly.
- Common pests: Thrips and cabbage sawfly.
- Common diseases: Powdery mildew.
- Organic/IPM management: Spray with a garlic-chili mixture to deter thrips.
- Best tip: Harvest in the early morning to prevent the plucked greens from wilting rapidly.
- Sagaa / Spider Plant: Best variety to choose: Sagret, a productive spider-plant selection adapted to Kenyan growing conditions.
6. Dhania (Coriander / Cilantro)
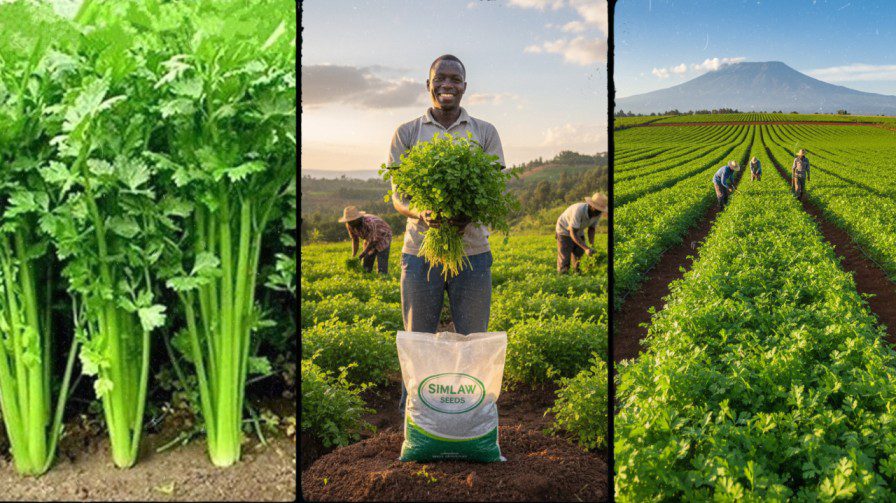
- Why grow it: Essential culinary herb with constant daily demand in Kenyan kitchens.
- Best growing conditions: Mild to cool climates; will bolt (go to seed) quickly in intense summer heat.
- Best kitchen-garden system: Shallow wooden trays, window boxes, or balcony pots.
- Soil requirements: Loamy, moist, yet excellently drained soil.
- How to plant: Direct sow seed; crush the seed pods gently before planting to improve germination.
- Spacing: Row planting at 10 cm spacing.
- Watering: Keep the soil surface consistently damp; water stress triggers early bolting.
- Organic feeding: Mix vermicompost or compost into the planting medium.
- Harvest time: 35 to 45 days.
- How to harvest: Cut individual external leaves, or harvest the whole plant by cutting 2 cm above soil level.
- Common pests: Aphids and armyworms.
- Common diseases: Damping-off and powdery mildew.
- Organic/IPM management: Plant in partial shade during hot months to extend the harvesting window.
- Best tip: Sow a new batch of seeds every two weeks to maintain a continuous, year-round supply.
- The best coriander (dhania) varieties to grow for maximum yield and market demand in Kenya are Dhania Longstanding (also known as American Long Standing) and Coriander Multicut.
Read Also: Organic Fertilizer in Kenya: Complete Guide to Compost, Manure & Vermicomposting (2026)
7. Spring Onions
- Why grow it: Highly resilient, requires minimal space, and can be harvested repeatedly without replanting.
- Best growing conditions: Full sun; performs exceptionally well in dry, hot, and cool climates.
- Best kitchen-garden system: Vertical towers, grow bags, and shallow raised beds.
- Soil requirements: Well-aerated, sandy loam with a loose, crumbly texture.
- How to plant: Direct transplant from nursery or use onion sets/offsets.
- Spacing: 10 cm apart.
- Watering: Regular, light watering; dry cycles cause tough, fibrous stems.
- Organic feeding: Incorporate composted chicken manure for a nitrogen boost.
- Harvest time: 60 to 70 days.
- How to harvest: Cut off green leaves from the outside, or pull up the entire clump and divide.
- Common pests: Onion thrips.
- Common diseases: Purple blotch and downy mildew.
- Organic/IPM management: Practice crop rotation and avoid overhead sprinkler watering.
- Best tip: You can propagate spring onions from the discarded white root bases of supermarket-bought bunches.
- Spring Onions: Best variety to choose: White Lisbon, a reliable bunching onion suitable for repeated sowing and container production
8. Carrots
- Why grow it: Nutritious root vegetable that is highly rewarding to harvest fresh at home.
- Best growing conditions: Cool to mild climates; hot soil can cause bitter, tough roots.
- Best kitchen-garden system: Deep raised beds (minimum 30 cm depth) or large, deep grow bags.
- Soil requirements: Light, stone-free sandy soil; stones or heavy clay cause carrots to split or fork.
- How to plant: Direct sow seeds in shallow furrows; never transplant carrots.
- Spacing: Thin seedlings to 5 cm apart.
- Watering: Water deeply and evenly to encourage long, straight roots.
- Organic feeding: Avoid fresh manure; high nitrogen causes hairy, misshapen carrots. Use old, well-rotted compost.
- Harvest time: 75 to 90 days.
- How to harvest: Loosen the surrounding soil with a hand fork before pulling by the green top.
- Common pests: Carrot rust fly.
- Common diseases: Leaf blight and cavity spot.
- Organic/IPM management: Cover beds with fine insect netting to prevent the rust fly from laying eggs.
- Best tip: Keep the soil damp during germination, which can take up to 14 days.
- Carrots: Best variety to choose: Nantes, valued for smooth, sweet, cylindrical roots and widely available from Kenyan seed suppliers.
9. Tomatoes
- Why grow it: Unmatched culinary utility; home-grown tomatoes are vastly more flavorful than store-bought ones.
- Best growing conditions: Warm, sunny locations with at least 6 to 8 hours of direct light daily.
- Best kitchen-garden system: Deep, heavy grow bags (minimum 20 liters) or open-ground beds with staking.
- Soil requirements: Fertile, deep, well-draining loam rich in organic matter and calcium.
- How to plant: Sow in trays and transplant when seedlings reach 15 cm height.
- Spacing: 45 cm by 60 cm for determinate (bush) types; indeterminate (vining) types need sturdy stakes.
- Watering: Water the soil deeply at the base; overhead watering encourages fungal leaf blights.
- Organic feeding: Mix bone meal into the soil at planting for calcium, and feed with compost tea during fruiting.
- Harvest time: 75 to 90 days.
- How to harvest: Twist gently or clip the fruit from the vine when fully colored.
- Common pests: Tuta absoluta, whiteflies, and red spider mites.
- Common diseases: Early blight, late blight, and bacterial wilt.
- Organic/IPM management: Use sticky traps for whiteflies and remove infected lower leaves to improve air circulation.
- Best tip: Irregular watering causes calcium deficiency, leading to blossom end rot; keep soil moisture consistent.
- Tomatoes: Best variety to choose: Ansal F1, a productive determinate tomato with strong disease resistance, making it manageable in backyard beds and large grow bags.
10. Capsicum (Bell Peppers)
- Why grow it: High market value, excellent vitamin content, and highly productive in small pots.
- Best growing conditions: Warm, humid to dry climates; highly sensitive to frost.
- Best kitchen-garden system: Medium-sized clay pots, grow bags, or raised beds.
- Soil requirements: Rich, well-drained, sandy loam soil.
- How to plant: Raise in a nursery and transplant.
- Spacing: 40 cm by 45 cm.
- Watering: Keep soil moist; drought causes flower drop and distorted fruits.
- Organic feeding: High potassium demands; apply compost made from fruit wastes or wood ash.
- Harvest time: 80 to 90 days.
- How to harvest: Cut the stem with clean pruning shears to avoid tearing the plant branch.
- Common pests: Aphids, thrips, and broad mites.
- Common diseases: Powdery mildew and anthracnose.
- Organic/IPM management: Spray with copper-based organic fungicides or neem extract.
- Best tip: Stake the branches early as they can snap easily under the weight of heavy peppers.
- Capsicum: Best variety to choose: California Wonder, a widely adapted open-pollinated sweet pepper producing large, blocky fruits.
11. Cabbage
- Why grow it: Excellent storage life, highly filling, and nutritious.
- Best growing conditions: Cool highland zones; experiences severe pest pressure in low-altitude warm areas.
- Best kitchen-garden system: Deep raised beds or large open-ground plots.
- Soil requirements: Highly fertile, moisture-retentive clay loam soils.
- How to plant: Transplant robust seedlings from a shaded nursery.
- Spacing: 45 cm by 45 cm.
- Watering: Heavy, consistent watering; dry periods followed by heavy water cause heads to split.
- Organic feeding: Incorporate heavy amounts of compost and manure before transplanting.
- Harvest time: 85 to 110 days.
- How to harvest: Cut the head off at the base with a sharp knife, leaving the outer leaves.
- Common pests: Diamondback moth and cabbage aphids.
- Common diseases: Black rot and clubroot.
- Organic/IPM management: Apply crop rotation and use neem-based organic insecticides.
- Best tip: Plant companion herbs like rosemary or sage nearby to mask the cabbage smell from moths.
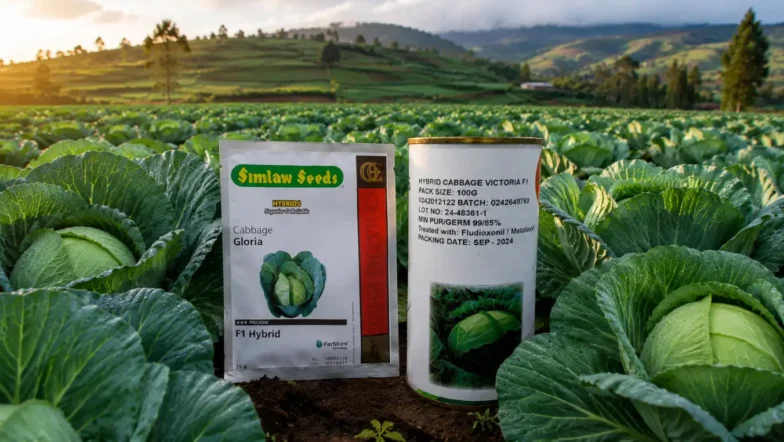
- The best cabbage varieties in Kenya depend on your region and climate, with top-performing hybrid F1 options including Victoria F1, Gloria F1 (or Gloria Star F1), and Kiboko F1.
12. Lettuce
- Why grow it: Rapid maturity, high value for salads, and performs very well in shade.
- Best growing conditions: Cool temperatures; easily turns bitter and runs to seed in hot weather.
- Best kitchen-garden system: Multi-storey garden towers, shallow pots, or vertical bags.
- Soil requirements: Rich, light, sandy loam soil with excellent drainage.
- How to plant: Transplant delicate seedlings or direct sow and thin.
- Spacing: 20 cm by 25 cm.
- Watering: Frequent, shallow watering to keep the shallow roots cool and hydrated.
- Organic feeding: Light, nitrogen-rich organic foliar sprays like seaweed extract.
- Harvest time: 45 to 60 days.
- How to harvest: Pick outer leaves for loose-leaf types, or cut the central head at the soil line.
- Common pests: Slugs, snails, and green peach aphids.
- Common diseases: Bottom rot and lettuce mosaic virus.
- Organic/IPM management: Use drip lines instead of overhead sprinklers to prevent rot.
- Best tip: Plant behind taller crops like tomatoes to shield the lettuce from intense midday sun.
- Lettuce: Best variety to choose: Great Lakes, a proven heading lettuce variety commonly supplied in the Kenyan seed market.
13. Cucumbers
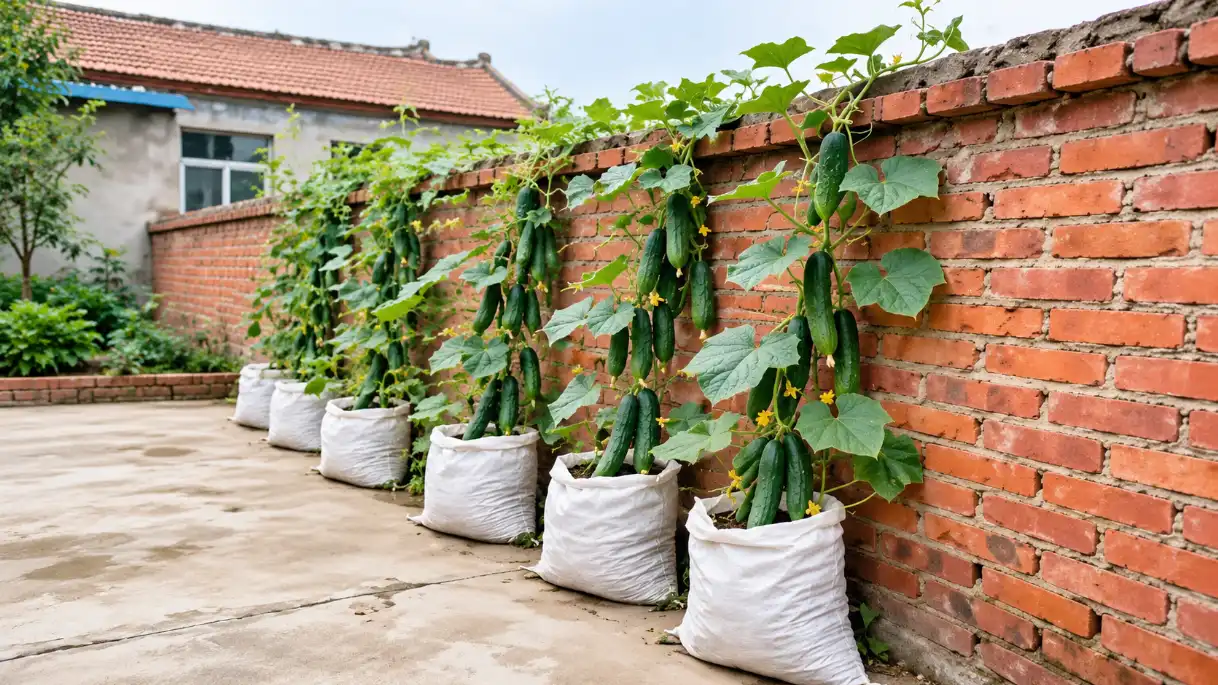
- Why grow it: High water content, refreshing taste, and highly productive when grown vertically.
- Best growing conditions: Warm, sunny, sheltered positions; highly sensitive to cold winds.
- Best kitchen-garden system: Pots with a vertical trellis or boundary wall net.
- Soil requirements: Highly fertile, moist, organic-rich sandy loam.
- How to plant: Direct sow or transplant carefully to avoid root damage.
- Spacing: 30 cm apart along a trellis.
- Watering: Water deeply daily; dry soil makes the cucumbers bitter.
- Organic feeding: Weekly application of diluted organic liquid manure once flowering begins.
- Harvest time: 60 to 70 days.
- How to harvest: Clip fruits when firm and green before they turn yellow and woody.
- Common pests: Melon flies and whiteflies.
- Common diseases: Powdery mildew and downy mildew.
- Organic/IPM management: Wrap young fruits in paper bags to protect them from melon fly egg-laying.
- Best tip: Train vines upwards on a trellis to save valuable ground space and keep fruits clean.
- Cucumbers: Best variety to choose: Ashley, a high-yielding slicing cucumber that performs well when trained vertically in a kitchen garden.
14. Bush Beans
- Why grow it: Beans fix atmospheric nitrogen into the soil, improving fertility for subsequent crops.
- Best growing conditions: Mild to warm climates; do not require trellises.
- Best kitchen-garden system: Raised beds or medium grow bags.
- Soil requirements: Loose, well-draining soil; sensitive to acidic soils (prefers pH 6.0 to 7.0).
- How to plant: Direct sow seeds directly into the soil; beans do not transplant well.
- Spacing: 15 cm by 45 cm.
- Watering: Moderate watering; keep soil moist during flowering and pod development.
- Organic feeding: Low nitrogen requirement; benefit from rock phosphate at planting.
- Harvest time: 55 to 65 days.
- How to harvest: Snap off mature pods gently before the seeds inside bulge too heavily.
- Common pests: Bean fly, aphids, and flower thrips.
- Common diseases: Rust, anthracnose, and common bacterial blight.
- Organic/IPM management: Avoid working in the bean patch when the leaves are wet to prevent disease spread.
- Best tip: Plant beans in sections where you plan to plant heavy feeders like cabbage next.
- Certified bush bean seeds (commonly known locally as dwarf or field beans) are widely available across Kenya from leading seed companies, local agricultural suppliers, and e-commerce platforms.
15. Swiss Chard
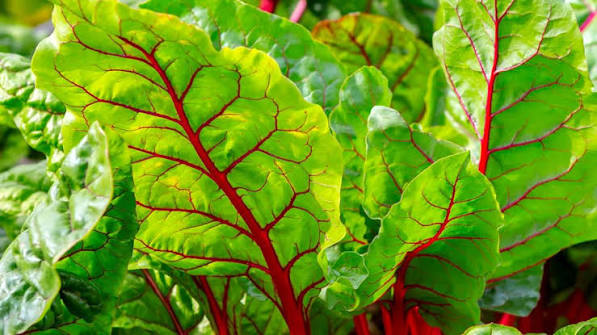
- Why grow it: Colorful, hardy, and highly ornamental while producing huge yields of nutritious leaves.
- Best growing conditions: Performs well in both cold highlands and moderately warm areas.
- Best kitchen-garden system: Multi-storey vertical towers, raised beds, or large pots.
- Soil requirements: Deep, fertile, well-draining loamy soil.
- How to plant: Transplant seedlings raised in seedbeds.
- Spacing: 30 cm by 30 cm.
- Watering: Consistent deep watering to keep stems crisp and juicy.
- Organic feeding: Regular top-dressing with rich vermicompost.
- Harvest time: 50 to 60 days.
- How to harvest: Harvest outer leaves by pulling them downward and outward to snap them clean off the main stem.
- Common pests: Beet armyworms and leaf miners.
- Common diseases: Cercospora leaf spot.
- Organic/IPM management: Remove and destroy leaves showing serpentine leaf miner tunnels.
- Best tip: The stems are edible; cook them like asparagus to reduce kitchen waste.
- Swiss Chard: Best variety to choose: Fordhook Giant, an easy-to-grow, heat-tolerant variety that produces large leaves continuously over a long harvesting period.
16. Red Onions
- Why grow it: Essential dry crop with a long shelf life, saving on daily grocery purchases.
- Best growing conditions: High sun exposure; requires a dry season or dry period for proper bulb curing.
- Best kitchen-garden system: Elevated, well-drained raised beds.
- Soil requirements: Highly friable, loose sandy loam; heavy soils block bulb expansion.
- How to plant: Raise in nursery beds and transplant pencil-thin seedlings.
- Spacing: 8 cm to 10 cm apart.
- Watering: Regular watering until bulbing starts, then reduce watering gradually.
- Organic feeding: Apply well-rotted compost; avoid excess nitrogen which produces thick necks and small bulbs.
- Harvest time: 100 to 120 days.
- How to harvest: Pull bulbs when 70 percent of the green tops fall over naturally; cure in the shade.
- Common pests: Onion thrips.
- Common diseases: Purple blotch and downy mildew.
- Organic/IPM management: Mulch beds to preserve moisture and suppress weeds.
- Best tip: Never bury the transplant too deeply; the bulb should form on the soil surface.
- Red Onions: Best variety to choose: Red Creole, a widely grown open-pollinated red onion known for firm bulbs and good storage.
17. Beetroot
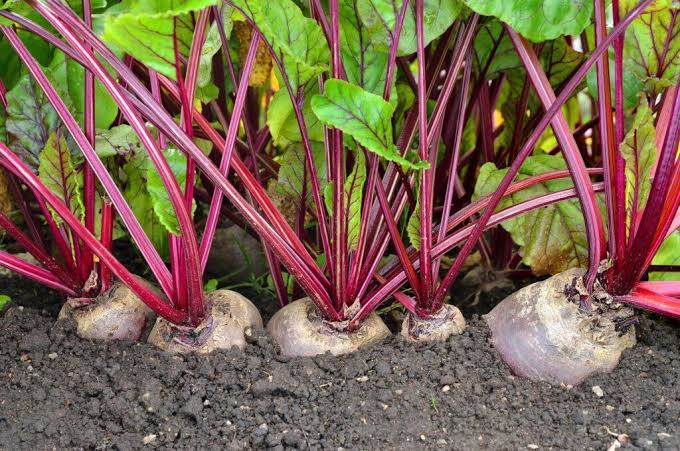
- Why grow it: Highly nutritious roots and edible greens; very easy to grow in home beds.
- Best growing conditions: Cool to mild climates; hot weather causes white zoning rings in the roots.
- Best kitchen-garden system: Deep raised beds or individual grow bags.
- Soil requirements: Loose, non-compacted, compost-rich soil with a neutral pH.
- How to plant: Direct sow; each beetroot “seed” is actually a cluster of 2 to 4 seeds that must be thinned.
- Spacing: Thin seedlings to 10 cm apart.
- Watering: Keep moisture levels even; dry spells followed by sudden heavy watering cause roots to split.
- Organic feeding: Mix wood ash into the soil to provide potassium for root swelling.
- Harvest time: 60 to 75 days.
- How to harvest: Twist off leaves (leaving 2 cm of stem to prevent bleeding) and pull up roots gently.
- Common pests: Beet leaf miners.
- Common diseases: Leaf spot and powdery mildew.
- Organic/IPM management: Rotate beetroot with legumes to maintain balanced soil profiles.
- Best tip: Eat the thinned seedlings as baby greens in salads.
- Beetroot: Best variety to choose: Detroit Dark Red, a reliable variety producing smooth, deep-red roots suitable for home gardens.
18. Courgette / Zucchini
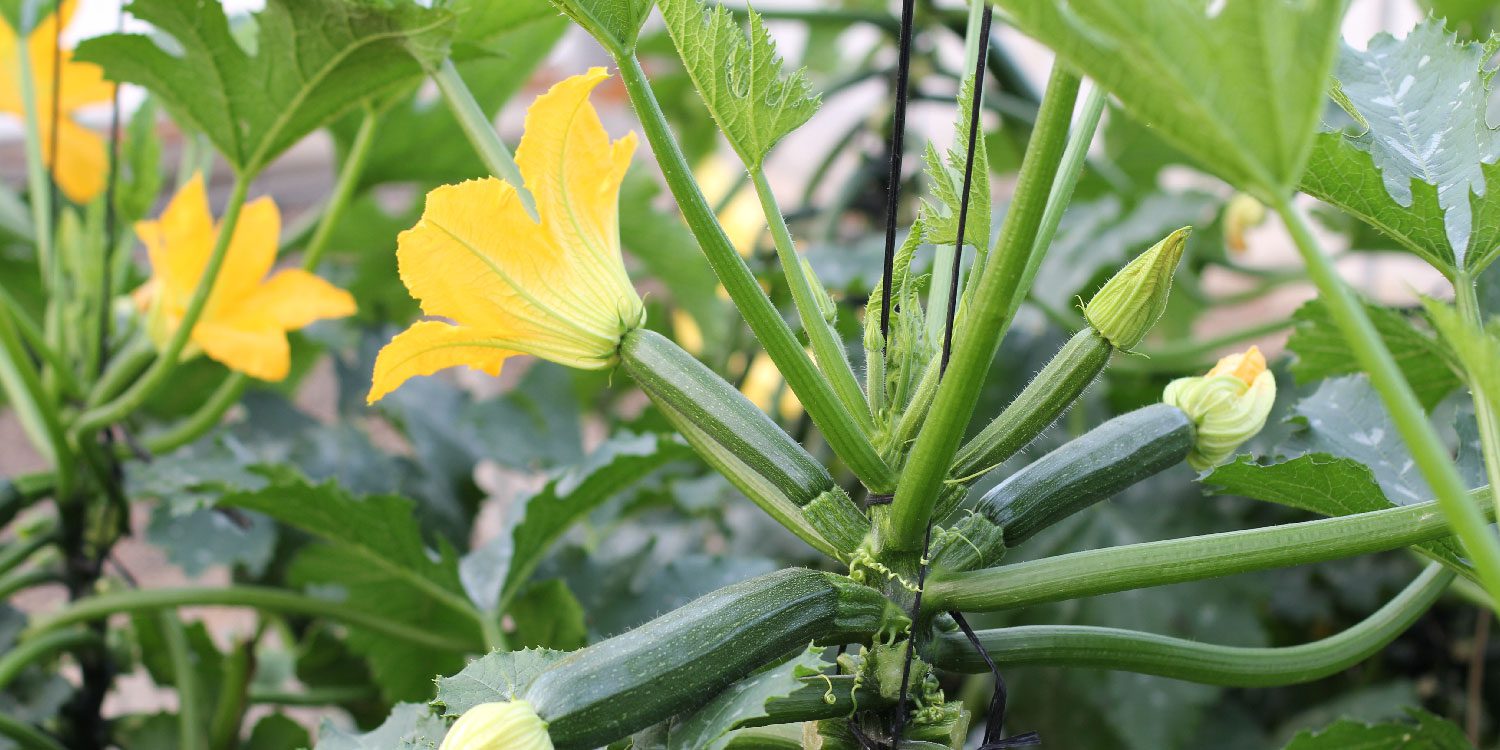
- Why grow it: Highly prolific; a few well-managed plants can easily feed a family.
- Best growing conditions: Warm, sunny, open spaces with minimal humidity to prevent leaf molds.
- Best kitchen-garden system: Large individual tubs (30 liters) or open backyard corners.
- Soil requirements: Extremely rich soil packed with decomposed organic manure.
- How to plant: Direct sow seeds directly into rich soil mounds.
- Spacing: Allow 60 cm to 90 cm of crawling space per plant.
- Watering: Water deeply around the base of the plant twice weekly; keep leaves completely dry.
- Organic feeding: High demands; feed with composted chicken manure or vermicompost every two weeks.
- Harvest time: 50 to 60 days.
- How to harvest: Cut fruits when 15 cm to 20 cm long; larger fruits become woody and lose flavor.
- Common pests: Fruit flies and epilachna beetles.
- Common diseases: Powdery mildew and zucchini yellow mosaic virus.
- Organic/IPM management: Spray with a baking soda and oil mixture to control powdery mildew.
- Best tip: Hand-pollinate the yellow flowers in the morning if fruits turn yellow and drop off without growing.
- Courgette / Zucchini: Best variety to choose: Amanda F1, a courgette variety currently listed for the Kenyan vegetable-seed market.
19. Chinese Cabbage (Pak Choi)
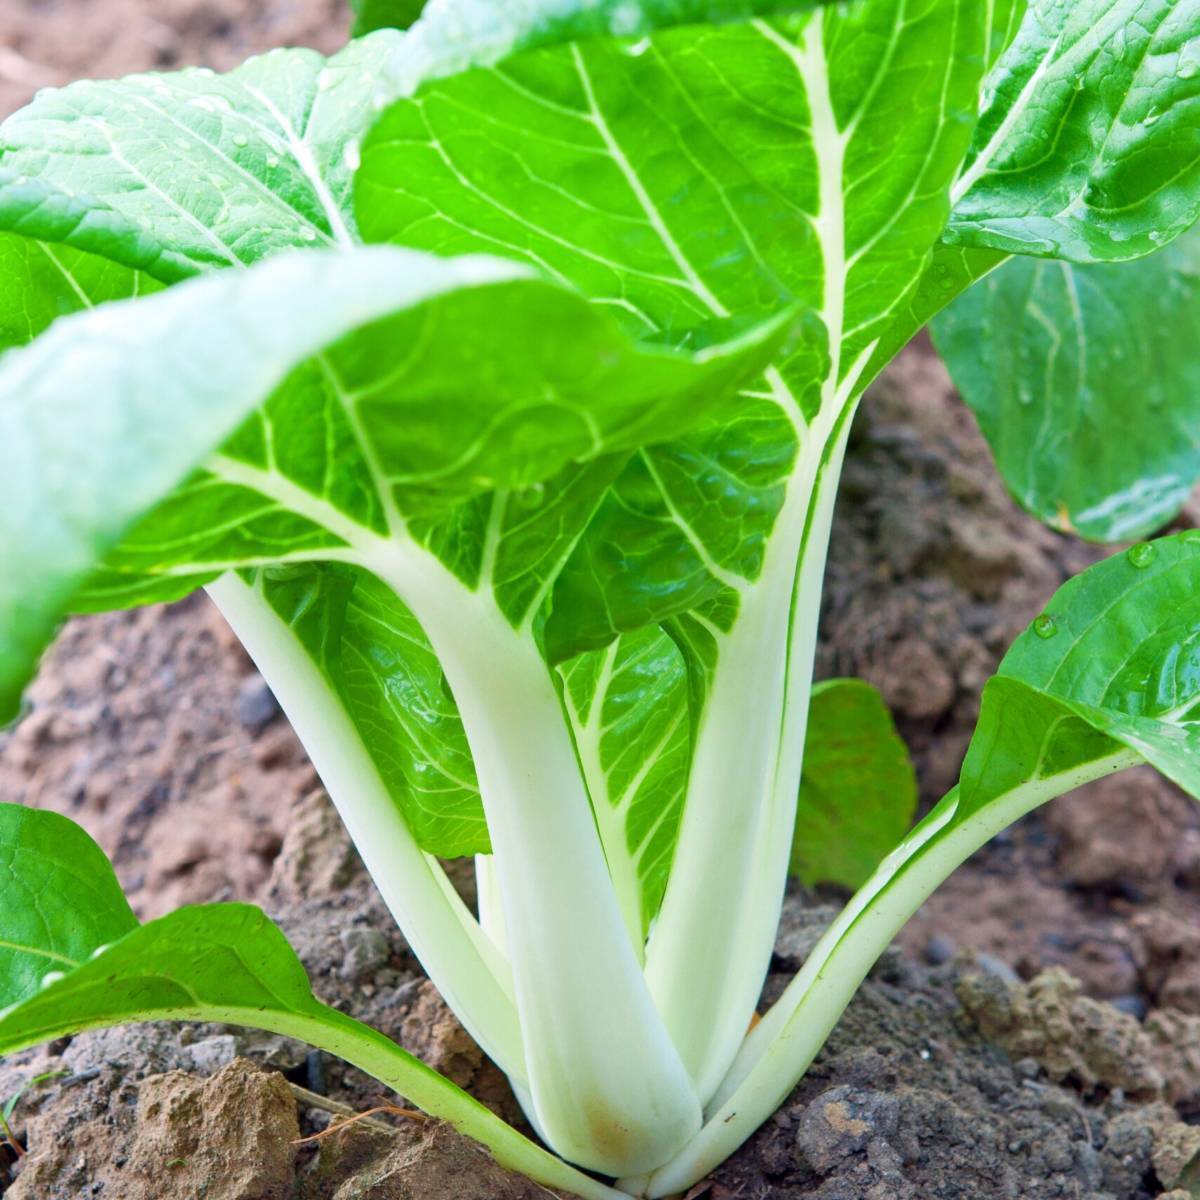
- Why grow it: Matures much faster than standard cabbage and thrives in tight vertical pockets.
- Best growing conditions: Cool climates or partially shaded spots in warmer zones.
- Best kitchen-garden system: Multi-storey towers, grow bags, or shallow raised beds.
- Soil requirements: Moist, rich, fertile loam.
- How to plant: Transplant young, vigorous seedlings.
- Spacing: 20 cm apart.
- Watering: Regular watering is essential to prevent early bolting.
- Organic feeding: Feed with liquid manure once a week.
- Harvest time: 55 to 70 days.
- How to harvest: Cut the entire head at the base, or harvest outer leaves continuously.
- Common pests: Flea beetles and caterpillars.
- Common diseases: Clubroot and downy mildew.
- Organic/IPM management: Use neem sprays and physical insect barriers.
- Best tip: Grow this crop during the rainy season when natural humidity is high.
- Chinese Cabbage: Best variety to choose: Michihili, a fast-growing Chinese cabbage variety already supplied in the Kenyan seed market.
20. African Eggplant (Gboma)
- Why grow it: A hardy, bitter-sweet traditional vegetable that acts as a perennial in frost-free regions.
- Best growing conditions: Hot, humid, or dry climates; thrives under strong sunlight.
- Best kitchen-garden system: Deep containers or raised garden beds.
- Soil requirements: Well-drained loam soil rich in organic matter.
- How to plant: Sow in a nursery and transplant when seedlings have 5 leaves.
- Spacing: 40 cm by 50 cm.
- Watering: Drought-tolerant but produces tender fruit with weekly deep watering.
- Organic feeding: Apply organic compost and mulch around the base.
- Harvest time: 75 to 90 days.
- How to harvest: Clip mature yellowing or green-yellow fruits depending on local varieties.
- Common pests: Spider mites and shoot borers.
- Common diseases: Verticillium wilt.
- Organic/IPM management: Rotate with non-solanaceous crops (avoid planting after tomato or potato).
- Best tip: Prune old, non-bearing branches to stimulate fresh, productive flushes of leaves and fruit.
- Chinese Cabbage: Best variety to choose: Michihili, a fast-growing Chinese cabbage variety already supplied in the Kenyan seed market.
- African Eggplant: Best variety to choose: Tengeru White, a Solanum aethiopicum African eggplant suitable for East African conditions.
Which Vegetables Are Best for Beginners?
Beginners should start with hardy, fast-growing crops that tolerate minor management errors. Sukuma wiki, spinach, terere, managu, and spring onions are ideal because they tolerate irregular watering better than delicate crops like tomatoes.
Starting with highly demanding crops like tomatoes or capsicums often leads to frustration for first-time gardeners. These plants require precise staking, pruning, and consistent calcium feeding to avoid blossom end rot. Leafy indigenous crops, on the other hand, adapt easily to local conditions and recover quickly from minor watering omissions.
Read Also: Cabbage Farming in Kenya 2026: Profit & Fertilizer Guide
Staggering your plantings with easy greens like spinach or spring onions builds your confidence. As you develop a regular watering and feeding routine, you can gradually introduce more sensitive fruiting plants into your garden plan.
Best Vegetables for Small Kenyan Spaces
Match crop rooting and canopy habits to your specific living setup. Balconies suit shallow pots with herbs, whereas narrow backyard lanes can be highly productive when fitted with vertical grow bags or multi-storey garden towers.
Balcony Gardens
In apartments across Nairobi or Mombasa, balcony gardeners should focus on shallow-rooted, compact crops. Dhania, loose-leaf lettuce, spring onions, dwarf chilies, and Swiss chard perform exceptionally well in window boxes and hanging pots. Ensure the balcony receives at least 4 hours of daylight, and rotate your containers regularly so all plants get equal sun exposure.
Tiny Compounds
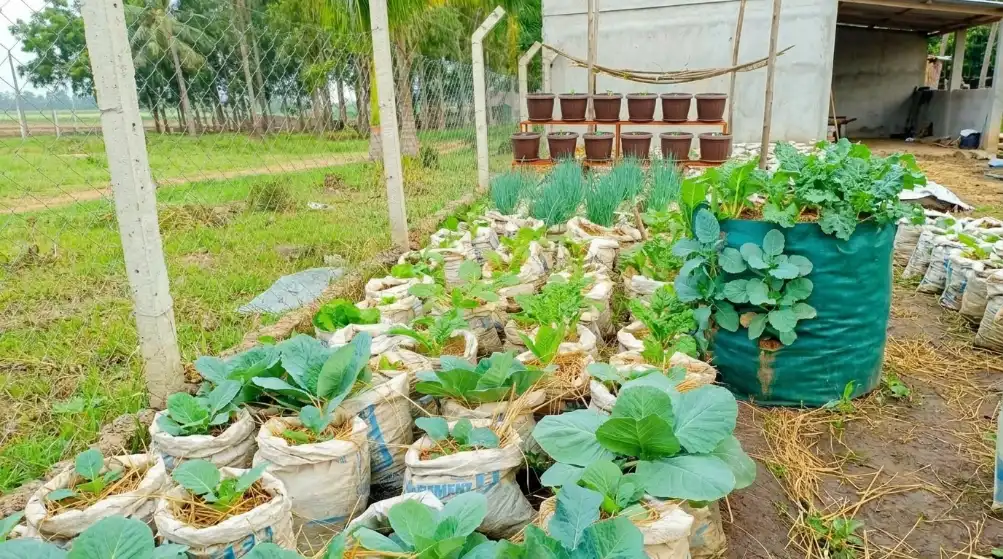
For paved or small courtyard homes, vertical cultivation maximizes your physical footprint. Utilizing white UV-treated grow bags or vertical net bags lets you grow dozens of plants in a single square meter. Grow bags can be arranged along perimeter walls to capture maximum sunlight while keeping your central walkways clear.
Normal Backyard Gardens
If you have a small patch of soil, raised wooden beds combined with trellising are highly effective. You can plant root crops like carrots and beetroot in the beds, while training cucumbers and vining tomatoes upward on frames. This vertical arrangement keeps leaves off the damp ground, reducing fungal diseases and making harvesting much easier.
Choosing the Right Kitchen Garden System
The right garden system depends on your local space constraints, soil quality, and water availability. Raised beds are ideal for root vegetables, while vertical towers and UV grow bags offer excellent water efficiency and pest management in small spaces.
Using the correct growing system directly affects how much water and soil nutrients your crops can access. The table below outlines how common domestic systems compare across key management metrics.
| System Type | Space Efficiency | Water Consumption | Soil Volume Needed | Best Crop Types | Mobility |
|---|---|---|---|---|---|
| Open-Ground Beds | Low | High | Unlimited | Root crops, brassicas, legumes | Fixed |
| Raised Wooden Beds | Medium | Medium | High | Carrots, beetroot, cabbage, onions | Fixed |
| White UV Grow Bags | High | Low | Medium | Tomatoes, capsicum, eggplants | Highly Mobile |
| Vertical Net Bags | Very High | Low | Low | Spinach, dhania, strawberries | Semi-Mobile |
| Multi-Storey Towers | Extremely High | Very Low | High (Central core) | Sukuma wiki, lettuce, managu | Fixed |
| Wick Containers | High | Extremely Low | Low | Herbs, mint, spring onions | Highly Mobile |
Growing Vegetables in White UV-Treated Grow Bags
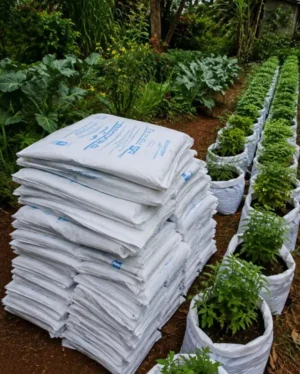
White UV-treated grow bags reflect intense solar heat to prevent root damage, and they feature built-in drainage holes to stop waterlogging. Fill them with a loose loam, compost, and manure mix to create an ideal environment for heavy feeders.

Unlike standard black plastic bags, which absorb heat and can cook delicate plant roots in hot weather, white UV-treated grow bags reflect sunlight. This keeps root zones at a stable, cool temperature, which is essential for consistent nutrient uptake. These bags are constructed from thick, durable plastic designed to withstand several seasons of direct exposure to the sun.
When setting up your grow bags, place them in their permanent positions before filling them, as they become heavy and difficult to move once wet. Fill the bottom 5 cm of the bag with clean gravel or small stones to help water drain freely and prevent the soil mix from compacting over time.
Leave a 5 cm gap at the top of the bag when filling it with soil. This space acts as a water reservoir, allowing moisture to soak deep into the roots rather than spilling over the sides during watering. Apply a layer of organic mulch, like dry grass, over the soil surface to reduce evaporation.
Growing Vegetables in Vertical Net Grow Bags
Vertical net bags feature multiple pre-cut side planting pockets around a central soil column. This space-saving design is highly effective for growing leafy greens like spinach, kale, and strawberries on sunny walls or balconies.
Vertical net bags allow you to grow crops vertically, making them highly efficient for small spaces. The outer net supports the internal soil column, preventing it from bulging or sagging. Plants grow out through side pockets, keeping their leaves clean and off the soil, which helps prevent soil-borne diseases.
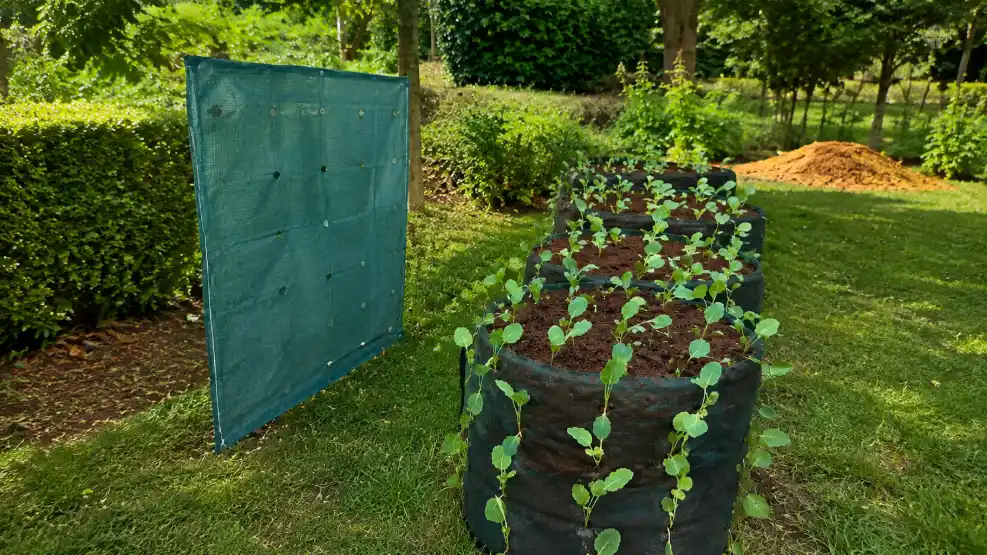
To fill a net bag evenly, insert a rigid plastic pipe (about 3 inches wide) down the center of the bag. Pack your soil mix firmly around the pipe, and fill the inside of the pipe with coarse sand or small gravel. Once filled, slide the pipe out, leaving a central drainage and watering channel that distributes moisture evenly from top to bottom.
Plant small, healthy seedlings into the side pockets, ensuring their roots point slightly downward into the main soil column. Water the bag from the top, allowing the moisture to filter down through the central gravel core to reach every pocket without washing the soil out.
Growing Vegetables in Multi-Storey Vertical Garden Towers
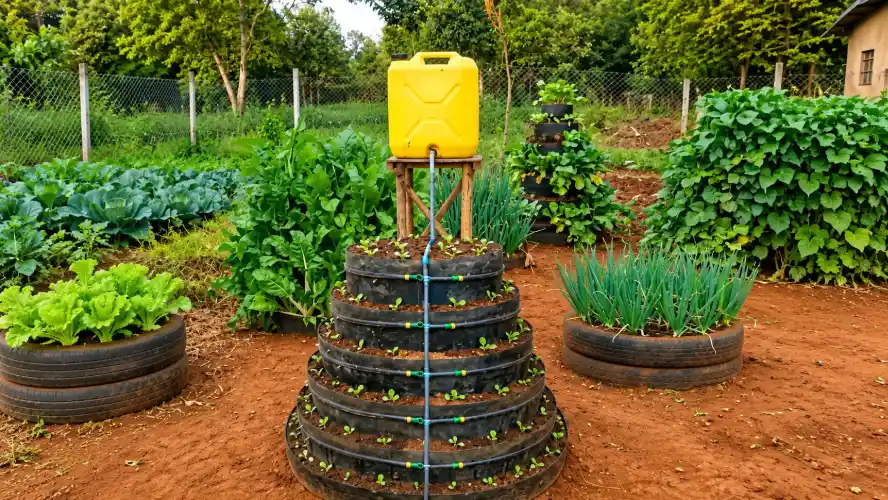
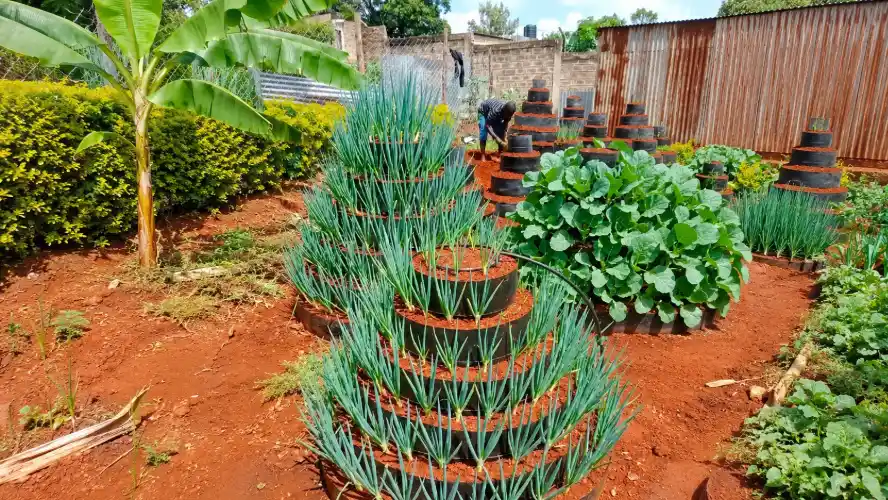
Multi-storey garden towers are space-saving structures that hold up to 100 plants in a single square meter. They use a central core filled with gravel or compost to distribute water and nutrients evenly across multiple vertical planting tiers.
Multi-storey vertical garden towers are highly popular for urban kitchen gardens in Kenya. They consist of stacked circular tiers made of durable, UV-resistant plastic or heavy duty canvas. These systems can hold dozens of plants, making them ideal for growing leafy greens like sukuma wiki, spinach, and managu.
To ensure even growth, place your vertical tower in a spot that gets at least 6 hours of daily sunlight. Because plants on the shady side can grow slower, choose a tower design that can be rotated easily, or place shade-tolerant crops like lettuce and celery on the side facing away from the afternoon sun.
Vertical towers require regular, balanced nutrient inputs since their soil volume is limited. Feed your tower weekly with compost tea or diluted organic liquid manure poured directly into the watering tube, ensuring nutrients reach every level of the tower.
Where to Buy Seeds, Seedlings, and Grow Bags
Buy certified vegetable seeds from licensed local agrovets or established suppliers like Simlaw Seeds. For high-quality white UV-treated grow bags, vertical net bags, and multi-storey vertical garden towers, order directly from Crazy Kanairo Farming.
Starting with high-quality seeds and materials is essential for a successful, high-yielding kitchen garden. When buying seeds, always check the packaging date and purchase from licensed dealers to ensure high germination rates and healthy plants.
To help you get started, Crazy Kanairo Farming offers a wide selection of durable, space-saving kitchen gardening supplies designed for urban homes, including:
- White UV-treated grow bags in various sizes
- Vertical net bags for space-saving side planting
- Multi-storey vertical garden towers
- Seedling trays, potting soils, and organic fertilizers
You can view and order our complete selection of premium kitchen gardening products online at: https://crazykanairofarming.com/products/
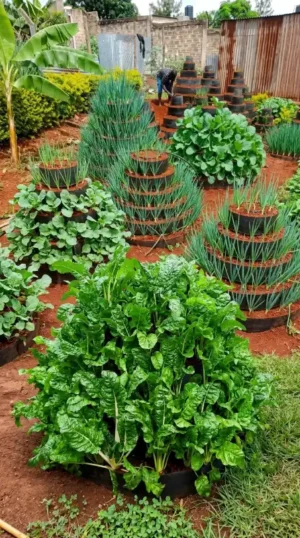
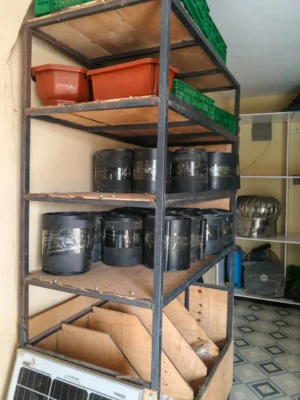
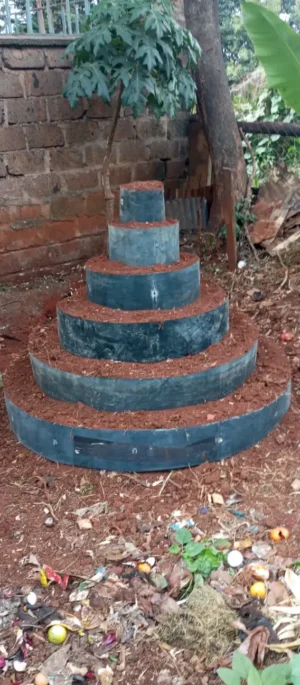
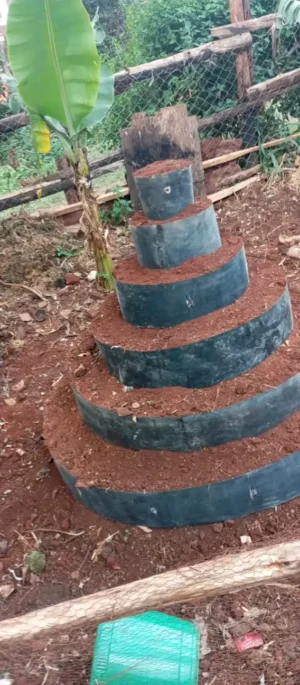
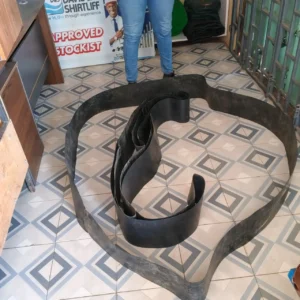

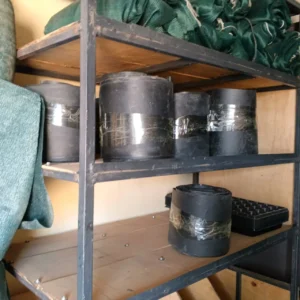
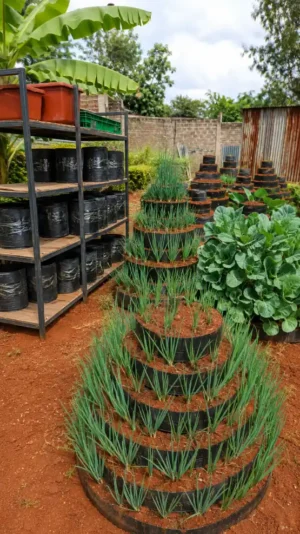
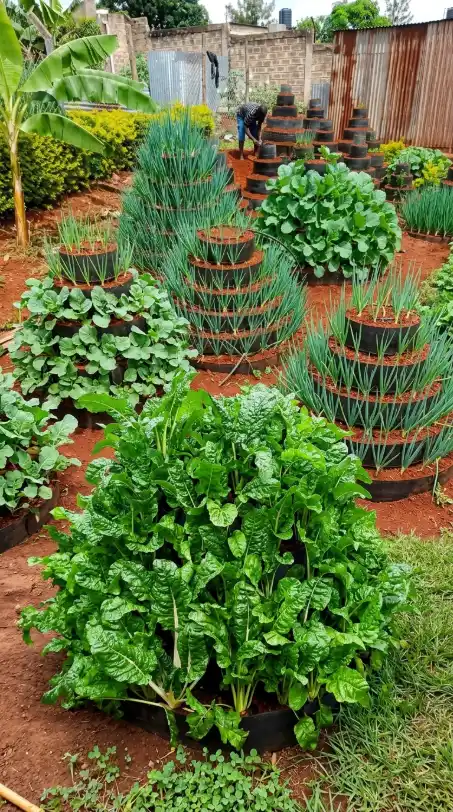
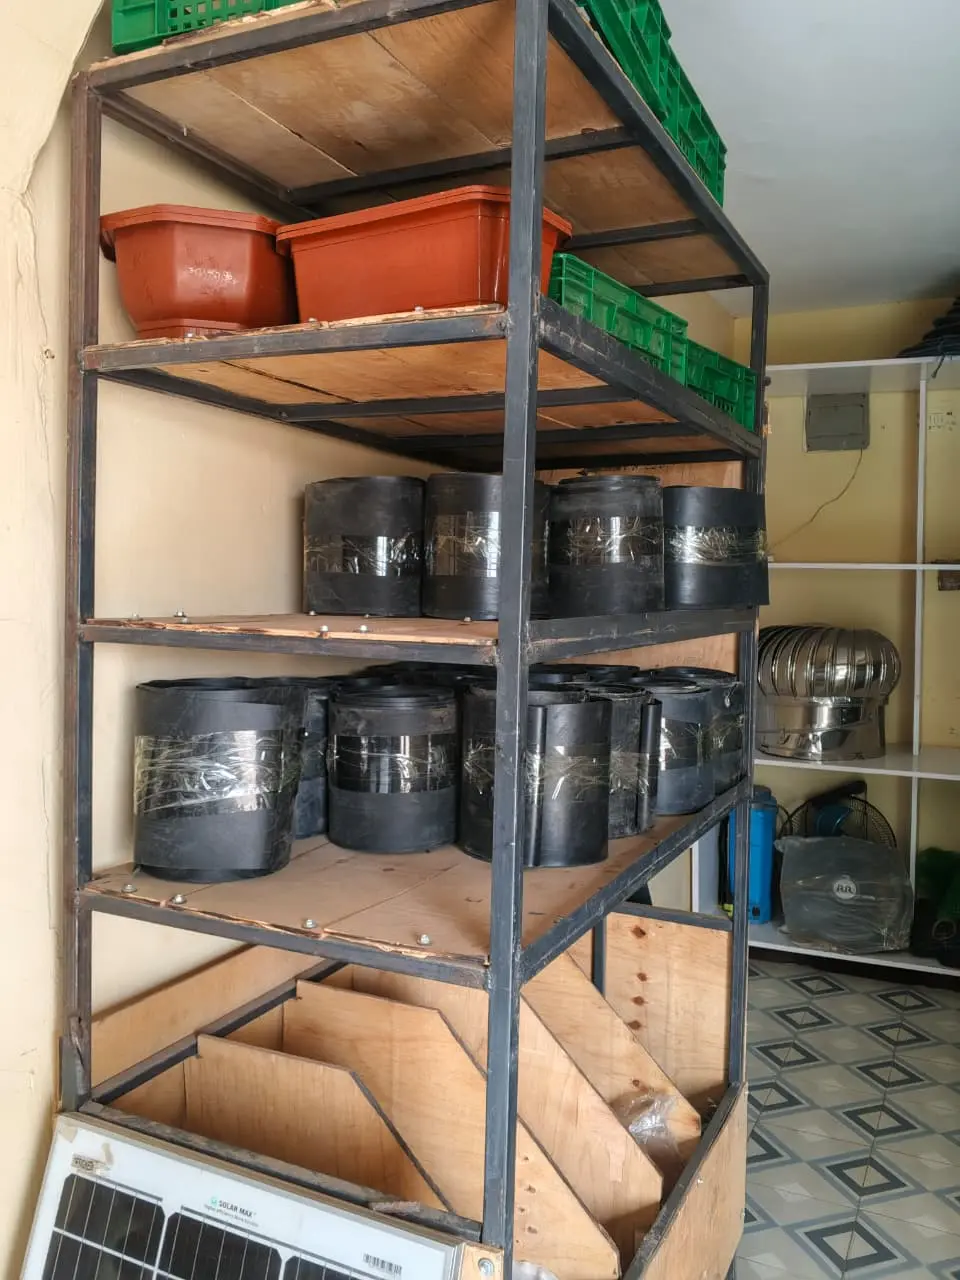
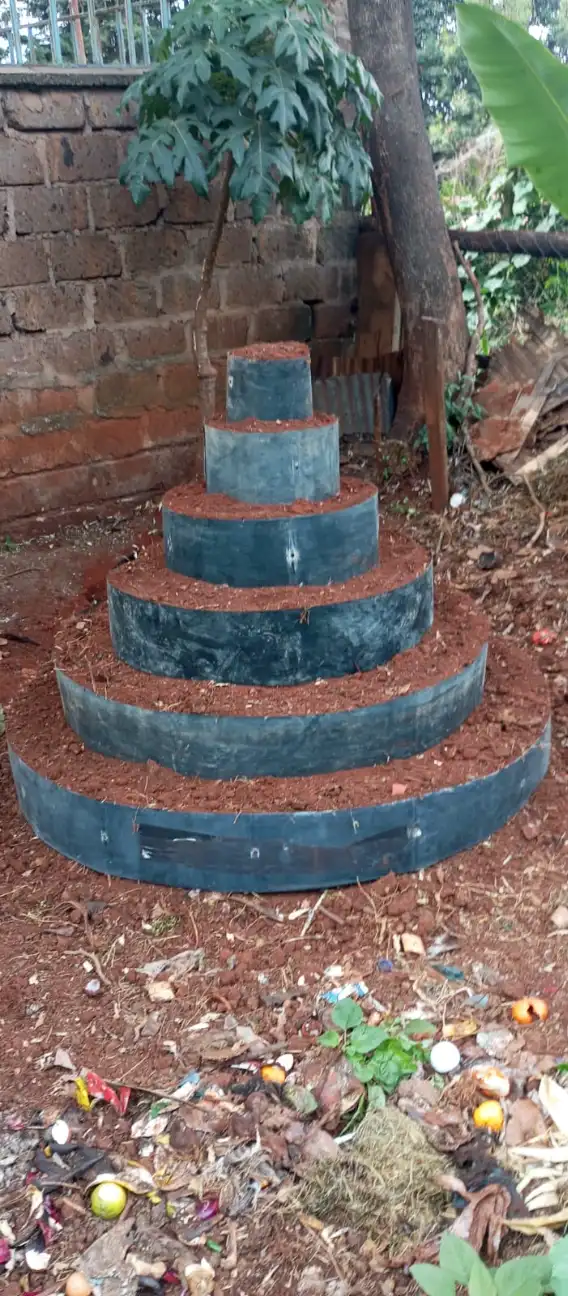
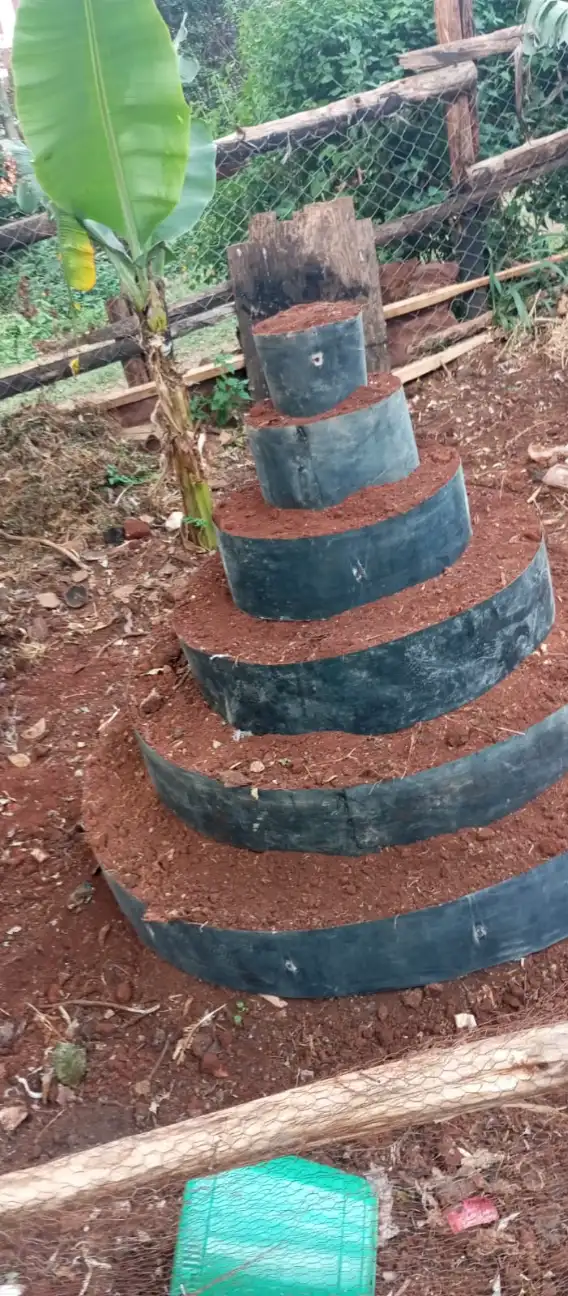
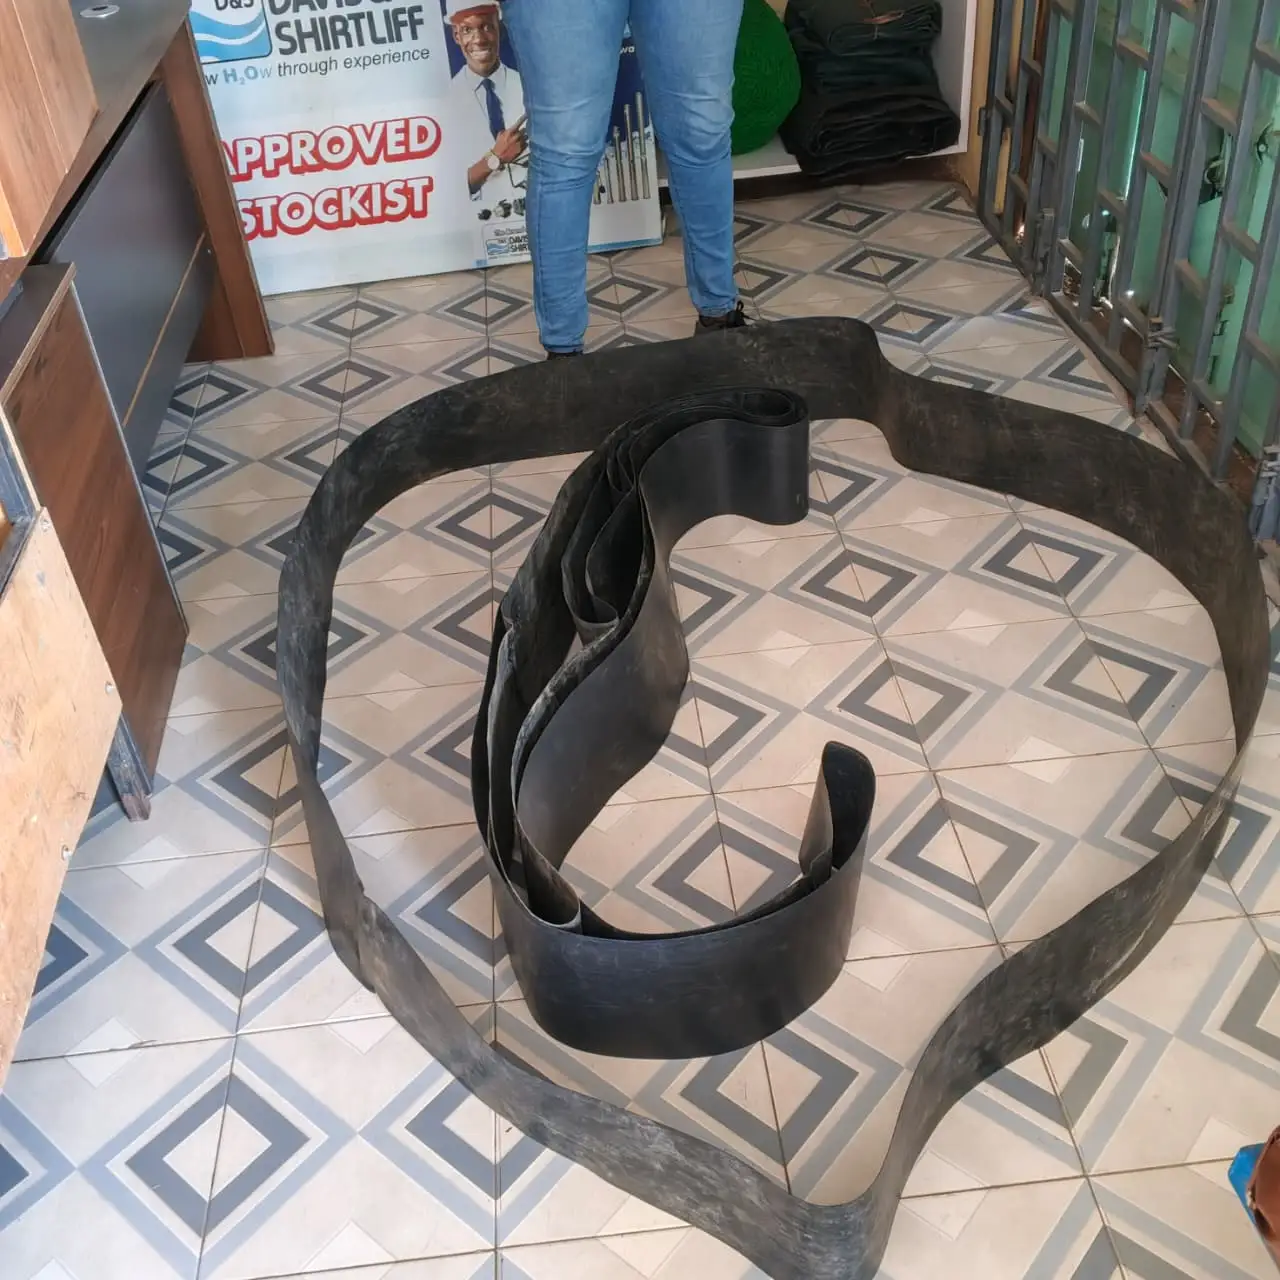
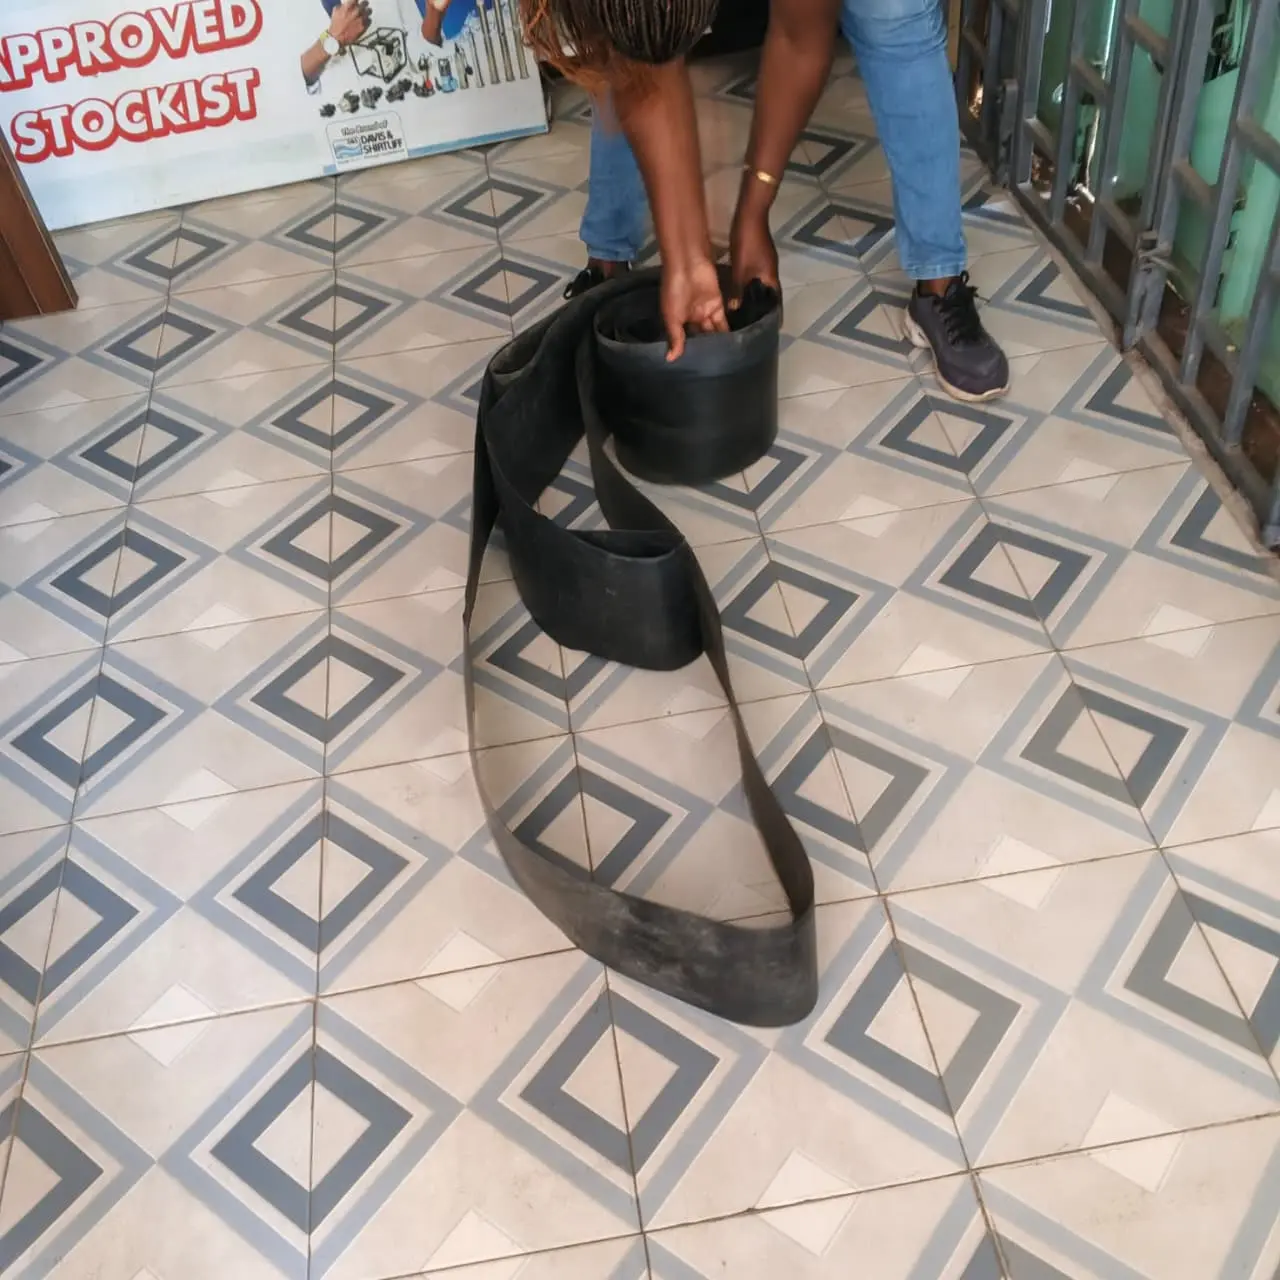
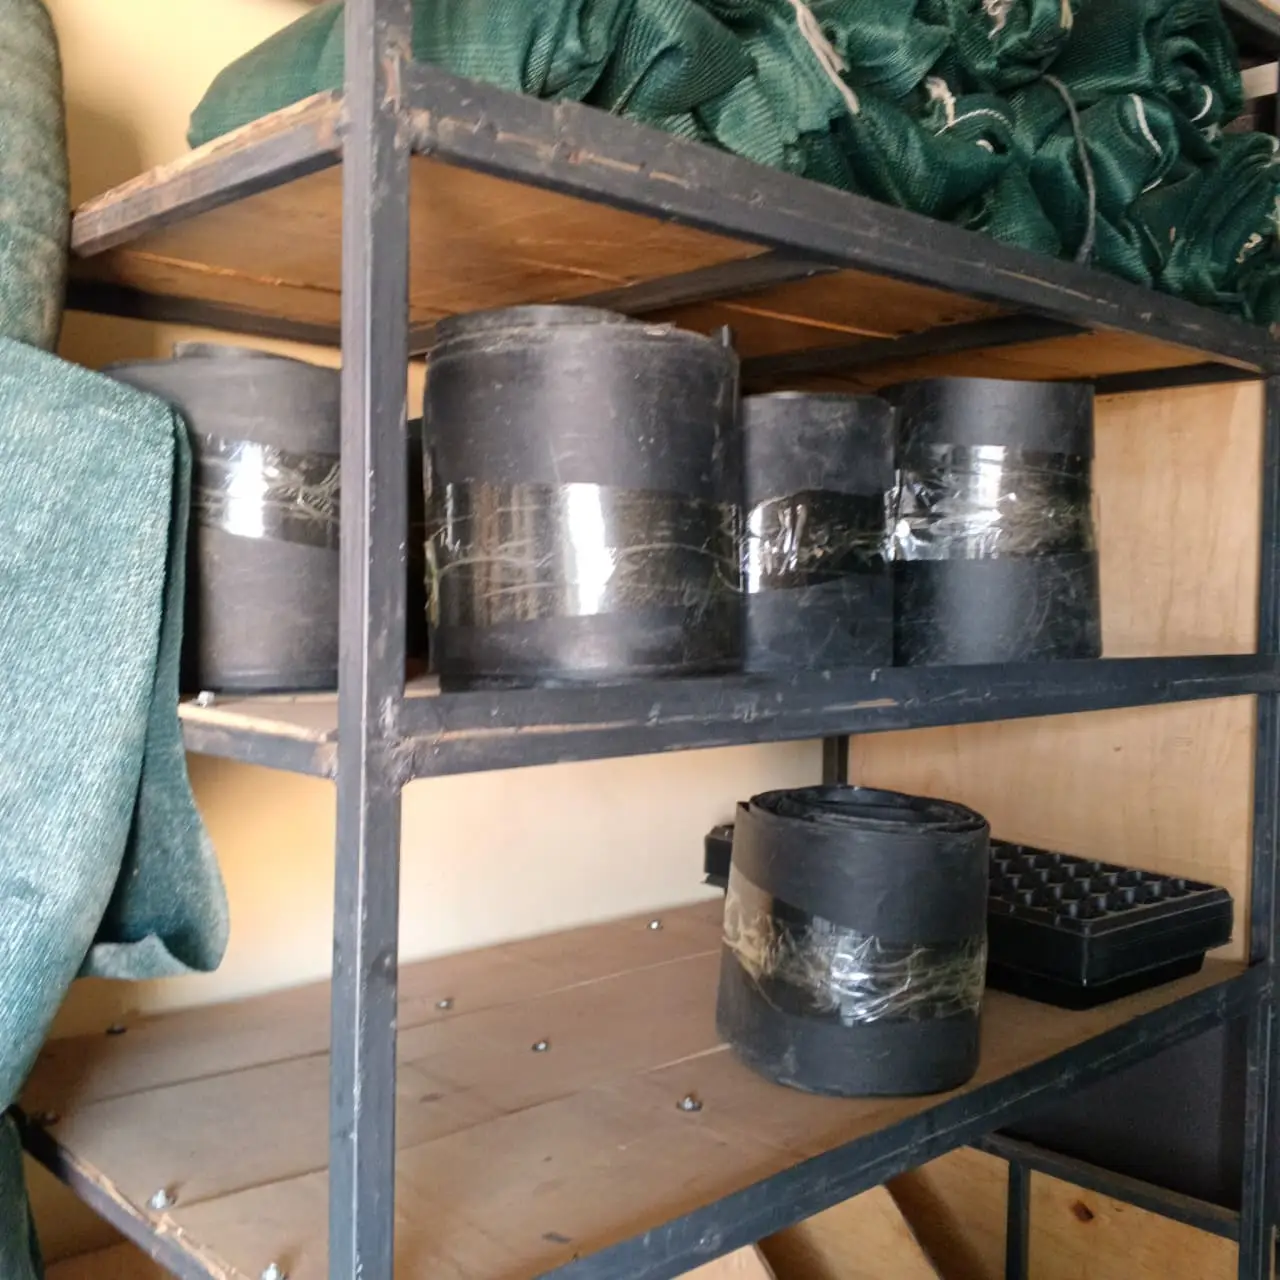
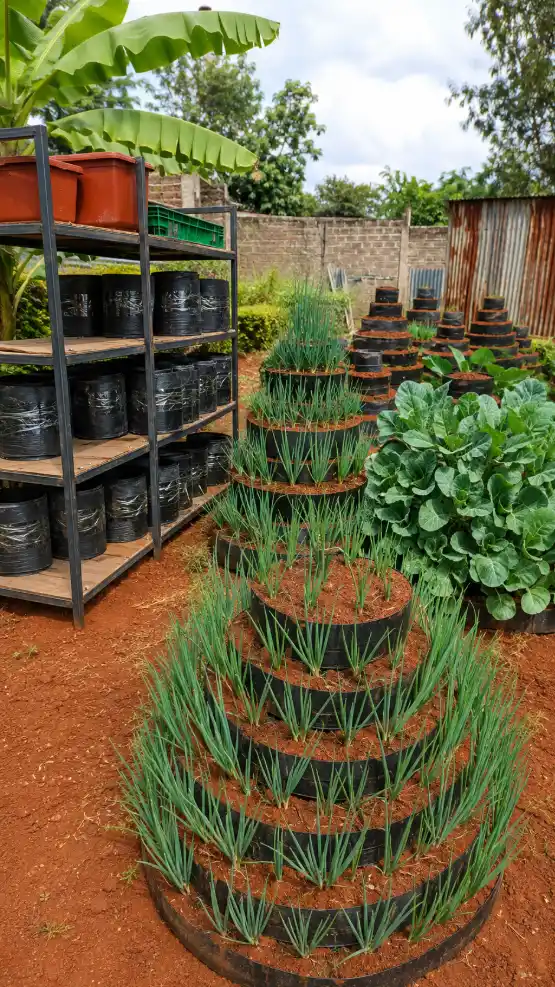
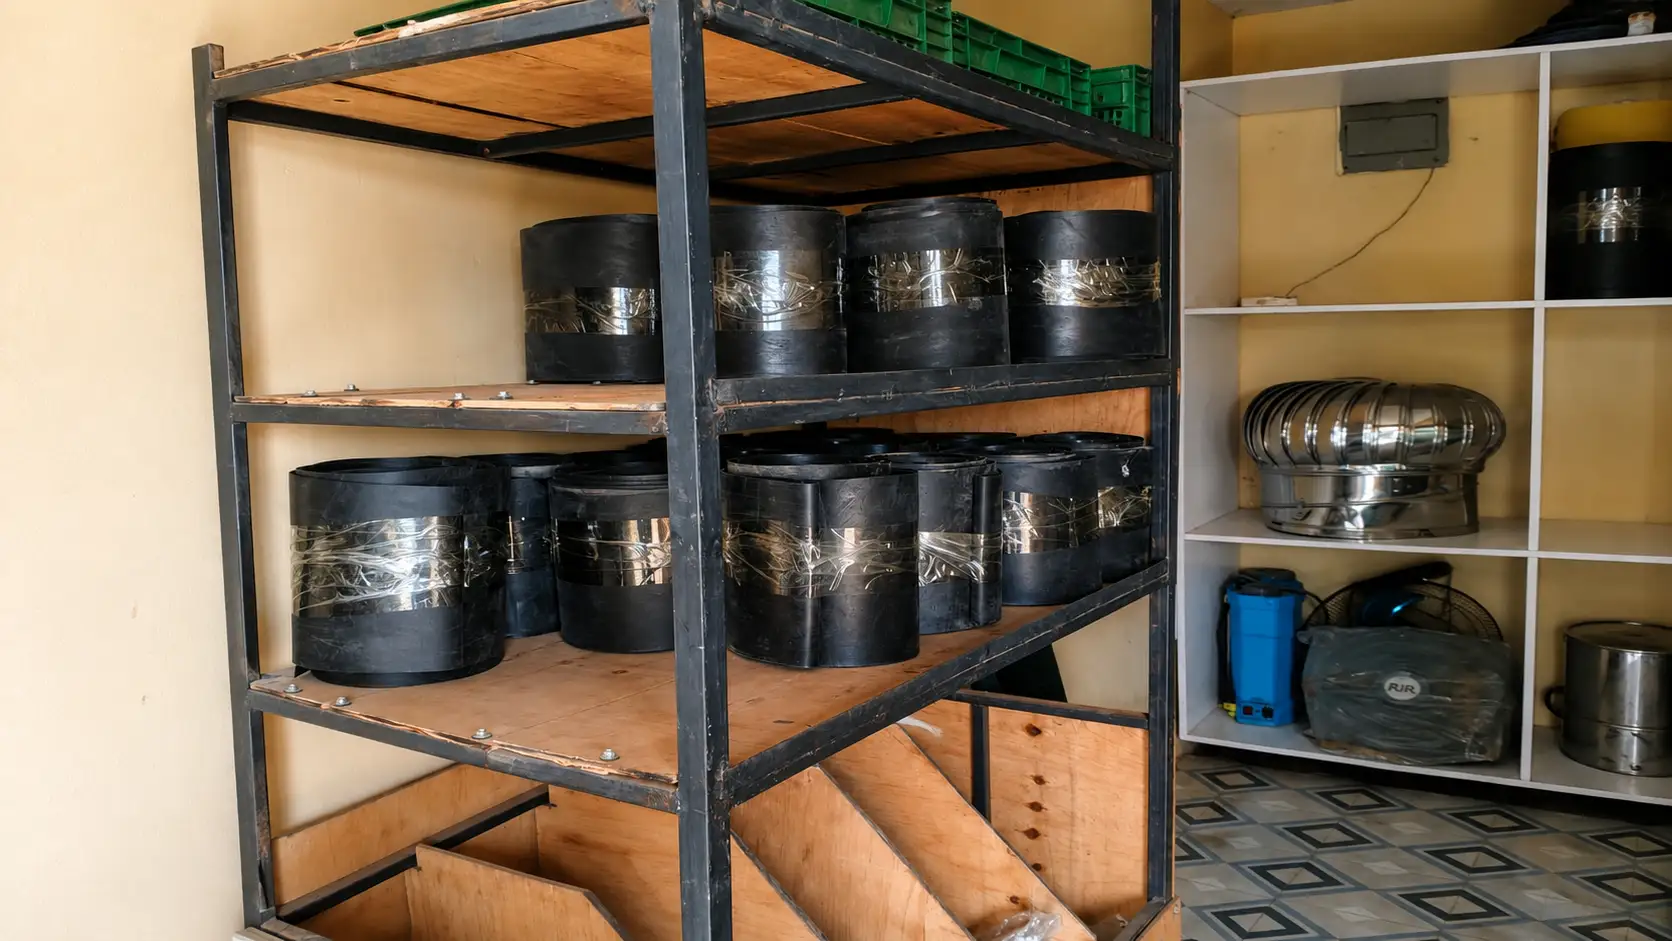
6 Layer Vertical Multi-Storey Garden System in Kenya | Buy Space-Saving Garden Planters
Maximize your harvest with our 6 Layer Vertical Multi-Storey Garden System made from premium 1mm UV-stabilized HDPE. Designed for homes, apartments, schools, hotels and commercial farms, this space-saving vertical garden helps you grow more vegetables, herbs and flowers in a compact area while promoting healthy plant growth. Perfect for urban farming and kitchen gardening across Kenya. | KSh 1750 Per Unit.
https://www.youtube.com/shorts/zBARDRsPEI8
Best Soil for a Kitchen Garden in Kenya
The ideal vegetable soil must balance moisture retention, drainage, and structural support while hosting beneficial microbes. Mix red topsoil, well-decomposed animal manure, compost, and sand or coco peat to create a loose, highly fertile growing medium.
Vegetables need a loose, well-aerated soil structure to grow strong, healthy roots. Heavy clay soils (like black cotton soil found in parts of Nairobi or Athi River) hold too much water, suffocating roots and causing root rot. Conversely, sandy soils (common in coastal areas) drain too quickly, washing away essential nutrients before plants can absorb them.
Read Also: How to Build a Vertical Garden Using Banana Stems: Step-by-Step Guide for Growing Vegetables
Healthy soil should feel light and crumbly when damp, holding its shape when squeezed but breaking apart easily when tapped. Adding organic compost introduces beneficial microbes that break down nutrients, making them easily available to your plants.
Practical Soil Mixes for Different Vegetables
Tailor your soil mixes to suit specific crop types: leafy greens require high nitrogen compost, root crops need light, sand-rich soil, and vertical systems benefit from lightweight materials like coco peat to ensure proper drainage.
Using a single soil mix for all crops often leads to poor results, as different vegetables have unique structural and nutritional needs. The guidelines below will help you prepare the best soil mix for each vegetable group:
- Leafy Greens (Sukuma Wiki, Spinach, Indigenous Greens): Mix 2 parts red topsoil, 2 parts well-decomposed chicken manure, and 1 part compost. This mix provides the high nitrogen levels needed for healthy, green leaves.
- Fruiting Crops (Tomatoes, Capsicums, Eggplants): Combine 2 parts topsoil, 1 part well-decomposed cow manure, 1 part compost, and half a part of agricultural lime or bone meal. The added calcium helps prevent blossom end rot.
- Root Crops (Carrots, Beetroots): Mix 1 part topsoil, 1 part fine river sand, and 1 part mature, well-sifted compost. Keep this mix completely free of stones and fresh manure to prevent roots from splitting or forking.
- Vertical Garden Towers and Grow Bags: Mix 2 parts topsoil, 2 parts coco peat (or well-weathered sawdust), 1 part compost, and 1 part well-decomposed goat manure. The coco peat keeps the system lightweight and improves water retention.
Why You Should Never Use Fresh Manure Directly
Fresh animal manure contains high levels of ammonia, which can burn tender plant roots, and it often carries weed seeds and harmful pathogens. Always compost manure for at least 3 to 6 months until it turns into a dark, odorless, crumbly soil conditioner.
Using fresh, uncomposted manure is a common mistake that can easily ruin a kitchen garden. As fresh manure breaks down in the soil, it generates intense heat and releases ammonia gas, which can damage or kill delicate seedling roots. This process also temporarily strips nitrogen from the surrounding soil, causing leaves to turn yellow and stunts plant growth.
Additionally, fresh manure from grass-fed livestock often contains viable weed seeds and harmful bacteria like E. coli. Composting manure properly allows the pile to reach temperatures high enough to kill these pathogens and weed seeds, turning the manure into a safe, nutrient-rich organic fertilizer.
How to Make Compost for Your Kitchen Garden
Compost is made by layering green nitrogen-rich materials with brown carbon-rich materials. Maintain a damp-sponge moisture level and turn the pile every two weeks to produce rich, dark organic compost within 8 to 12 weeks.
Making compost at home is an easy way to recycle kitchen and garden waste into rich organic nutrients. To start, find a shaded corner in your yard or use a large plastic compost bin with aeration holes. A successful compost pile relies on a balanced mix of “greens” and “browns.”
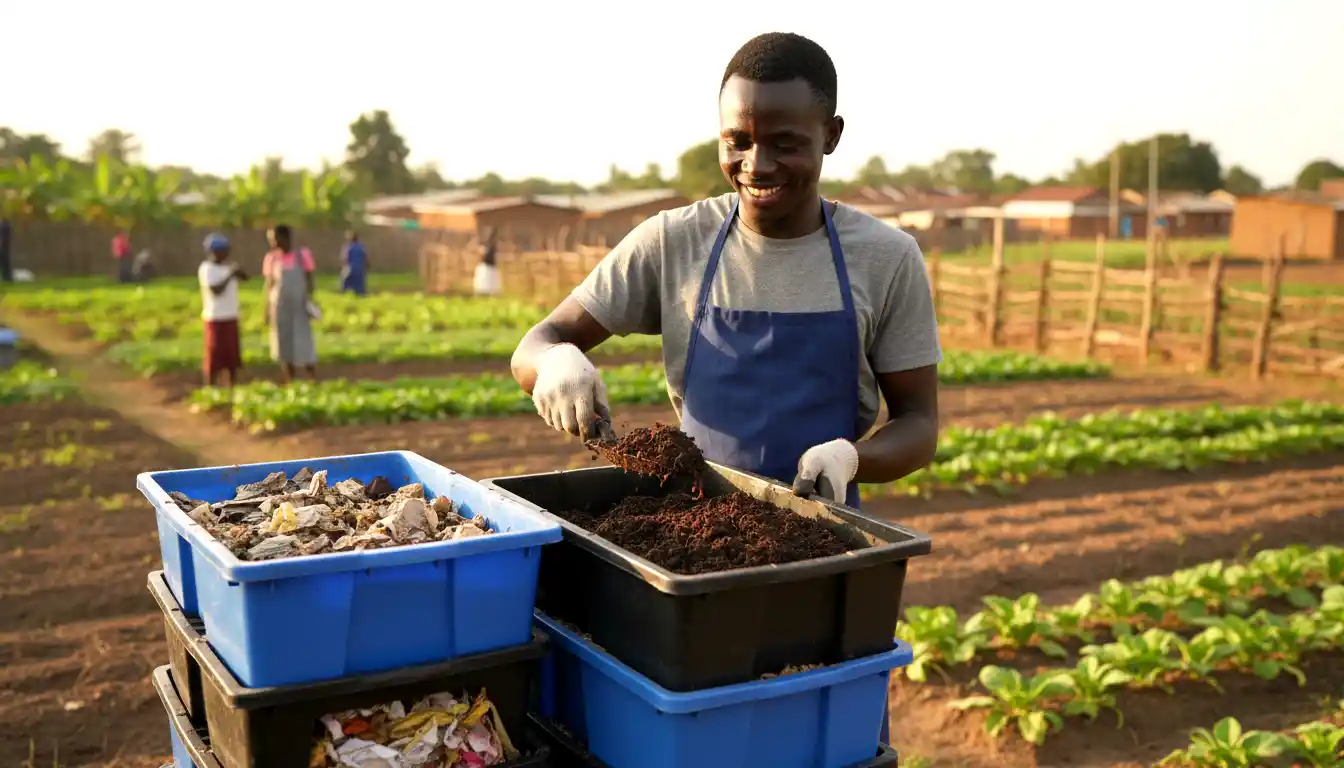
Follow these simple steps to build your compost pile:
- Layer the base: Place a 10 cm layer of coarse twigs or dry corn stalks at the bottom of the pile to allow air to circulate from below.
- Add Greens (Nitrogen): Add a 10 cm layer of kitchen vegetable scraps, fresh grass clippings, or green garden trimmings.
- Add Browns (Carbon): Cover with a 10 cm layer of dry leaves, shredded cardboard, straw, or sawdust.
- Moisten and repeat: Sprinkle each layer with water until it feels as damp as a wrung-out sponge. Repeat these layers until your pile is about 1 meter high.
- Turn the pile: Turn the heap every two weeks with a garden fork to mix the materials and introduce oxygen, which speeds up decomposition.
Your compost is ready when it turns dark, crumbly, and smells like fresh, earthy soil. Use it to top-dress your garden beds or mix it directly into your container potting soils.
Organic Fertility Management
Organic feeding focuses on building long-term soil health rather than just feeding the plant directly. Use compost, vermicompost, wood ash, and liquid feeds like compost tea or seaweed extracts to supply balanced, slow-release nutrients.
Synthetic chemical fertilizers can damage soil structure and kill beneficial soil organisms over time. Organic fertility management, on the other hand, feeds the microbes in the soil, which in turn break down organic matter into easily absorbable nutrients for your plants.
To supply essential nutrients organically, use these natural sources:
- Nitrogen (N) for Leaf Growth: Use well-decomposed poultry manure, stinging nettle tea, or blood meal.
- Phosphorus (P) for Root Development: Use bone meal or rock phosphate mixed into the soil at planting time.
- Potassium (K) for Flowers and Fruit: Mix wood ash into the soil or spray plants with comfrey leaf liquid extract.
How to Water a Kitchen Garden Correctly
Water your garden deeply in the early morning to minimize evaporation and give leaves time to dry. Use drip irrigation or a watering can with a rose nozzle, directing water to the base of the plants to prevent fungal diseases.
Shallow, daily watering encourages plants to develop weak, shallow root systems that wilt quickly on hot days. Instead, water your crops deeply two or three times a week, ensuring moisture penetrates deep into the root zone. This encourages roots to grow downward, making them more resilient to dry spells.
Always water in the morning so any accidental moisture on the leaves can dry during the day, reducing the risk of fungal diseases like powdery mildew. If you use container systems, water until you see moisture draining from the bottom holes to ensure the entire root zone is wet.
Mulching Your Vegetables
Mulch is a protective layer of organic material placed over the soil to conserve moisture, suppress weeds, and regulate soil temperature. Use clean dry grass, straw, or dry sugarcane bagasse, keeping it slightly away from plant stems.
Mulching is essential for water-efficient gardening, especially during dry seasons. A thick layer of organic mulch protects the soil from direct sunlight, reducing water evaporation by up to 50 percent. This keeps the soil damp and cool, reducing watering frequency and saving on water bills.
As the organic mulch breaks down over time, it adds organic matter back into the soil, improving its fertility and structure. When applying mulch, leave a small gap around the stems of your plants to prevent moisture from pooling against the bark, which can cause rot.
Organic Pest Control in Kenyan Kitchen Gardens
Organic pest control uses Integrated Pest Management (IPM) to manage pests safely. Focus on prevention through companion planting and crop rotation, and use natural treatments like neem oil or garlic-chili sprays only when needed.
In organic gardening, the goal is to manage pest populations safely rather than trying to eliminate every bug. Chemical pesticides kill both pests and beneficial insects like ladybugs, which naturally keep pest populations under control. Protecting these beneficial insects helps your garden maintain a natural ecological balance.
Start by inspecting your plants regularly, checking the undersides of leaves and new growth where pests often hide. Removing infested leaves by hand or washing pests off with a gentle spray of water is often enough to manage small infestations before they spread.
Major Kitchen Garden Pests in Kenya
Common garden pests include aphids, whiteflies, thrips, and caterpillars. Identify these pests early and use targeted organic treatments, such as neem-based sprays or soap solutions, to protect your crops without using harsh chemicals.
Aphids
Aphids are tiny, soft-bodied insects that cluster on the undersides of leaves and new shoots, sucking plant sap and causing leaves to curl and yellow. To control them, spray infested areas with a mixture of water and a few drops of organic liquid soap, or apply a diluted neem oil solution.
Whiteflies
Whiteflies are small, moth-like insects that flutter in clouds when plants are disturbed. They drain plant energy and spread viral diseases. Hang yellow sticky traps around your garden beds to catch adult whiteflies, and spray leaf undersides with insecticidal soap.
Thrips
Thrips are tiny, slender pests that feed on flowers and leaves, leaving behind silvery scars and dark spots. They thrive in dry conditions. Keep your plants well-watered, use blue sticky traps, and spray with garlic-chili extract to repel them.
Red Spider Mites
These tiny pests thrive in hot, dry weather, spinning fine webs on leaf undersides and causing leaves to turn dusty-yellow. Mist your plants regularly with water to raise humidity, and use neem-based organic sprays to manage infestations.
Diamondback Moth Caterpillars
These pale green caterpillars feed on brassicas like sukuma wiki and cabbage, chewing small holes through the leaves. Hand-pick them from plants, or spray with Bacillus thuringiensis (Bt), a natural soil bacteria that targets caterpillars safely.
Common Vegetable Diseases
Common vegetable diseases include early and late blights, powdery mildew, and bacterial wilt. Prevent these issues by ensuring good air circulation, watering the soil instead of the leaves, and practicing strict crop rotation.
Fungal and bacterial diseases spread easily in damp, overcrowded garden beds. Once a plant is infected with a systemic disease like bacterial wilt, it cannot be cured. The safest action is to uproot and destroy the infected plant to prevent the disease from spreading to healthy crops.
To prevent disease outbreaks, space your plants properly to allow air to dry the leaves quickly after rain. Clean your gardening tools with a mild disinfectant after working on infected plants to avoid carrying pathogens to healthy areas of your garden.
Companion Planting: What Helps and What Is Internet Myth?
Companion planting uses natural plant relationships to improve growth and repel pests. Intercrop strong-smelling herbs like garlic, onions, or marigolds with your vegetables to confuse pests and attract beneficial insects to your garden.
Companion planting is a highly effective way to manage pests naturally, but it must be based on real plant relationships rather than internet myths. Planting marigolds does not create an invisible shield over your entire garden, but their strong scent can help confuse and deter flying pests like whiteflies and aphids.
Onions and garlic are excellent companions for leafy greens because their strong aroma masks the smell of the crops, making it harder for pests to find them. Additionally, planting tall crops like sweetcorn provides natural physical support for climbing beans while casting light shade over heat-sensitive lettuce.
Crop Rotation for Small Kitchen Gardens
Crop rotation involves changing the family of crops grown in a specific bed each season. This simple practice breaks pest life cycles and prevents specific nutrients from being depleted from the soil.
Planting the same crop family in the same spot season after season allows pests and diseases to build up in the soil. Crop rotation breaks these cycles by depriving pests of their preferred host plants, helping to keep soil populations low and manageable.
Divide your garden crops into four main families and rotate them through your beds using this simple seasonal sequence:
- Season 1: Legumes (Beans, Peas). These plants fix nitrogen, enriching the soil for the next crop.
- Season 2: Leafy Brassicas (Sukuma Wiki, Spinach, Cabbage). These heavy feeders thrive on the nitrogen left behind by the legumes.
- Season 3: Fruiting Solanaceous (Tomatoes, Capsicums, Eggplants). These crops require moderate nitrogen and high potassium.
- Season 4: Roots (Carrots, Beetroots, Onions). These light feeders help restore soil balance before the cycle starts again.
Growing Vegetables During Kenya’s Dry Season
Dry season gardening relies on efficient water management and soil protection. Use thick organic mulches, windbreaks, and shade netting, and prioritize water-efficient systems like drip irrigation to keep crops productive.
During the hot, dry seasons in Kenya, evaporation rates are high, causing exposed soil to dry out rapidly. To protect your garden, install 30 percent shade netting over sensitive crops like lettuce and spinach to prevent leaf scorch and reduce water loss.
Focus on growing drought-tolerant crops like cowpeas (kunde), amaranth (terere), and spring onions during these dry months. Grouping your containers close together also helps create a humid microclimate, reducing evaporation and saving water.
Growing During Heavy Rains
Heavy rainy seasons require excellent drainage and disease prevention. Use elevated raised beds to prevent waterlogging, prune lower leaves to improve air circulation, and apply organic copper sprays to protect against fungal infections.
Heavy rains can easily waterlog soil, drowning plant roots and causing rot. If you farm in areas with heavy clay soils, plant your crops in elevated raised beds (at least 20 cm high) to allow excess water to drain away quickly.
The high humidity during the rainy season also encourages fungal diseases like early and late blights to spread. Prune the lower leaves of your tomato and capsicum plants to keep them clear of wet soil, and apply a preventative organic copper-based spray once a week.
Kitchen Gardening by Kenyan Climate
Tailor your vegetable choices to match your local climate. Highlands suit cool-season crops like cabbage and carrots, mid-altitudes support a wide range of vegetables, while hot, semi-arid regions require heat-tolerant crops and shade nets.
Kenya’s diverse geography means that a kitchen garden in Limuru will require different management than one in Mombasa or Machakos. Understanding your local climate helps you select the right crops and systems for your home:
- Cool Highlands (Limuru, Kericho, Nyahururu): Ideal for cabbage, broccoli, spinach, carrots, and beetroot. Fungal disease pressure is high, so ensure wide plant spacing and good air circulation.
- Warm Mid-Altitudes (Nairobi, Nakuru, Eldoret, Kisumu): Highly versatile zone where almost all twenty vegetables thrive. Use mulching and compost to manage seasonal dry spells.
- Hot/Dry Regions (Kitengela, Machakos, Garissa): Focus on heat-tolerant crops like cowpeas, spider plant, amaranth, eggplants, and hot chilies. Use shade netting and drip irrigation to save water.
- Coastal Humid Areas (Mombasa, Kilifi, Kwale): Thrives with heat-tolerant crops. High humidity encourages fungal blights, so avoid overhead watering and prioritize well-aerated sandy soil mixes.
Seed vs Seedlings: Which Should You Use?
Direct sow root crops and herbs, which do not tolerate transplant shock well. For delicate, high-value crops like tomatoes, capsicums, and cabbages, raise them in nursery trays first, or buy strong, healthy seedlings to save time.
Using the correct planting method is essential for a successful harvest. Some crops have delicate roots that damage easily during transplanting, while others benefit from being raised in a protected nursery before being moved to their permanent spots.
Refer to this quick guide when planning your garden planting:
- Direct Sowing (Plant directly into beds): Carrots, beetroot, coriander (dhania), bush beans, sagaa, and peas.
- Nursery Transplanting (Raise in trays first): Tomatoes, capsicums, cabbages, sukuma wiki, spinach, onions, and eggplants.
How to Choose Healthy Seedlings
Select seedlings with thick, sturdy stems, vibrant green leaves, and well-developed roots. Avoid buying weak, yellowing, or root-bound seedlings, as they often struggle to establish and produce poor yields.
Starting with weak, diseased seedlings makes your garden more vulnerable to pests and diseases from the beginning. When buying seedlings from a commercial nursery, inspect them closely for any signs of trouble. Stems should be thick and strong, not thin and floppy, which indicates they did not receive enough light.
Gently slide a seedling out of its tray pocket to check the roots. The roots should be clean and white, spreading evenly through the soil mix. Avoid seedlings with brown, mushy roots or those where the roots are tightly wrapped around the pot, which can stunt the plant’s growth after transplanting.
How Much Can You Grow in a Small Space?
A well-designed 10 by 10-foot kitchen garden can easily produce over 15 kilograms of fresh vegetables monthly. Use vertical towers and grow bags to increase your growing space and maximize your yields.
You do not need a large farm to produce significant amounts of fresh food. By planning your space carefully and using vertical systems, you can grow a surprising volume of vegetables in a small backyard or paved courtyard.
A simple 10 by 10-foot space can easily accommodate two raised beds for root vegetables, several deep grow bags for tomatoes, and a multi-storey vertical tower. This combined setup can supply a small family with fresh leafy greens, herbs, and salad vegetables throughout the year.
Read Also: 15 Most Profitable Agribusiness Ideas in Kenya to Start in 2026
Example Kenyan Kitchen Garden Layout
Position your garden layout to make the best use of sunlight. Place tall, climbing crops on the south or sunny side, arrange low-growing raised beds in the center, and locate vertical towers and compost zones close to water access points.
A smart garden layout keeps tall plants from casting unwanted shade over smaller crops, ensuring all your vegetables receive adequate sunlight. The guide below illustrates an efficient layout for a standard home backyard garden:
- South / Sunniest Side: Place climbing crops like cucumbers, vining tomatoes, and pole beans on sturdy trellises here to capture maximum light.
- Center Zone: Arrange raised wooden beds for medium-sized vegetables like carrots, beetroot, capsicums, and onions.
- East / West Sides: Position vertical garden towers and grow bags for leafy greens like sukuma wiki, spinach, and lettuce.
- Shadiest Corners: Use these spots for delicate, heat-sensitive herbs like mint and coriander (dhania).
- Utility Area: Locate your compost bin and water storage tank in a convenient, easily accessible corner.
A Simple 12-Month Planting Strategy
Stagger your planting throughout the year to ensure a continuous, reliable harvest. Plant root crops and heavy feeders ahead of the main rainy seasons, and focus on hardy, drought-tolerant greens during dry periods.
Planting your entire garden all at once often results in a massive harvest that your family cannot consume before it spoils, followed by months of empty beds. A successful kitchen garden relies on a staggered planting schedule to ensure a steady, manageable supply of fresh food year-round.
Plan your plantings to work with Kenya’s seasonal weather patterns. Use the long rains (March to May) to grow heavy-yielding crops like cabbages, tomatoes, and beetroot, and shift to hardy, deep-rooted greens during the dry seasons to keep your garden productive.
Succession Planting
Succession planting involves sowing small batches of seeds every two to three weeks. This simple technique prevents harvest gluts and guarantees a steady, fresh supply of quick-growing crops like dhania and lettuce.
Instead of planting a large bed of coriander or lettuce all on the same day, sow a small row or container every two weeks. By the time the first batch is ready to harvest, the second will be growing well, and the third will be germinating.
This method is highly effective for quick-growing crops that lose their flavor or run to seed quickly. It keeps your garden productive and ensures you always have tender, fresh greens ready for the kitchen.
Harvesting for Maximum Production
Harvest your vegetables regularly to encourage fresh, productive growth. Pluck outer leaves from leafy greens to extend their lifespan, and clip fruiting crops early to stimulate the plant to produce more flowers and fruit.
How you harvest your crops directly affects how long they will continue to produce food. For cut-and-come-again greens like sukuma wiki, spinach, and Swiss chard, always pluck the mature outer leaves first, leaving the small inner leaves to continue growing.
For fruiting crops like courgettes, cucumbers, and capsicums, harvest the fruits when they are young and tender. Allowing fruits to over-mature on the plant signals it to stop producing new flowers, reducing your overall yield.
What to Do With the Soil After Harvest
After harvesting, clear out old plant roots, loosen the soil gently with a hand fork, and mix in fresh compost and manure. This restores nutrients and rebuilds soil structure before planting your next crop.
Vegetables extract large amounts of nutrients from the soil as they grow, leaving it depleted after harvest. Never plant a new crop in old, unconditioned soil, as this often leads to weak growth and poor yields.
Take time to refresh your beds and container soils between plantings. Gently loosen compacted soil to improve aeration, add a fresh layer of organic compost, and rotate crop families to keep your soil healthy and productive.
Most Common Kitchen Gardening Mistakes in Kenya
Common gardening mistakes include planting too closely, using fresh manure, overwatering, and ignoring pests. Avoid these pitfalls by following proper spacing guidelines, composting manure, and inspecting your plants regularly.
Many home gardeners face disappointing results due to a few common, easily avoidable mistakes. Understanding these pitfalls helps you protect your garden and ensure a healthy, abundant harvest:
- Overcrowding plants: Planting seeds or seedlings too closely together starves them of light, water, and nutrients, creating weak plants that are highly vulnerable to pests and diseases.
- Using fresh animal manure: Applying uncomposted manure burns delicate roots and introduces weeds and harmful pathogens into your garden beds.
- Overwatering containers: Keeping container soil constantly wet suffocates plant roots, leading to root rot and yellowing leaves. Always ensure your pots have good drainage.
- Neglecting pest inspections: Ignoring your plants until a major pest infestation occurs makes control difficult. Inspect your crops regularly to manage pests early.
- Planting the same crops continuously: Growing the same crop family in the exact same spot season after season depletes specific soil nutrients and allows pests to build up.
Cost of Starting a Kitchen Garden in Kenya
A basic home kitchen garden can be set up for under KES 2,000 using recycled containers. Mid-level grow bag systems cost between KES 5,000 and KES 8,000, while advanced vertical towers with drip irrigation range from KES 15,000 to KES 25,000.
The cost of starting a kitchen garden depends on the size of your space and the growing systems you choose. You do not need a large budget to begin; using recycled containers and making your own compost is an easy, low-cost way to start growing your own food.
To help you plan, we have outlined typical setup budgets based on current 2026 prices for gardening materials in Kenya.
| Expense Item | Basic DIY Garden (KES) | Mid-Level Grow Bag Garden (KES) | Advanced Vertical & Drip Garden (KES) |
|---|---|---|---|
| Soil, Compost & Manure Mix | 500 (DIY) | 1,500 (Purchased bulk) | 3,500 (Premium mixes) |
| Containers / Grow Bags | Free (Recycled cans) | 1,800 (10 UV Grow bags) | 8,500 (Multi-storey towers) |
| Quality Seeds / Seedlings | 300 (Basic seeds) | 800 (Assorted seedlings) | 2,000 (Certified varieties) |
| Irrigation Setups | 200 (Simple bottle wick) | 1,200 (Watering can + hose) | 6,000 (Gravity drip kit) |
| Organic Pest Control / Tools | 200 (Ash & soap) | 1,000 (Hand trowel & neem) | 3,000 (Knapsack sprayer & biologicals) |
| Total Estimate | 1,200 | 6,300 | 23,000 |
Can a Kitchen Garden Become a Small Business?
Yes, a well-managed kitchen garden can easily produce high-value surpluses of dhania, spring onions, mint, and indigenous greens. Selling these fresh herbs and greens directly to neighbors offers a reliable, steady source of household income.
While the primary goal of a kitchen garden is to feed your family, intensive growing systems often produce more food than a household can consume. High-value herbs like dhania, mint, and rosemary, along with popular indigenous greens like terere and managu, are excellent crops for local sale.
Packaging your surplus greens in clean bunches and selling them directly to neighbors or estate groups is an easy way to generate extra income. This small-scale business can quickly cover your garden operating costs, making your home food production system completely self-funding.
Conclusion: Start Small, Grow Smart, and Build a Productive Kenyan Kitchen Garden
A productive kitchen garden in Kenya does not require a large farm, expensive infrastructure, or all 20 vegetables at once. The strongest approach is to start with a few crops your household already eats, master your soil, watering, composting, and pest-control routine, then expand gradually into grow bags, raised beds, vertical net bags, or multi-storey garden systems as your confidence grows. Pasted text
For most beginners, a practical starting mix is sukuma wiki, spinach, managu, terere, dhania, spring onions, and tomatoes. Combine these with mature compost, well-decomposed manure, good drainage, mulch, and regular crop inspection. The goal of organic kitchen gardening is not simply to avoid synthetic chemicals. It is to build healthy soil, reduce unnecessary inputs, manage pests early, and create a growing system that can keep producing season after season.
If space is limited, do not treat that as a barrier. White UV-treated grow bags, vertical net grow bags, multi-storey garden towers, containers, and raised beds can turn balconies, paved compounds, small backyards, and narrow spaces into productive food-growing areas. The right system should always match the crop, available sunlight, water supply, and root space.
Most importantly, grow what your family actually uses. Plant in small batches, harvest regularly, refresh the soil after each crop, rotate plant families, and keep learning from every season. A well-managed kitchen garden can become a reliable source of fresh vegetables, a practical way to recycle organic household waste, and a much smarter use of limited home space.
Ready to start your kitchen garden? Choose your first 4 to 6 vegetables, prepare a healthy soil mix, select the right growing system, and begin with what you can manage well. For white grow bags, vertical net bags, multi-storey garden systems, seedling trays, and other kitchen gardening supplies, visit Crazy Kanairo Farming and build your garden step by step.
Frequently Asked Questions About Kitchen Garden Vegetables in Kenya
What are the best vegetables to grow in a kitchen garden in Kenya?
Sukuma wiki, spinach, managu, terere, sagaa, dhania, spring onions, and tomatoes are the best choices due to their strong local performance and high nutritional value.
Which vegetables are easiest to grow organically at home in Kenya?
Spring onions, spinach, terere, and Swiss chard are highly resilient and easy to grow organically, requiring minimal pest management.
What are the fastest-growing vegetables for a kitchen garden in Kenya?
Dhania and terere are ready to harvest within 30 to 35 days, while spring onions and spinach produce usable leaves in under 50 days.
Which vegetables grow best in white grow bags in Kenya?
Tomatoes, capsicums, eggplants, spinach, and Swiss chard perform exceptionally well in white UV-treated grow bags due to the excellent root aeration and temperature control.
What vegetables can be grown in multi-storey vertical gardens in Kenya?
Leafy greens like sukuma wiki, spinach, lettuce, managu, terere, and culinary herbs like dhania and mint thrive in multi-storey vertical systems.
What is the best soil mix for growing vegetables in a Kenyan kitchen garden?
Mix 2 parts fertile topsoil, 1 part well-decomposed manure, and 1 part mature organic compost. Add sand or coco peat for container systems to improve drainage.
How can I control pests and diseases organically in a kitchen garden?
Practice crop rotation, plant companion herbs to repel pests, inspect plants regularly, and use organic sprays like neem oil or soapy water when needed.
How often should I water vegetables growing in bags, containers, and vertical gardens?
Water deeply two to three times a week during cool weather, and increase to daily watering during hot, dry seasons to keep container soils damp.
Which indigenous Kenyan vegetables are best for a small kitchen garden?
Managu (African nightshade), terere (amaranth), and sagaa (spider plant) are highly nutritious, fast-growing, and well-adapted to small home gardens.
How much space do I need to start a productive kitchen garden in Kenya?
You can start a productive garden in as little as 1 square meter using a vertical garden tower, or set up a few grow bags on a small balcony.